Manage Devices
Add a Device Learn how to add new devices to your network. Since there is no global wifi password, a new entry is made for each new device.
Edit Devices Set tags, edit styles & update device info
Copy a device Lets you share wireless password between devices
Bulk Edit Select many devices at once to delete them or assign a group, tag, or policy
Device Classification See SPR's device type/brand guesses based on network traffic
Add a Device
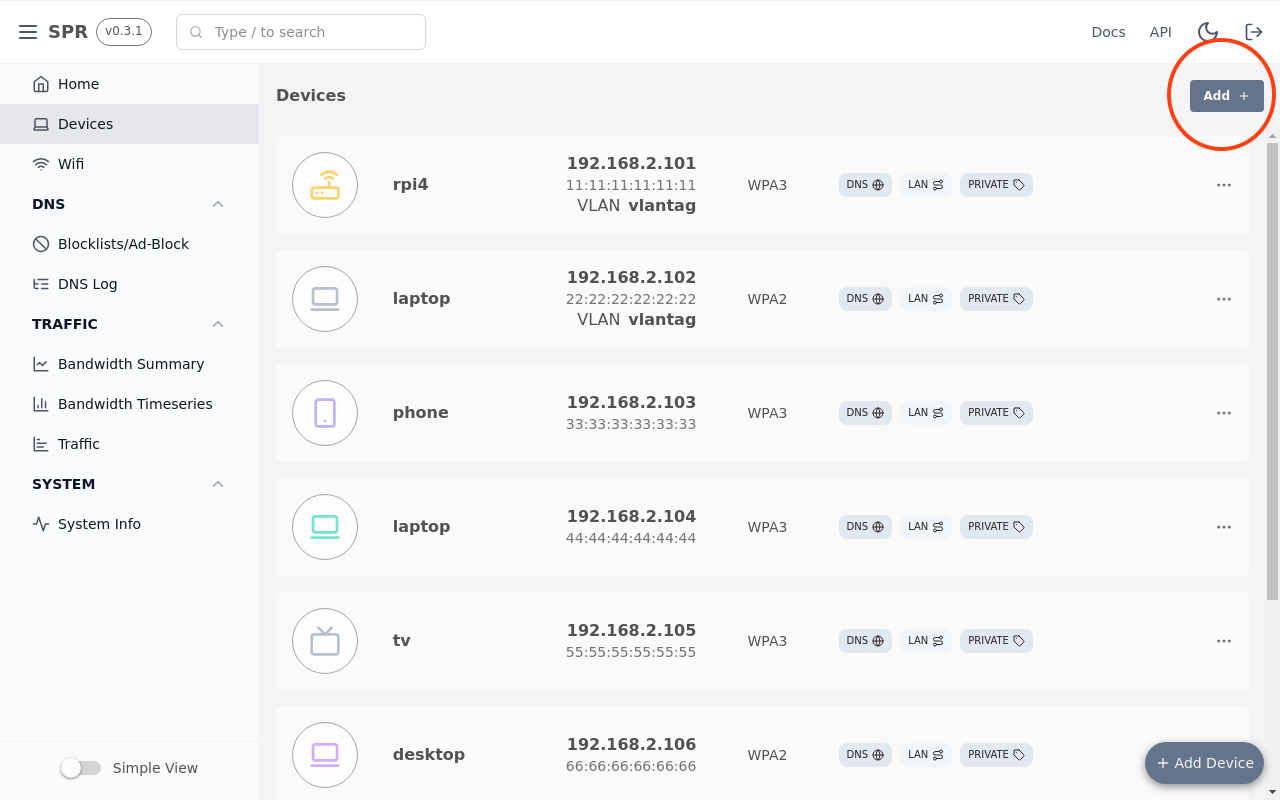
Navigate to Devices in the menu & click Add Device.
⚠️ iCloud Keychain Sync and WiFi Passwords
You need to set the same password on each of the iOS devices that are in the same keychain. Without this, they would sync the wrong password to each other and lock each other out of the network. You can copy an existing iOS device instead of adding a new one, to keep the same password.
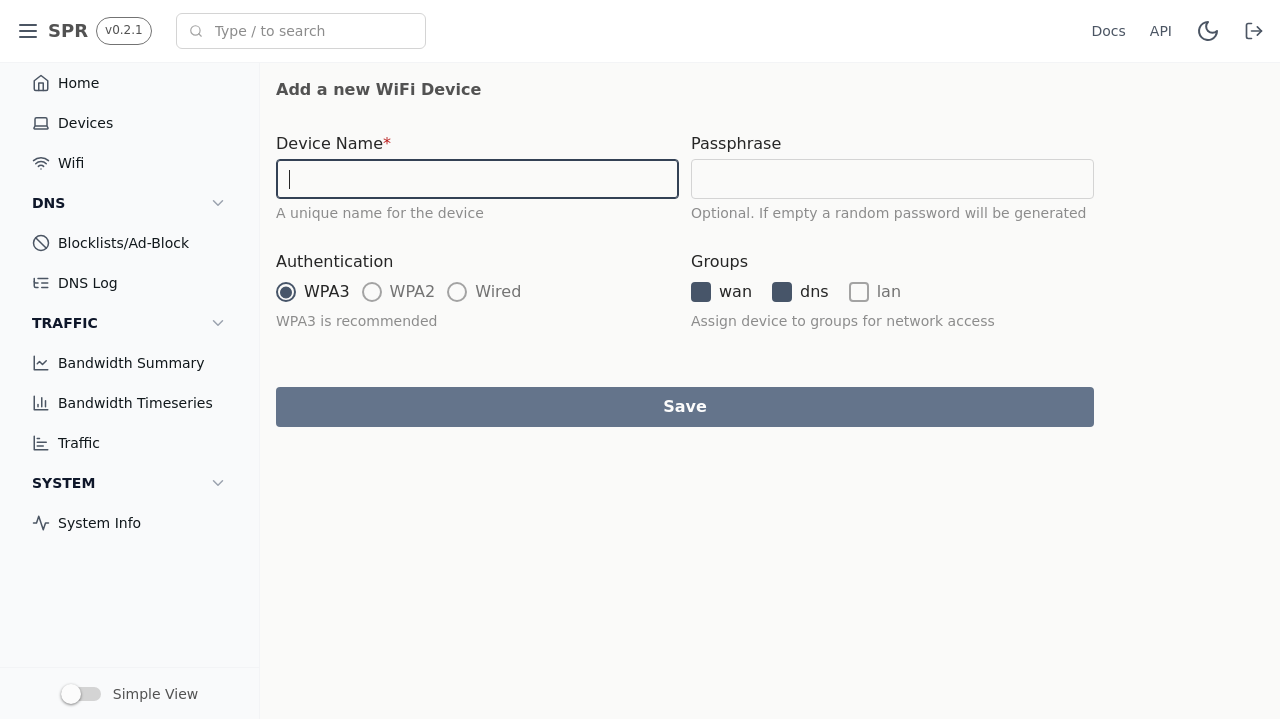
You are required to enter a Device Name. Pick a name for your device & enter a password (or leave empty for random), click Save.
Authentication, Policies, and Groups
Authentication
WPA3 works for newer devices and is recommended. Choose WPA2 if WPA3 does not work or Wired if you are connecting the device over ethernet.
Policies
- wan internet access
- dns for domain lookups, block/filter dns
- lan access to all other local devices
- lan_upstream allows the device to query LAN addresses from rfc1918 upstream of SPR
wan and dns is enabled by default. Add the device to lan sparingly, as this grants it access to all other devices. You can create groups and rules later for defining more specific access.
Groups
- Devices assigned to a Group can intercommunicate over ICMP, UDP, and TCP
- A firewall rule can be used if only a particular port should be reachable
Connect to the Wifi with your device, either by scanning the QR code or with the password.
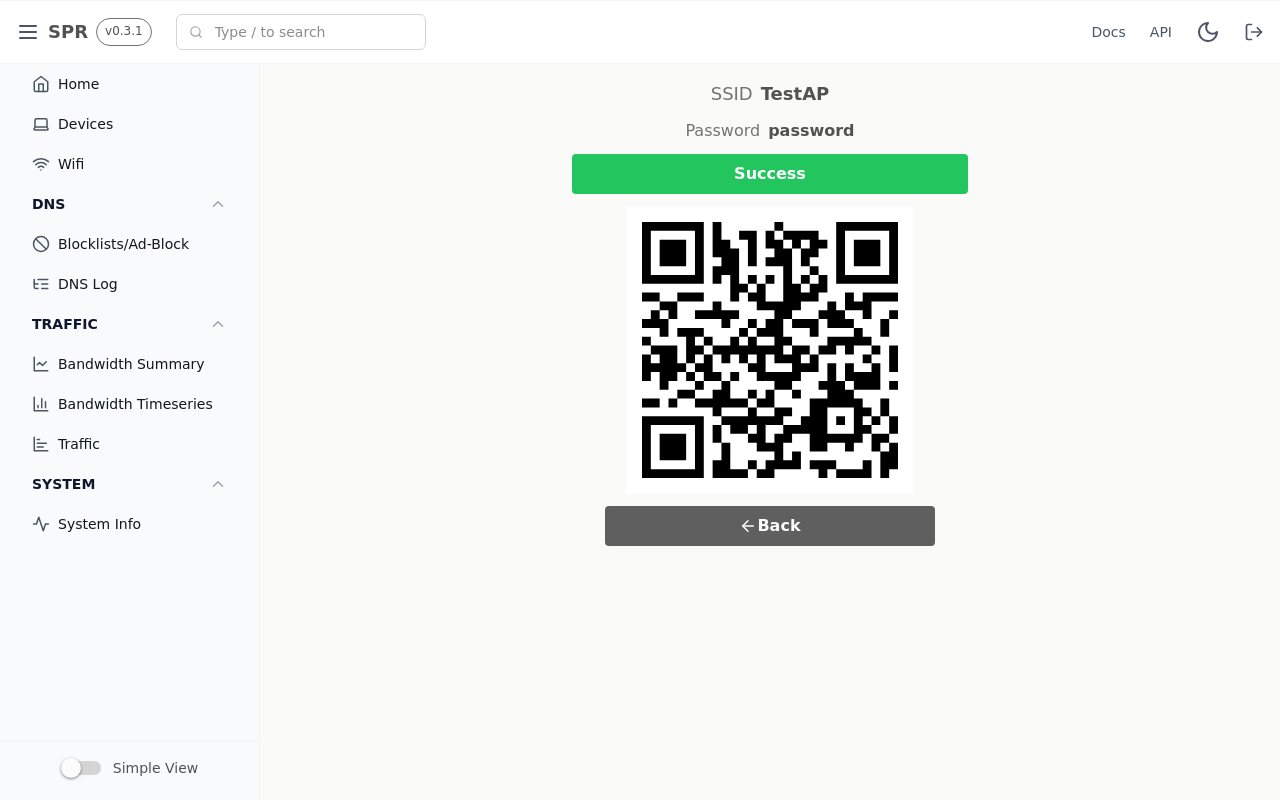
A notification will popup when the device is connected & the device is available in the device view.
Advanced Settings
Toggle "Advanced View" in the menu if you want to add Device expiry & other features.
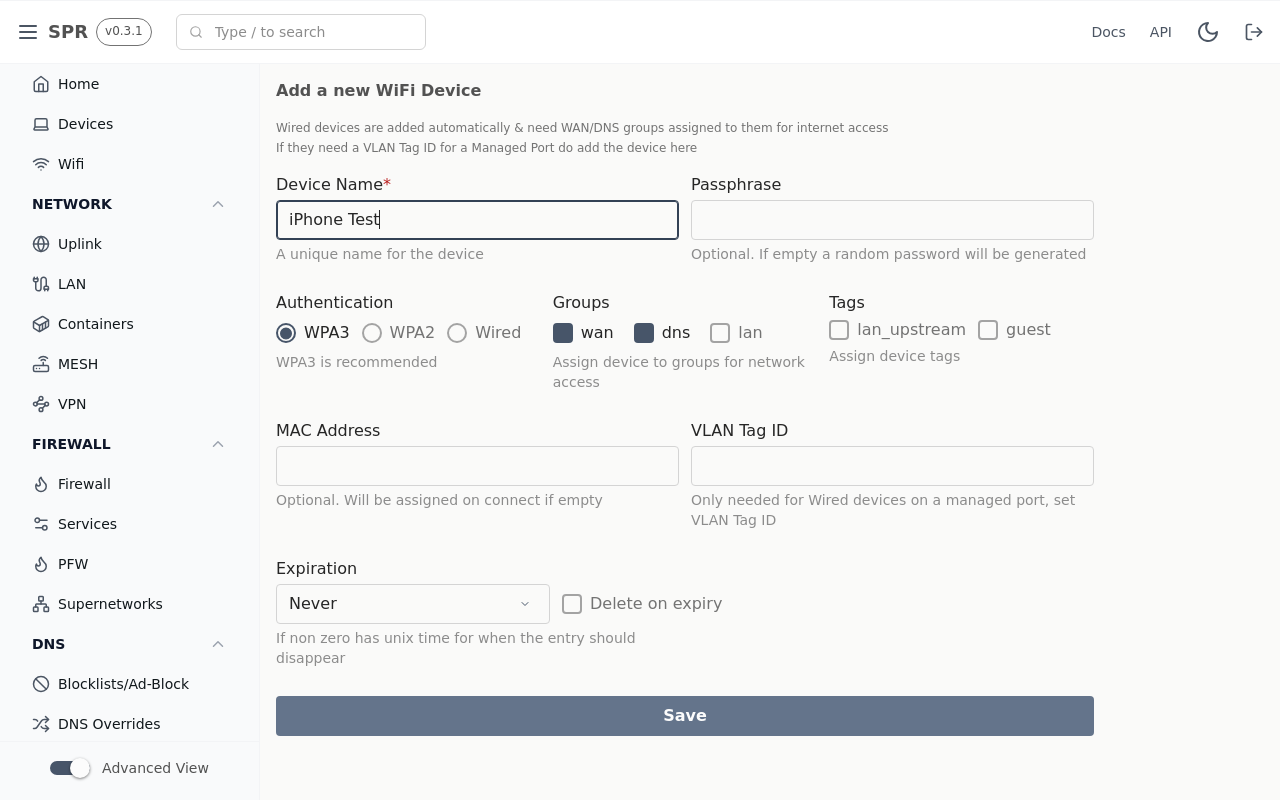
The advanced settings allow you to set MAC address, VLAN Tag ID and other settings for the device.
Tags
- guest if this is a guest device. This currently has no impact but may in the future
Custom tags can also enable tag-specific block lists
Expiration
Set Expiration (example 1 day) if the device only needs temporary access, also if you want to automatically delete the device on expiry.
Edit Device
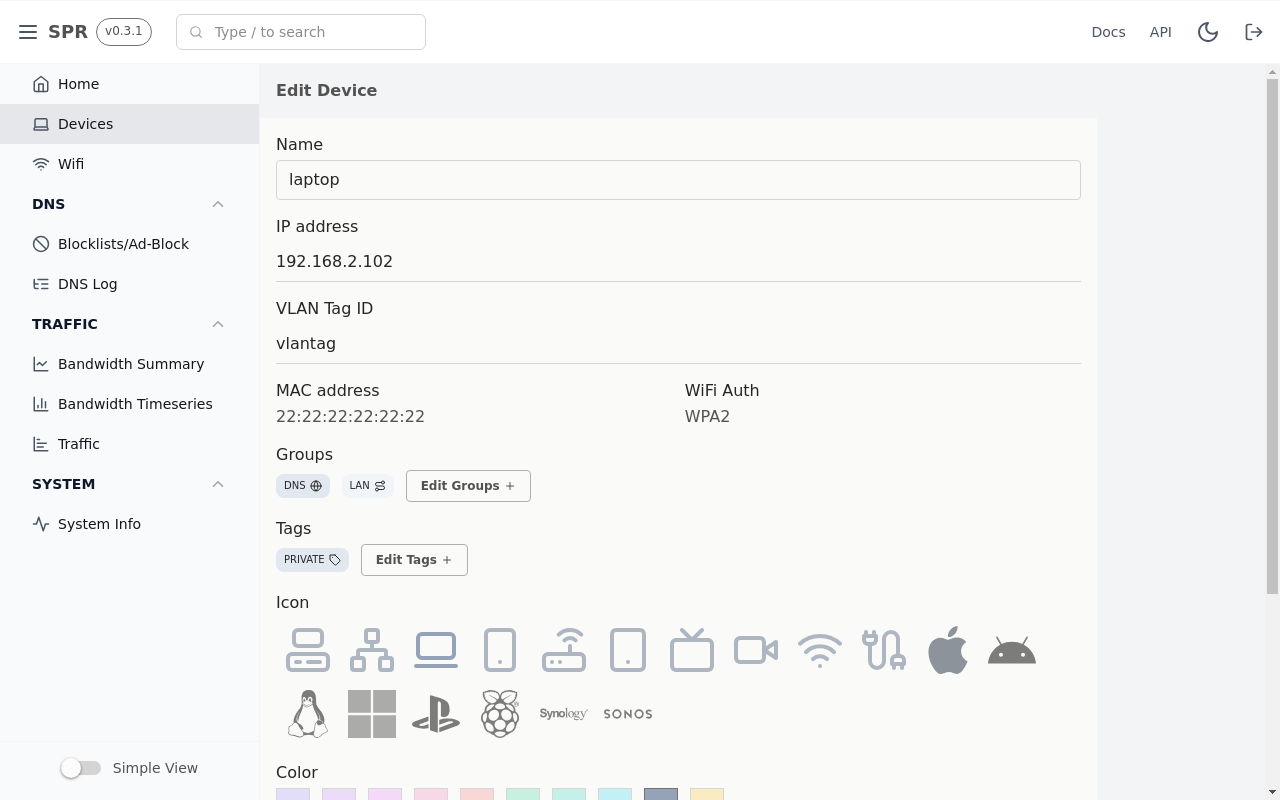
Set groups, tags, icon, color and other settings for your devices in the edit view.
Copy or Duplicate A Device Entry
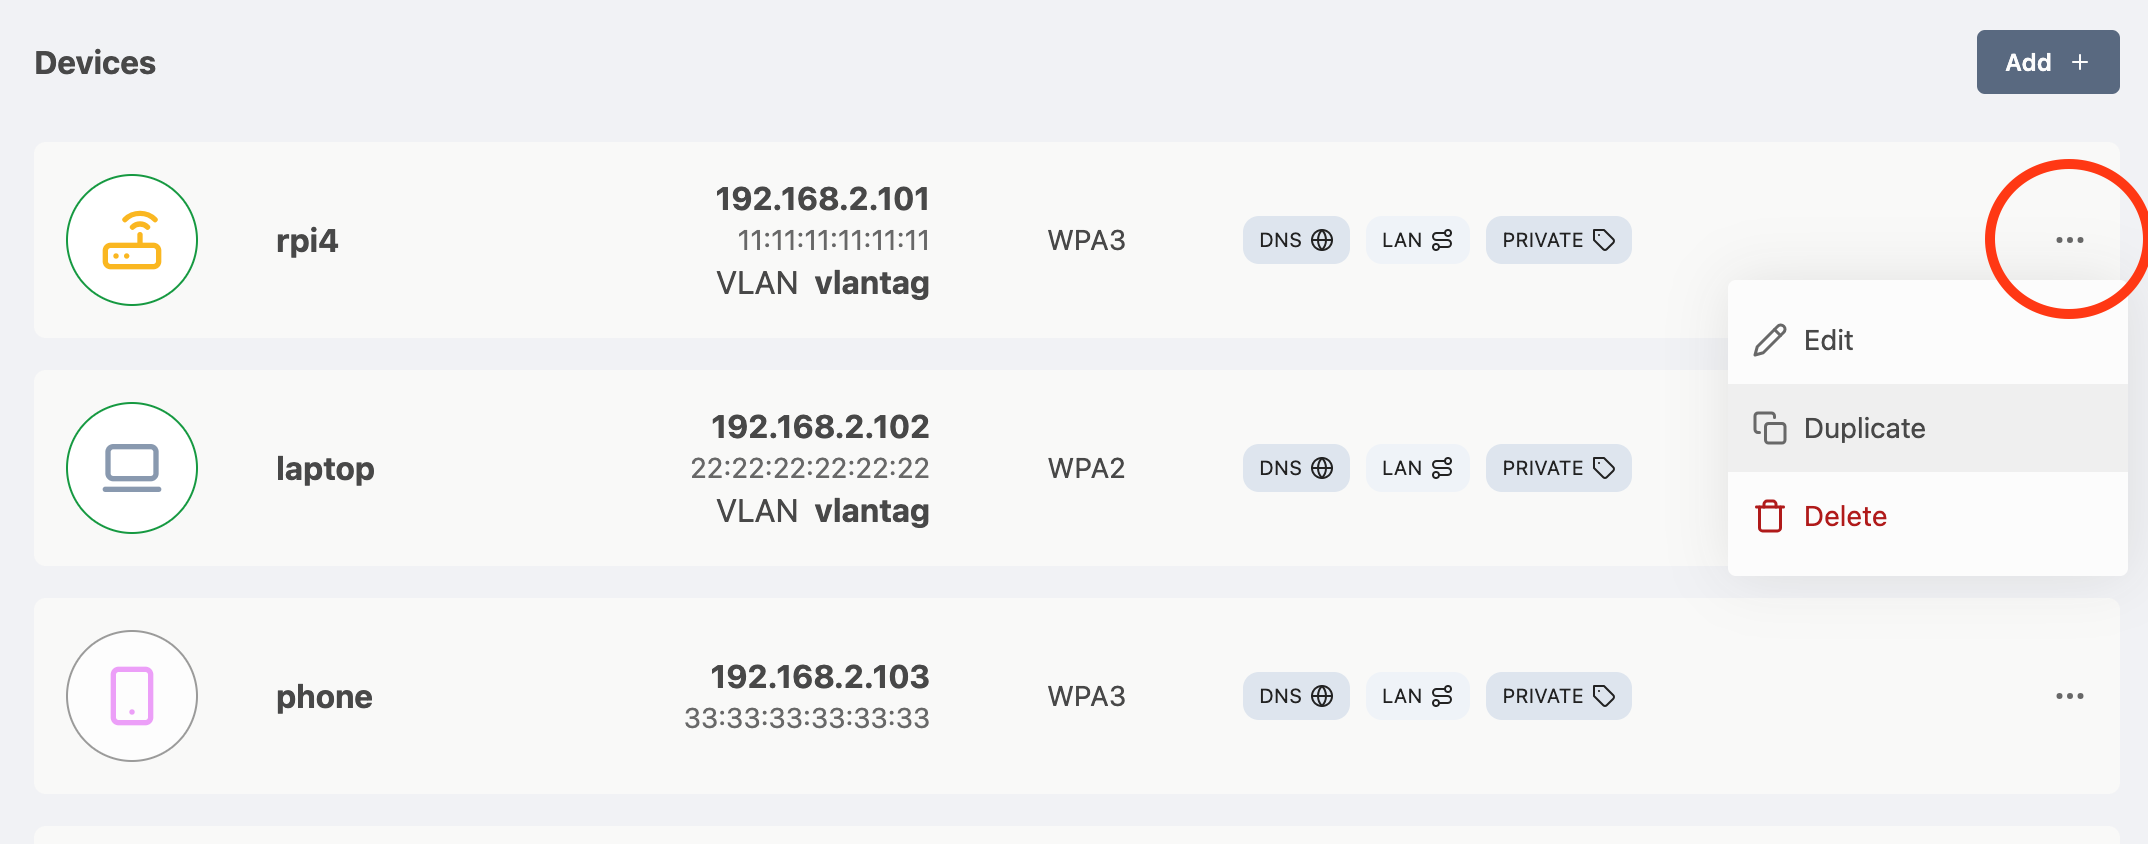
Click the ellipse on the end of the device listing, and select duplicate, then rename the device. This will copy the device to a new entry, and wait for a connection for a MAC address to be assigned.
The new entry will have the same WiFi password. This is especially useful for devices using iCloud Keychain Sync, which assumes the same WiFi password for all devices.
⚠️ iCloud Keychain Sync and WiFi Passwords
You need to set the same password on each of the iOS devices that are in the same keychain. Without this, they would sync the wrong password to each other and lock each other out of the network.
Bulk Edit
The Devices page is split into tabs. Open the Bulk Edit tab when you want to change many devices at once instead of editing them one by one.
Select the devices you want to act on:
- Use the tag/group dropdown to filter the list down to a single Group or Tag, then work on just those devices.
- Select all picks every device currently shown.
- Select unnamed picks every listed device that has no name assigned (shown as "N/A"), which is handy for tidying up newly connected devices.
- Toggle individual devices, or Clear to start over.
Once devices are selected, a toolbar appears where you can apply changes to all of them at once:
- Add group — type a group name and add it to every selected device.
- Add tag — type a tag and add it to every selected device.
- Add policy — choose a policy (
wan,lan,dns,dns:family,lan_upstream,noapi, orquarantine) to add to the selection. - Delete Selected — permanently removes the selected devices and their configuration. This cannot be undone, so a confirmation is shown first.
Assigning a group, tag, or policy only adds it; existing groups, tags, and policies on each device are kept.
You can also press Auto classify to run device classification on the selection and, after reviewing the guesses, apply the suggested type tag, groups, and policies to each device.
Device Classification
SPR can guess what kind of device something is (for example a camera, printer, TV, phone, or laptop) and often its brand, based on network signals it already observes. This is informational only — it helps you recognize and organize unfamiliar devices, and it never changes access or firewall behavior on its own.
Guesses are made passively from signals such as:
- the MAC address vendor (OUI)
- the device hostname
- DHCP details (vendor class and requested options)
- mDNS services and TXT records
- SSDP headers
- domains the device looks up over DNS
From these, SPR produces a category, an optional brand and model, and a confidence level (High, Medium, Low, or "Not enough signals"), along with the evidence behind the guess.
The Classification tab
Open the Classification tab on the Devices page to control how devices are matched.
- Your Rules are custom rules you add. Each rule matches one signal type (Hostname, OUI, MAC Vendor, mDNS Service, mDNS TXT, SSDP Header, DNS Query, DHCP Vendor Class, or DHCP Params) against a regular expression, and assigns a device Type (category), optional Brand, and a Weight that influences how strongly it counts.
- Built-in Rules ship with SPR. You can edit or remove them, and press Reset to defaults to restore the originals.
When you save, devices are re-scored against the current rules. You can share a useful rule back to the project with the share button, which opens a pre-filled GitHub issue.
To apply a guess to a device, use Auto classify in the Bulk Edit tab, which can add a classification:<type> tag plus any suggested groups and policies after you accept the result.
Personas have moved to their own tab; see the Parental Controls guide.