SPR VPN Setup Guide
SPR runs as a VPN, self-hosted or with Cloud Providers.
Key VPN Features
- AdBlocking for Mobile with Wireguard™ Access
- DNS & Traffic Monitoring
- Policy Based Network Access
- Friendly UI, see the UI Demo
SPR also runs as a WiFi Router & Firewall
Quick VPN Setup
sudo bash -c "$(curl -fsSL https://raw.github.com/spr-networks/super/master/virtual_install.sh)"
When SPR is used as a VPN we recommend the virtual network option with docker-compose-virt.yml.
This runs the SPR services and firewall separately from the host system's network.
The quick setup script takes care of this.
Cloud Provider Setup
You can host SPR with our Cloud Provider guides:
Host network configuration
If there is a firewall port 51280/udp needs to be open for incoming traffic, and port forwarded to the device.
Your source ip address need to be able to access the host running spr on port 51280/udp. For setup in the cloud, see the blog specific vendor guides for network configuration:
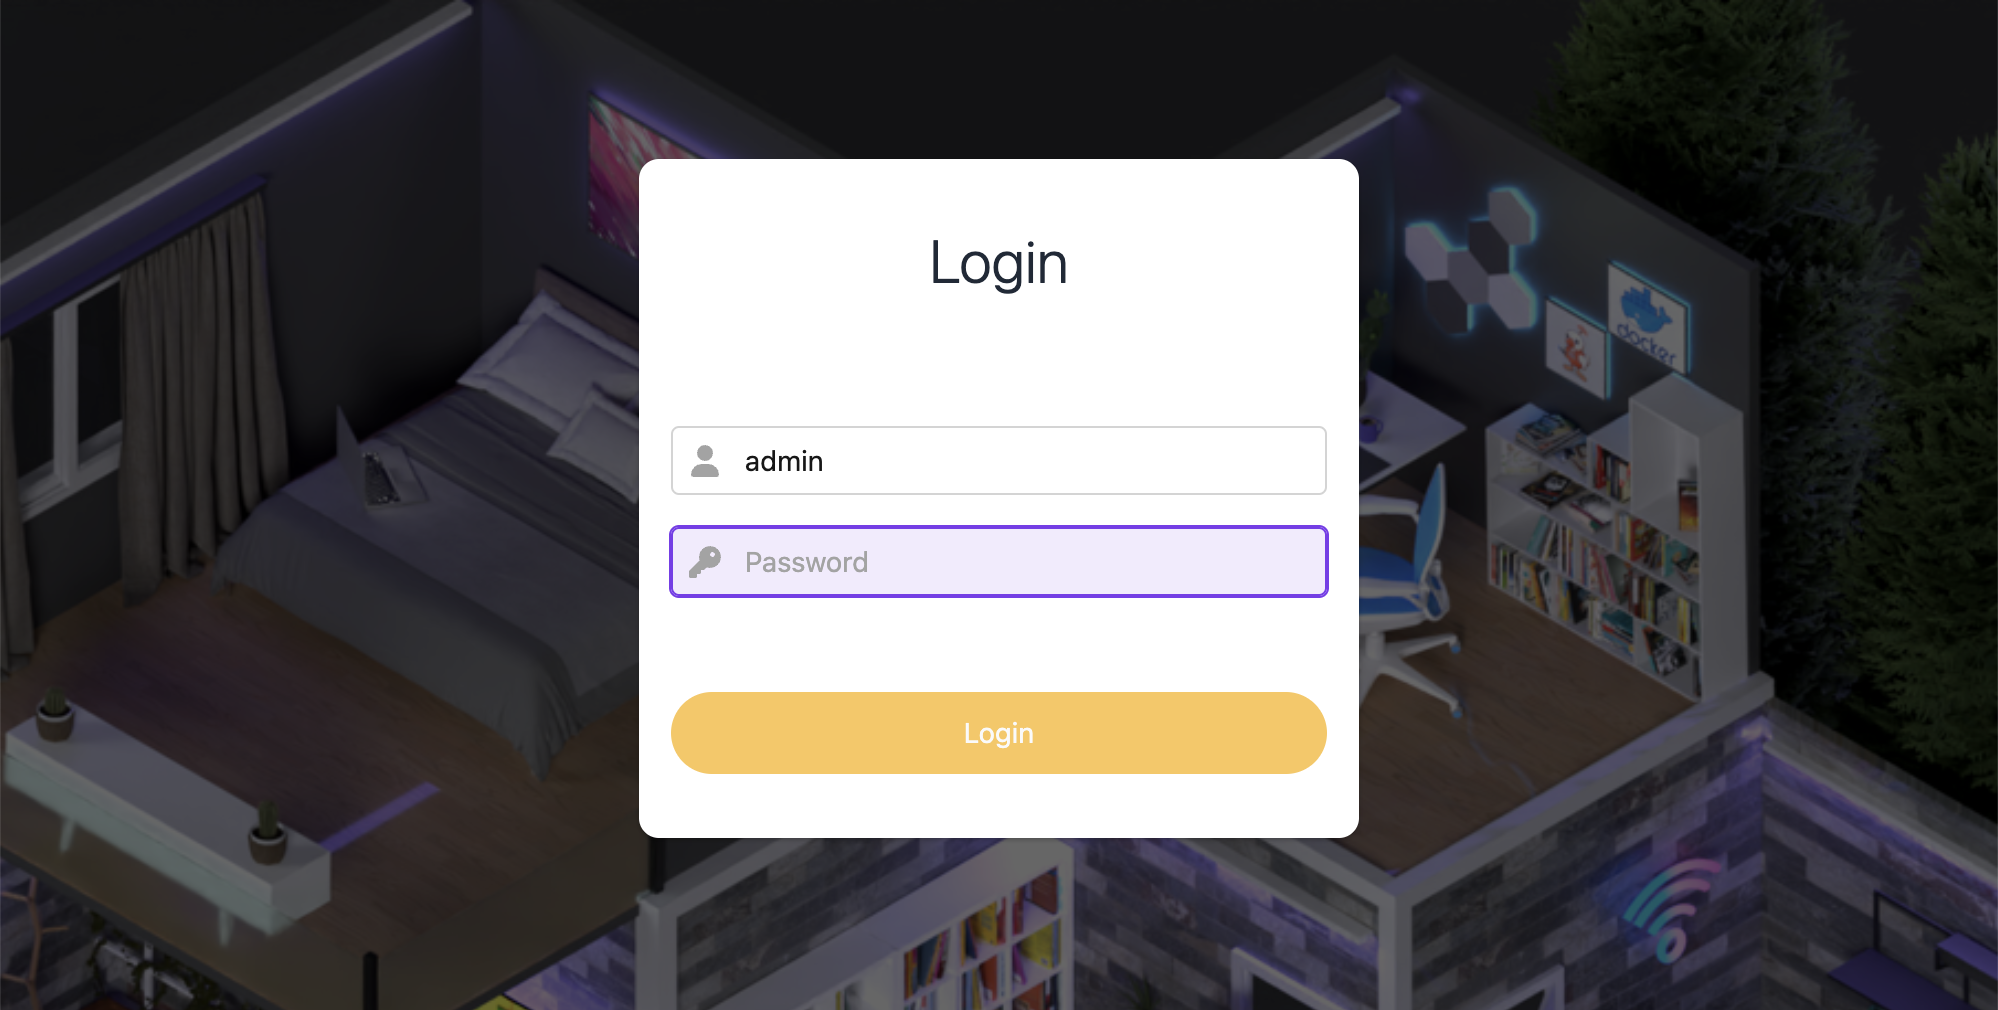
Sign in to the Web UI
The API is setup to listen on localhost:8000 on the host. To access the service from your local machine, forward port 8000 using ssh:
ssh $HOST -N -L 8000:127.0.0.1:8000
Navigate to http://localhost:8000/
Sign in with the username and password assigned in step 3 of the configuration.
Add a VPN peer
In the SPR web UI, navigate to VPN and click Add peer.
Click Save and download the client config or scan the QR Code on your phone with the official WireGuard (© Jason A. Donenfeld) client.
Note SPR exposes port 51280 over UDP (see $WIREGUARD_PORT in config.sh) on the host.
If a firewall is present you will need to allow access to this port. Check the documentation for your hosting provider on how to do this.
Configure the VPN client on your device
Install WireGuard (© Jason A. Donenfeld):
apt install wireguard for ubuntu. Official clients for Windows, macOS, iOS, Android.
For iOS and Android
Scan the QR Code in the official WireGuard App (iOS, Android) to import your VPN profile.
Linux, macOS and Windows
Click "Add empty tunnel..." paste the config and set a name for the tunnel. Or, if you saved the config to a file:
- Open your WireGuard client and click "Import tunnel(s) from file"
- Select the wg.conf file
- Click Activate
Admin interface
Make sure you're connected to the VPN endpoint & browse to http://192.168.2.1 to access the admin interface.
Login using the credentials shown in the output from the script or if you set the password manually (NOTE you can check the login info by running SKIP_VPN=1 ./virtual_install.sh).
If you prefer to use curl:
$ export TOKEN="BASE64-TOKEN-FROM-OUTPUT"
$ curl -s -H "Authorization: Bearer $TOKEN" 192.168.2.1/devices
Check out the documentation to get started using the SPR API.
Modify Blocklists
In the admin interface you can enable more blocklists by clicking Blocklists/Ad-block under DNS:
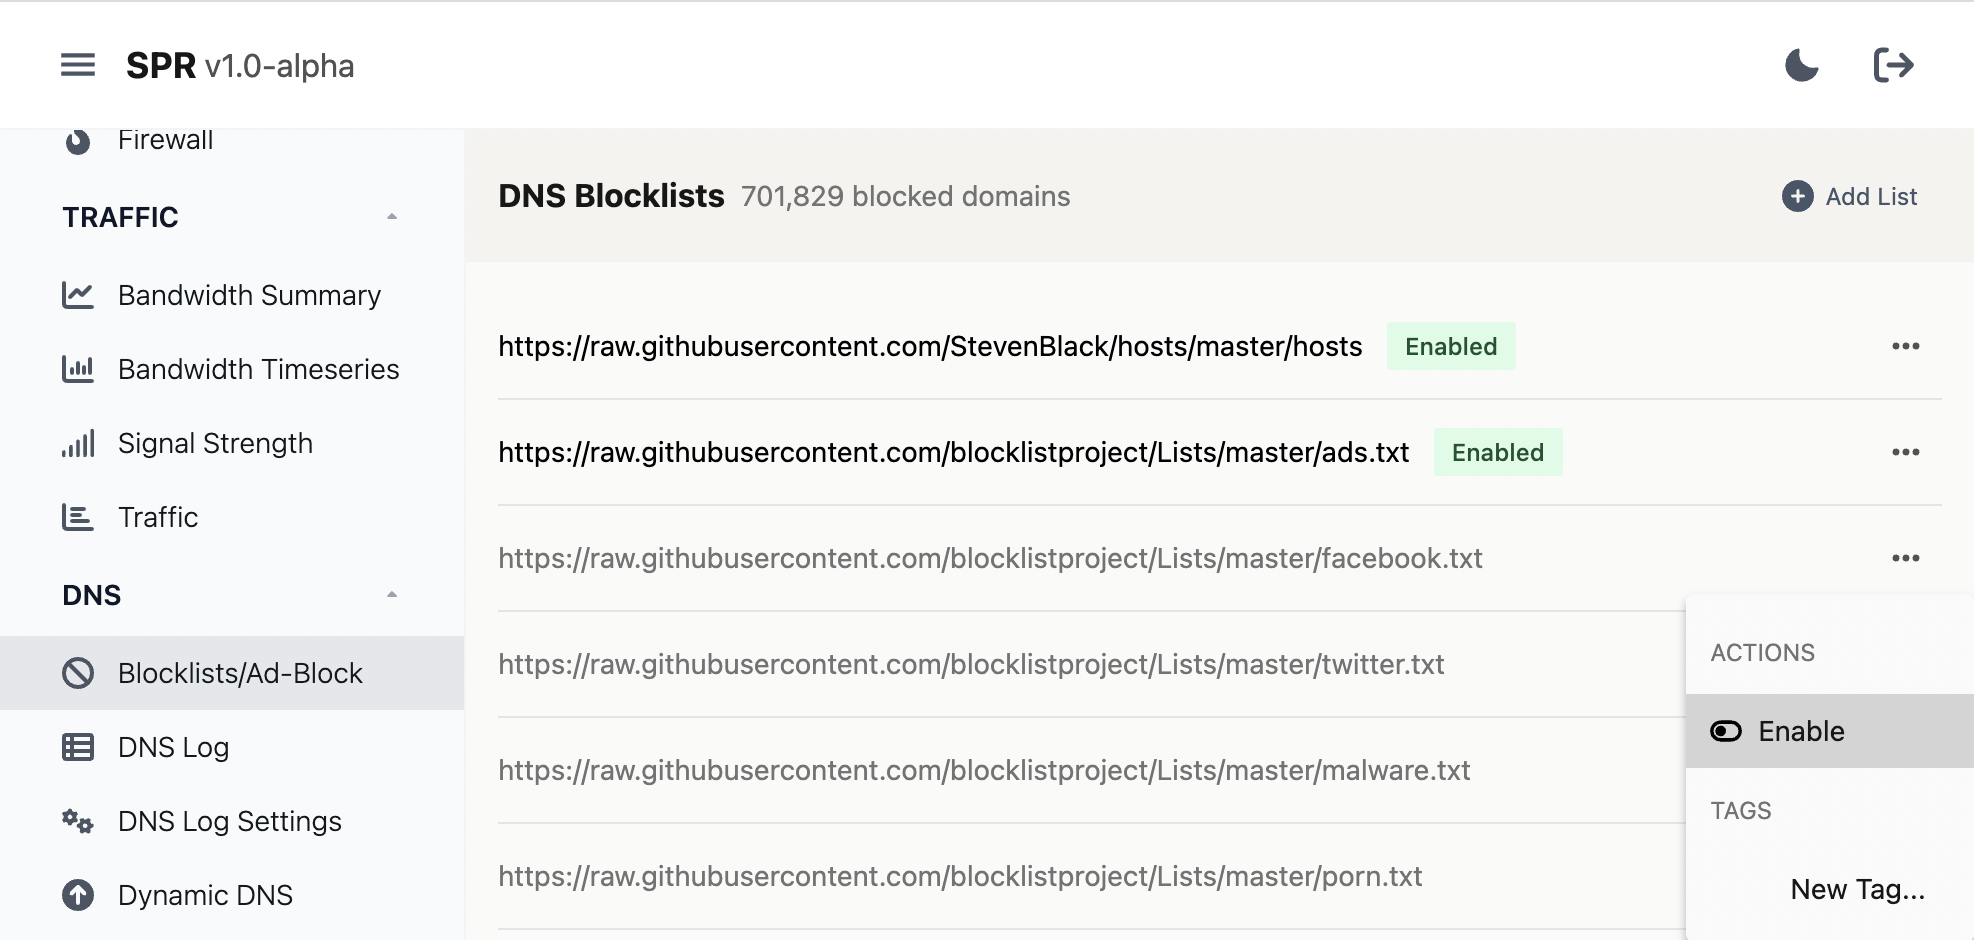
SPR comes bundled with the hosts file from https://github.com/StevenBlack/hosts and the blocklists from the https://github.com/blocklistproject/Lists repository, including: redirect, ads, facebook, twitter, malware, porn, redirect, tracking, youtube, everything
If something is missing you can always add custom blocklists or block specific domains.
View traffic
Navigate to DNS Log in the DNS category, select the client to get a log of domains:
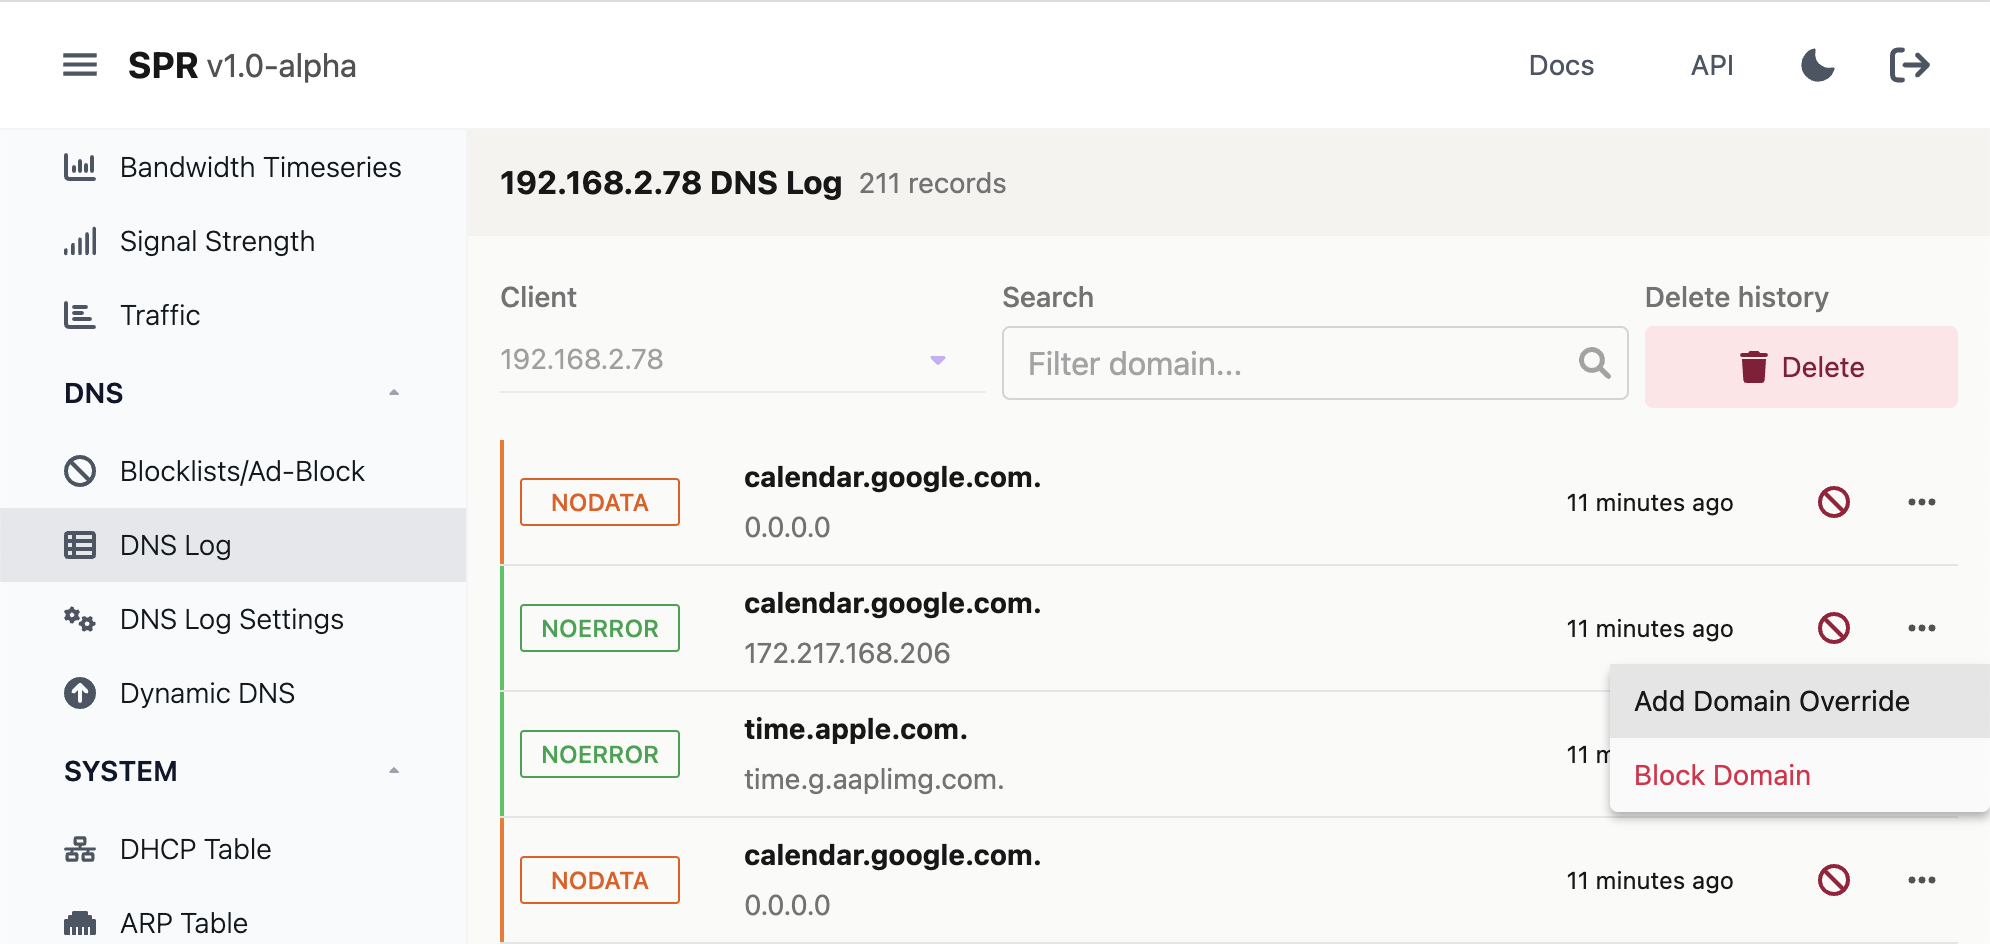
Here you can also add more blocks, domain overrides if you want to allow something temporarily, delete logs or disable them completely under Settings.
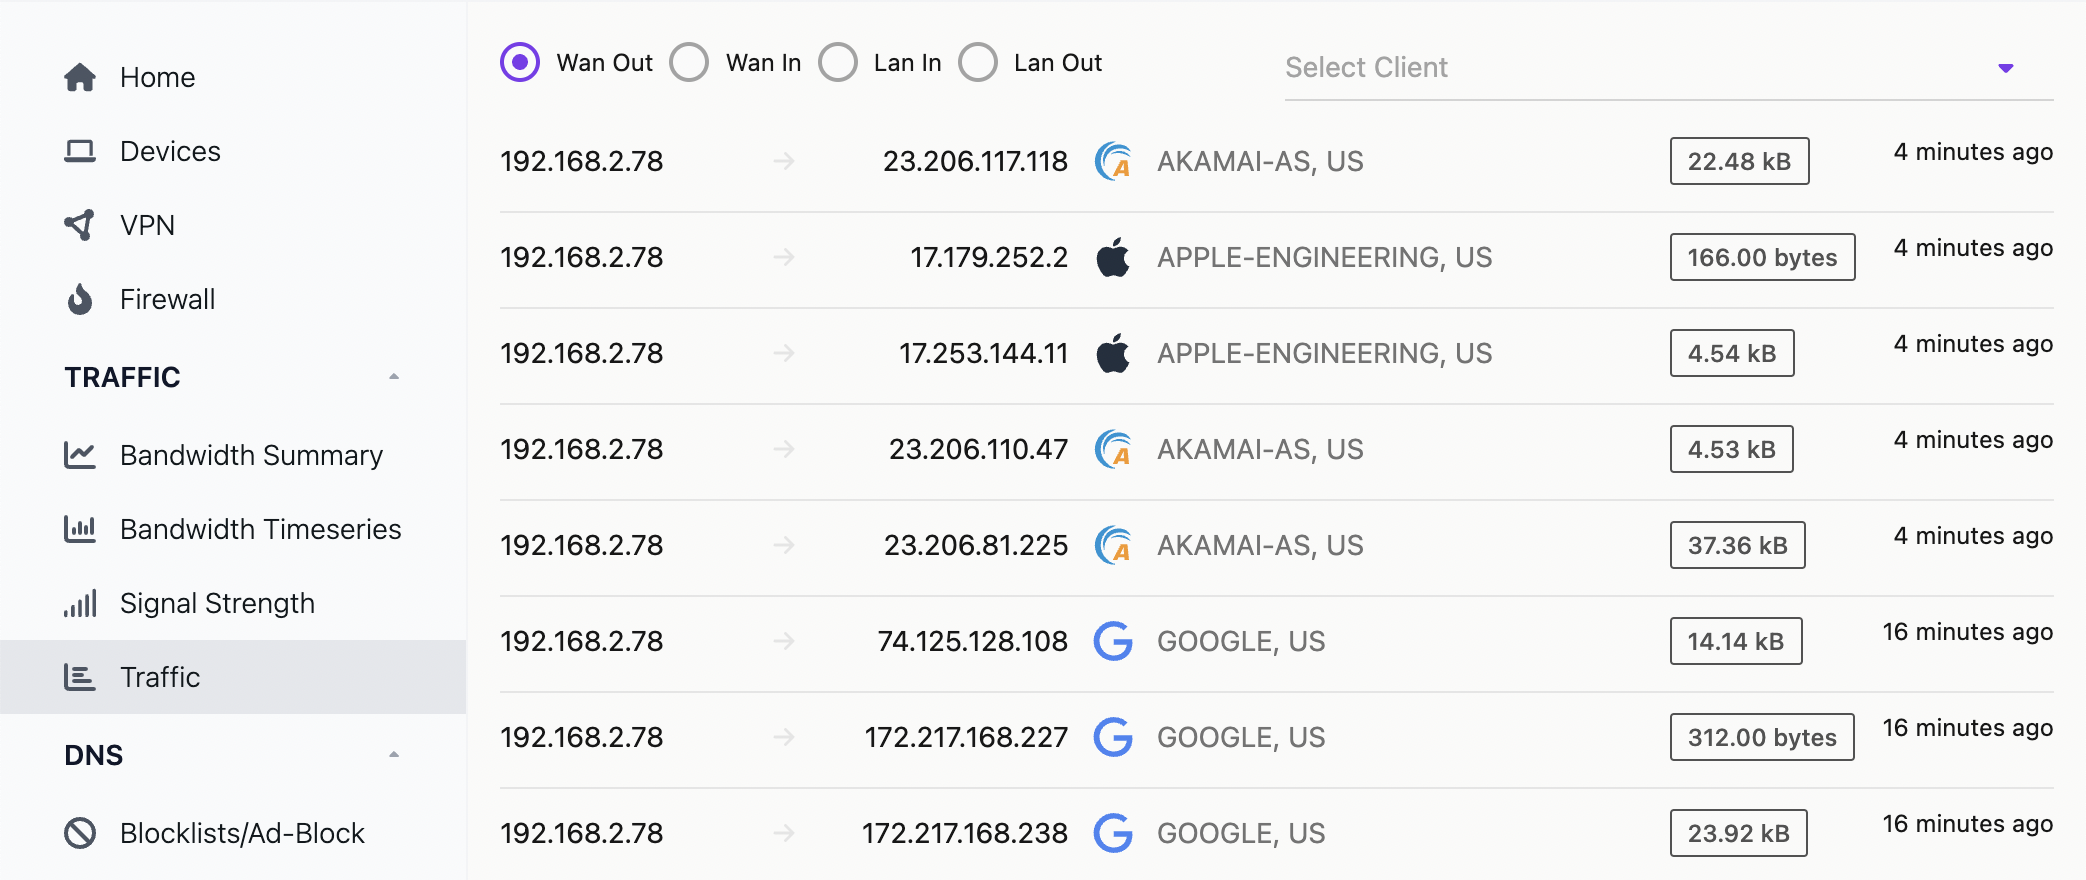
It is also possible to get more detail traffic for connections under Traffic:
Manual configuration
We recommend using SPR VPN with docker-compose-virt.yml, so the host system's firewall and network configuration is unaffected.
This will download the SPR repository and run virtual_install.sh.
The script will install dependencies, start all the containers and add one peer that can connect to the VPN.
See the next section for a walkthrough of the script.
If you would like to proceed through the setup yourself, follow the setups below
What you need
- A linux server running Ubuntu 24.04, that can run docker
- If there is a firewall port 51280/udp needs to be open for incoming traffic
- WireGuard (© Jason A. Donenfeld) installed on your client phone or desktop
Clone the super repository
git clone https://github.com/spr-networks/super.git
Run install script
Note: if you prefer to do this manually, skip this section and continue with the manual setup.
Install all dependencies and start the containers but skip adding a vpn peer:
cd super/
SKIP_VPN=1 ./virtual_install.sh
You can find the script source and more details are at the end of this guide.
Configuration
- Populate the configuration directory
cd super
cp -R base/template_configs/ configs/
- Enable virtual config in
configs/base/config.sh
cp configs/base/virtual-config.sh configs/base/config.sh
Example configuration:
#!/bin/sh
VIRTUAL_SPR=1
UPSTREAM_SERVICES_ENABLE=1
WANIF=eth0
RUN_WAN_DHCP=true
RUN_WAN_DHCP_IPV=4
LANIP=192.168.2.1
DNSIP=$LANIP
TINYNETSTART=192.168.2.4
TINYNETSTOP=192.168.2.255
TINYNETMASK=255.255.255.252
TINYSLASHMASK=30
WIREGUARD_PORT=51280
- Set an api username and password for the web UI
echo "{\"admin\" : \"your password goes here\"}" > configs/auth/auth_users.json
Start the SPR Services
docker compose -f docker-compose-virt.yml up -d
The services should now run and you can continue by signing in to the web ui.
On MacOS you may need to modify docker-compose-virt.yml to disable the journald driver and enable the json-file driver instead.
Optional Copy the virtual config for easier control of the docker containers:
cp docker-compose-virt.yml docker-compose.yml
Now you can run docker compose restart in the super directory to restart all the containers.
DNS Notes
SPR is configured to use DNS over HTTPs when resolving domains. You can modify the Coredns configuration in the ui by navigating to DNS -> DNS Settings or by editing configs/dns/Corefile.
Virtual SPR Install Script info
Virtual SPR Install Script info
Run Virtual Installer
sudo bash -c "$(curl -fsSL https://raw.github.com/spr-networks/super/master/virtual_install.sh)"
What the script does
- downloads the latest SPR repository from https://github.com/spr-networks/super/
- downloads prebuilt docker images
- generate default configs
- setup admin password and auth token for API access
- start SPR
- add a VPN peer and output the WireGuard config
You can also download the script if you want to check it out or add blocklists for ads:
curl -s -O https://raw.githubusercontent.com/spr-networks/super/main/virtual_install.sh
chmod +x virtual_install.sh
sudo DNS_BLOCK=hosts,ads,tracking,redirects ./virtual_install.sh
See here for available blocklists.
Example to block DNS requests to adservers and social media:
sudo DNS_BLOCK=ads,tracking,facebook,tiktok ./virtual_install.sh
If you want to change the admin password you can edit the file configs/base/auth_users.json
Running the script you should see login info, a QR Code & the WireGuard client config. Example:
...
[+] WireGuard config: (save this as wg.conf & import in client)
----------------------------------------------------------

[Interface]
PrivateKey = privkey
Address = 192.168.2.94
DNS = 192.168.2.1

[Peer]
PublicKey = pubkey
AllowedIPs = 0.0.0.0/0, ::/0
Endpoint = 198.211.120.224:51280
PersistentKeepalive = 25
PresharedKey = psk
If you want to connect to the VPN using a desktop client, save the config as wg.conf on your local computer.
Example to install all dependencies and start the containers but skip vpn setup:
SKIP_VPN=1 ./virtual_install.sh