Run Virtual SPR on a Google Cloud Free Tier Instance
Introduction
This guide shows how to setup a new E2 instance in Google Cloud, allow VPN access in firewall and install Virtual SPR. The result is a private VPN with a custom DNS server able to block ads, log traffic, and more features included in SPR.
For a more general and in-depth guide see the Virtual SPR Guide.
Setup Account
Skip this section if you already have an Google Cloud account & a project setup.
Go to Google Cloud & sign in with a Google account, or create a new one and enable Google Cloud. Google have a Free Tier where you get $300 in free credits when signing up as a new customer. Continue by creating a Payment Profile.
When done click New Project in the top menu dropdown and pick a name for your project.
Create Instance
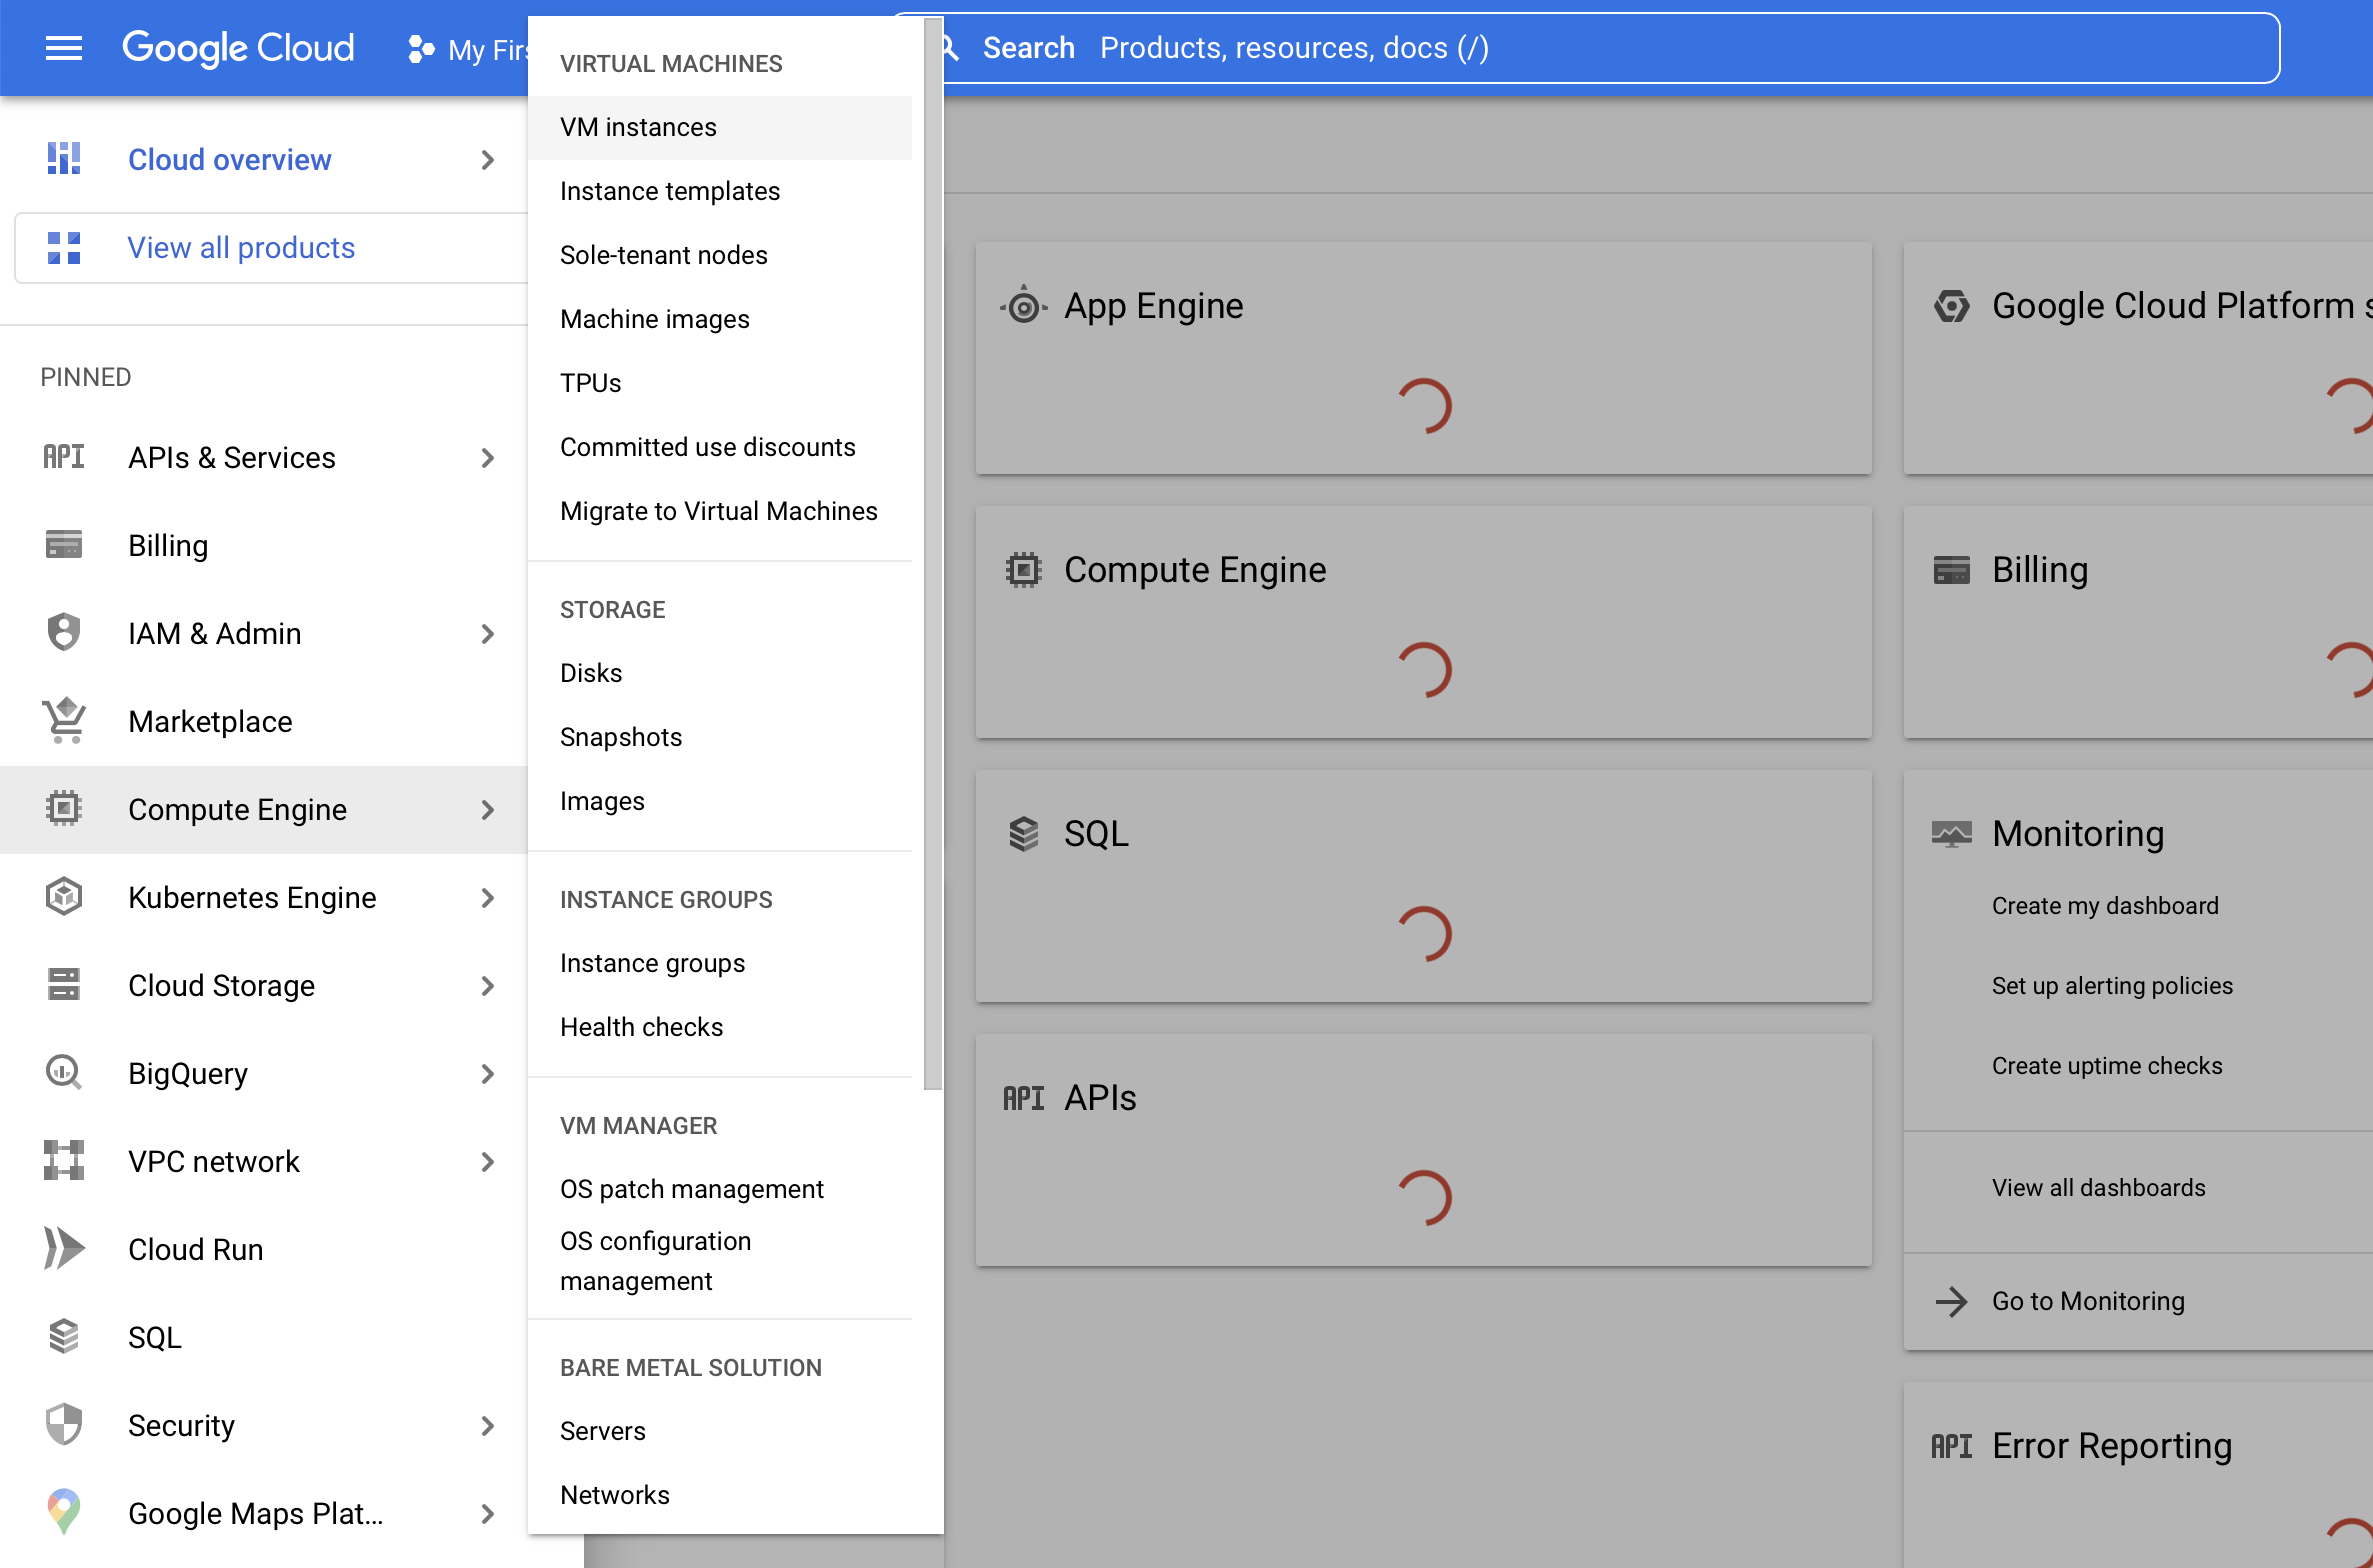
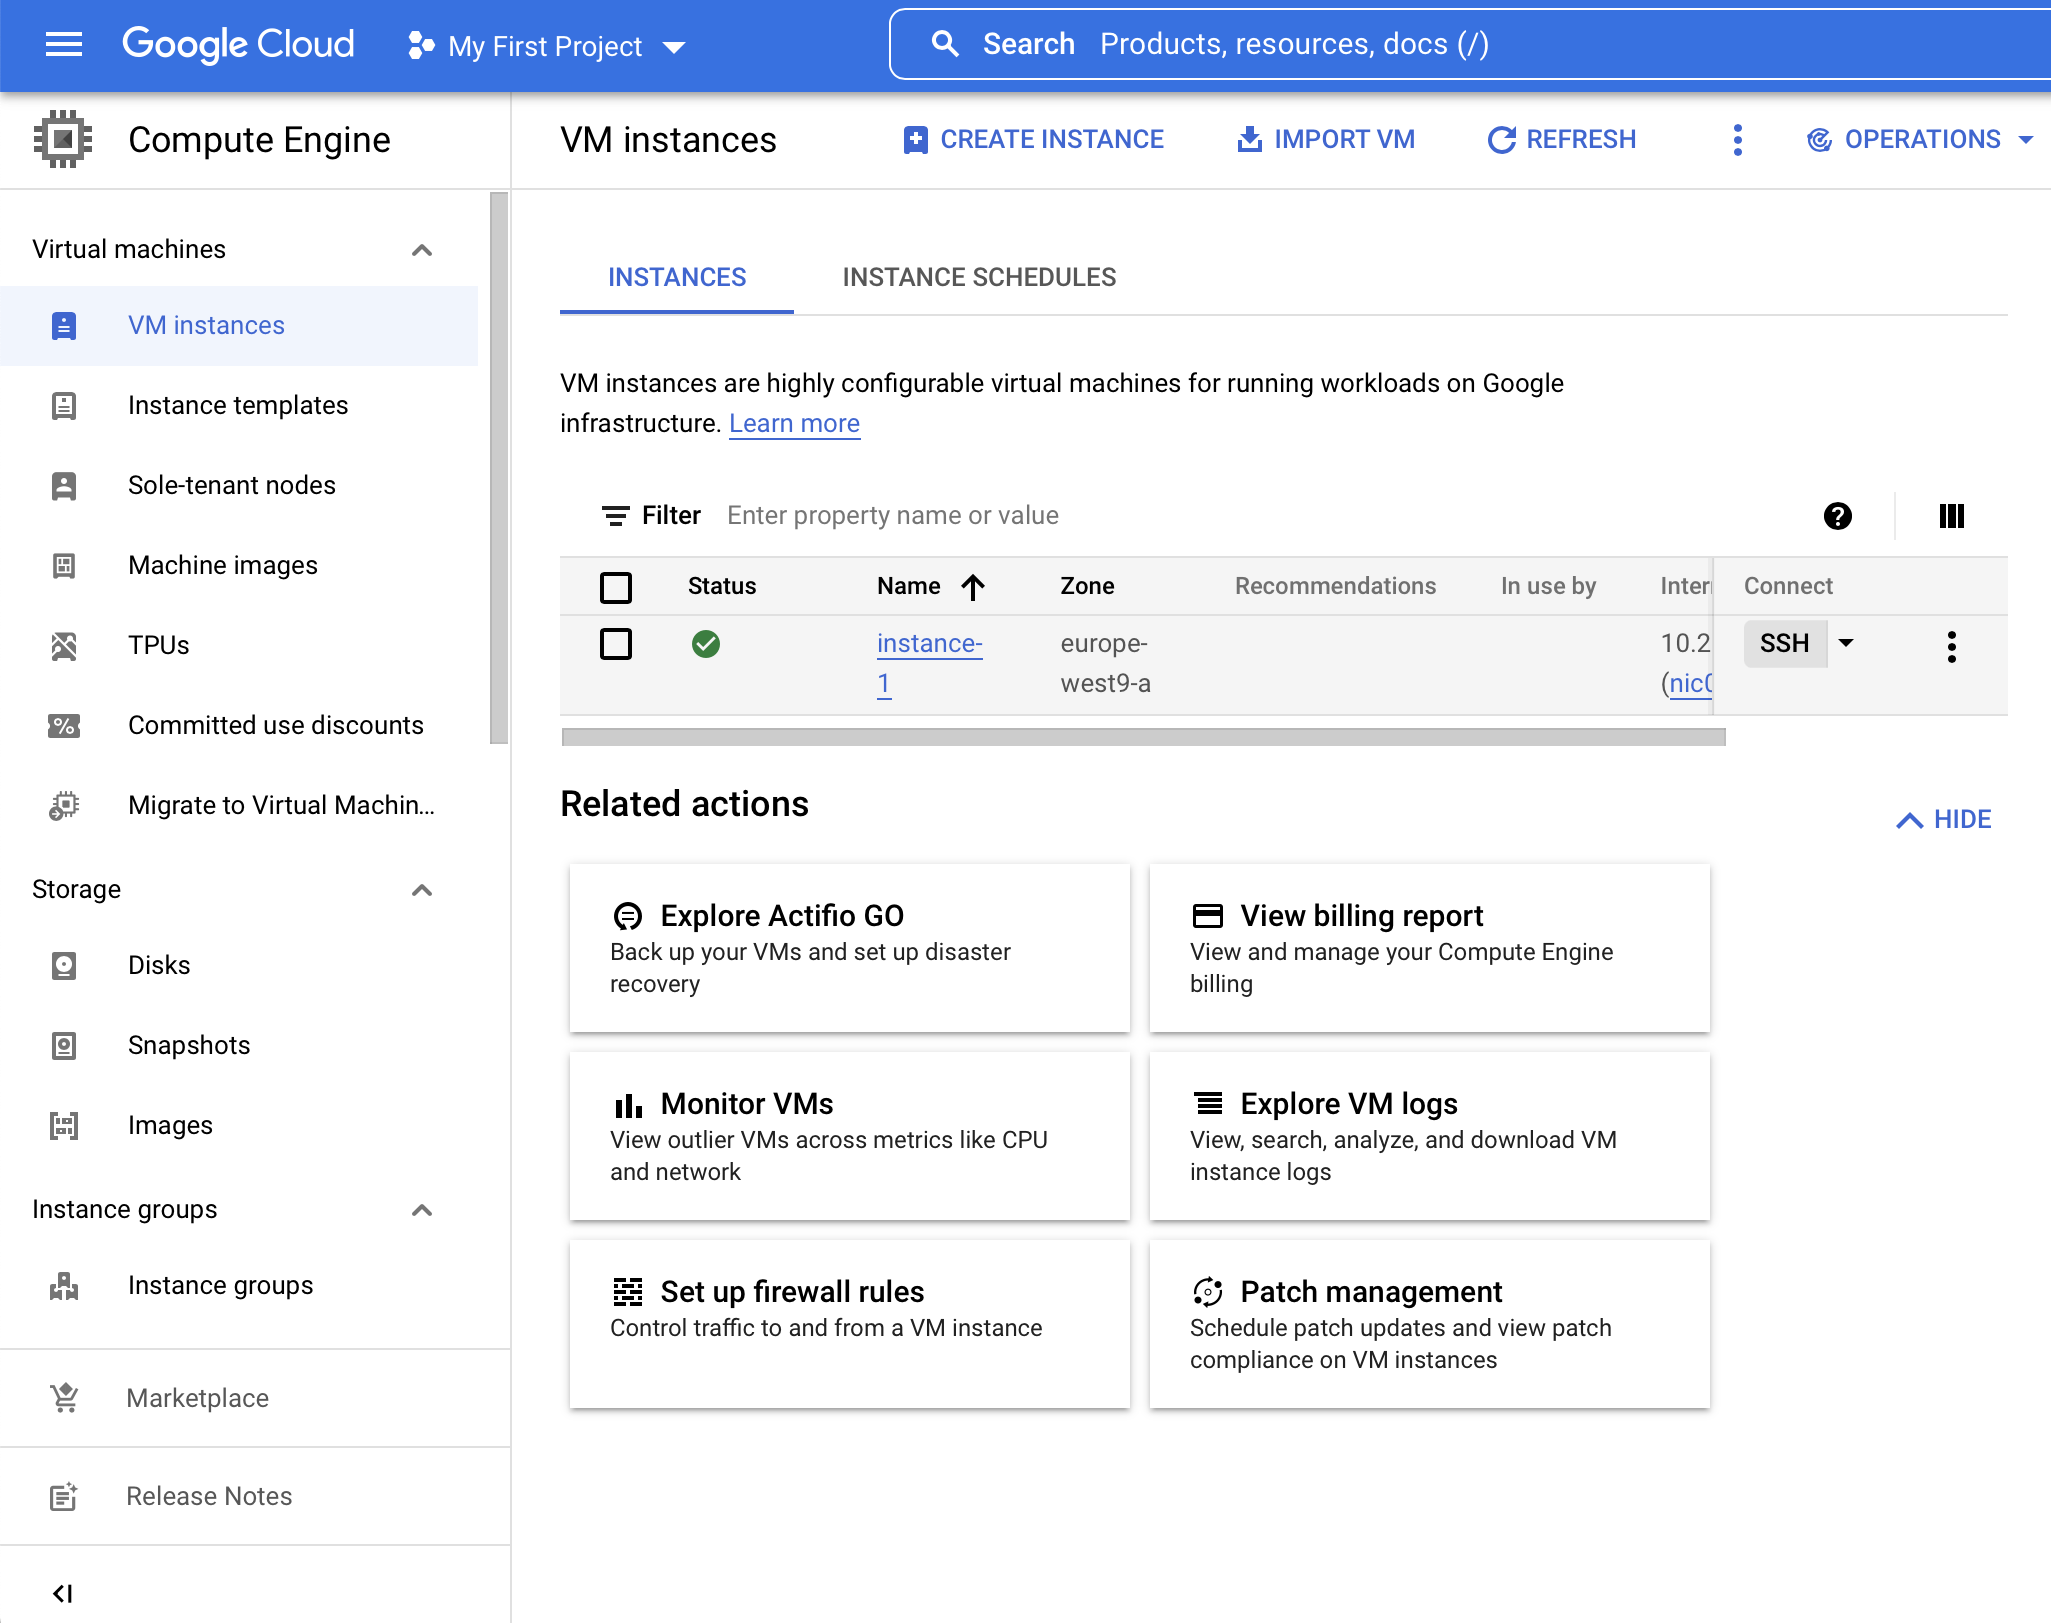
In the top navigation menu go to Compute Engine and click VM Instances.
Click Enable if you haven't used the service before. If promped to create a project, pick a name for it & click Create.
Click Create Instance.
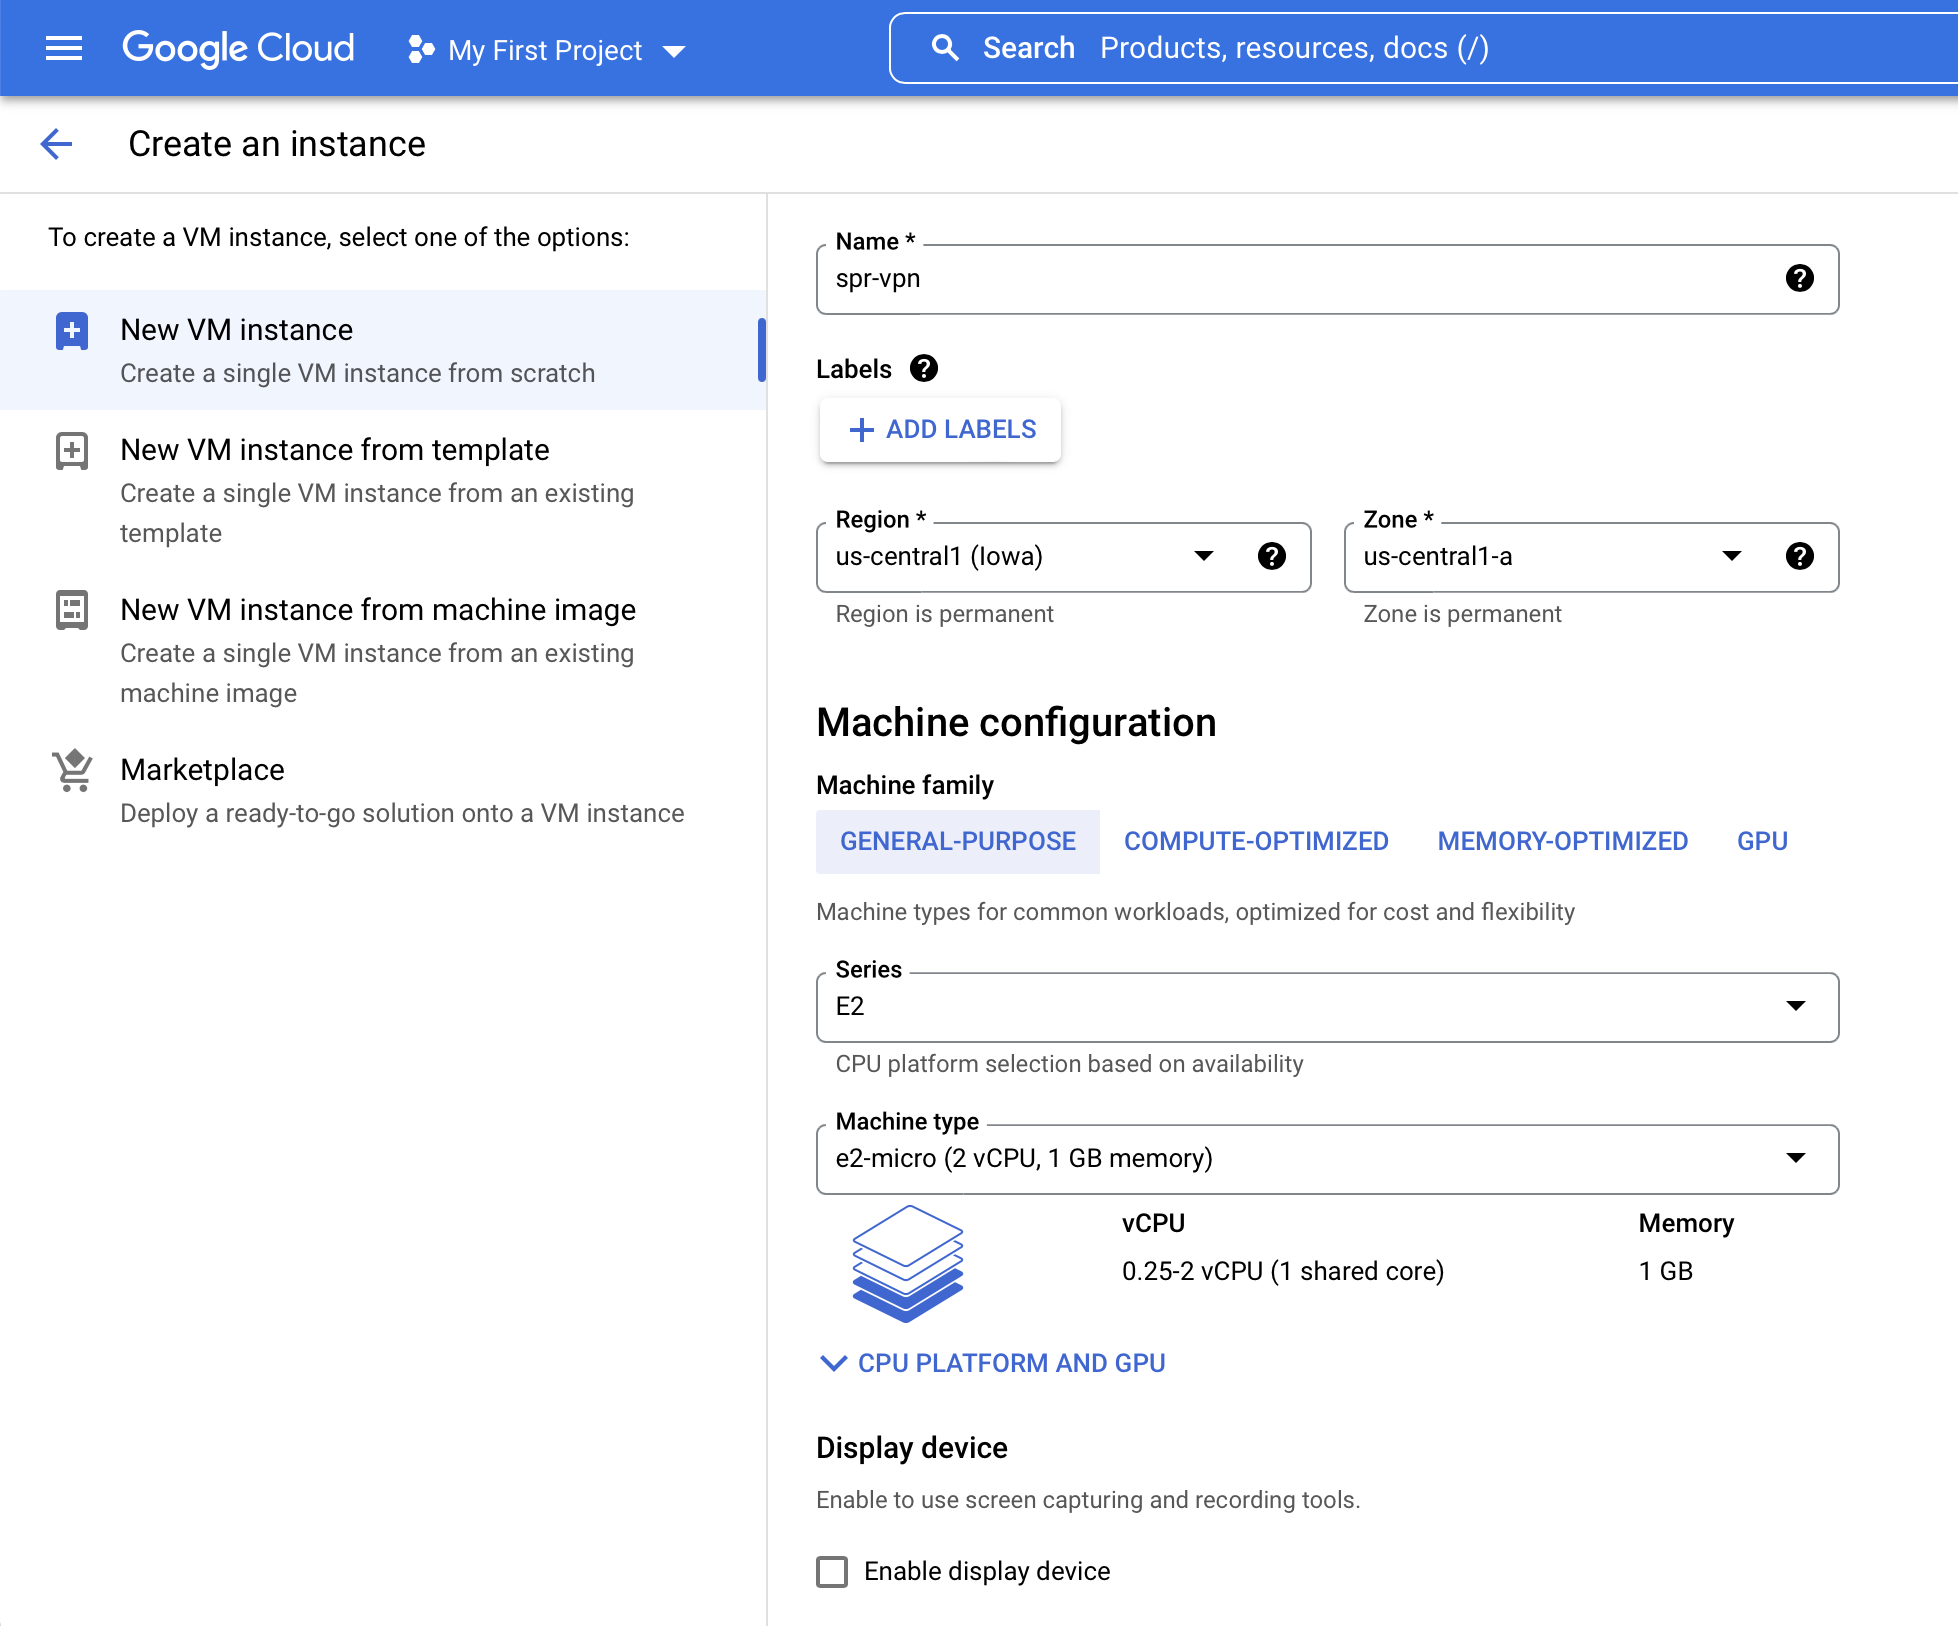
Select a name for your instance & pick a region.
For Series go with E2 and Machine type for the least expensive alternative.
Under Boot disk click Change:
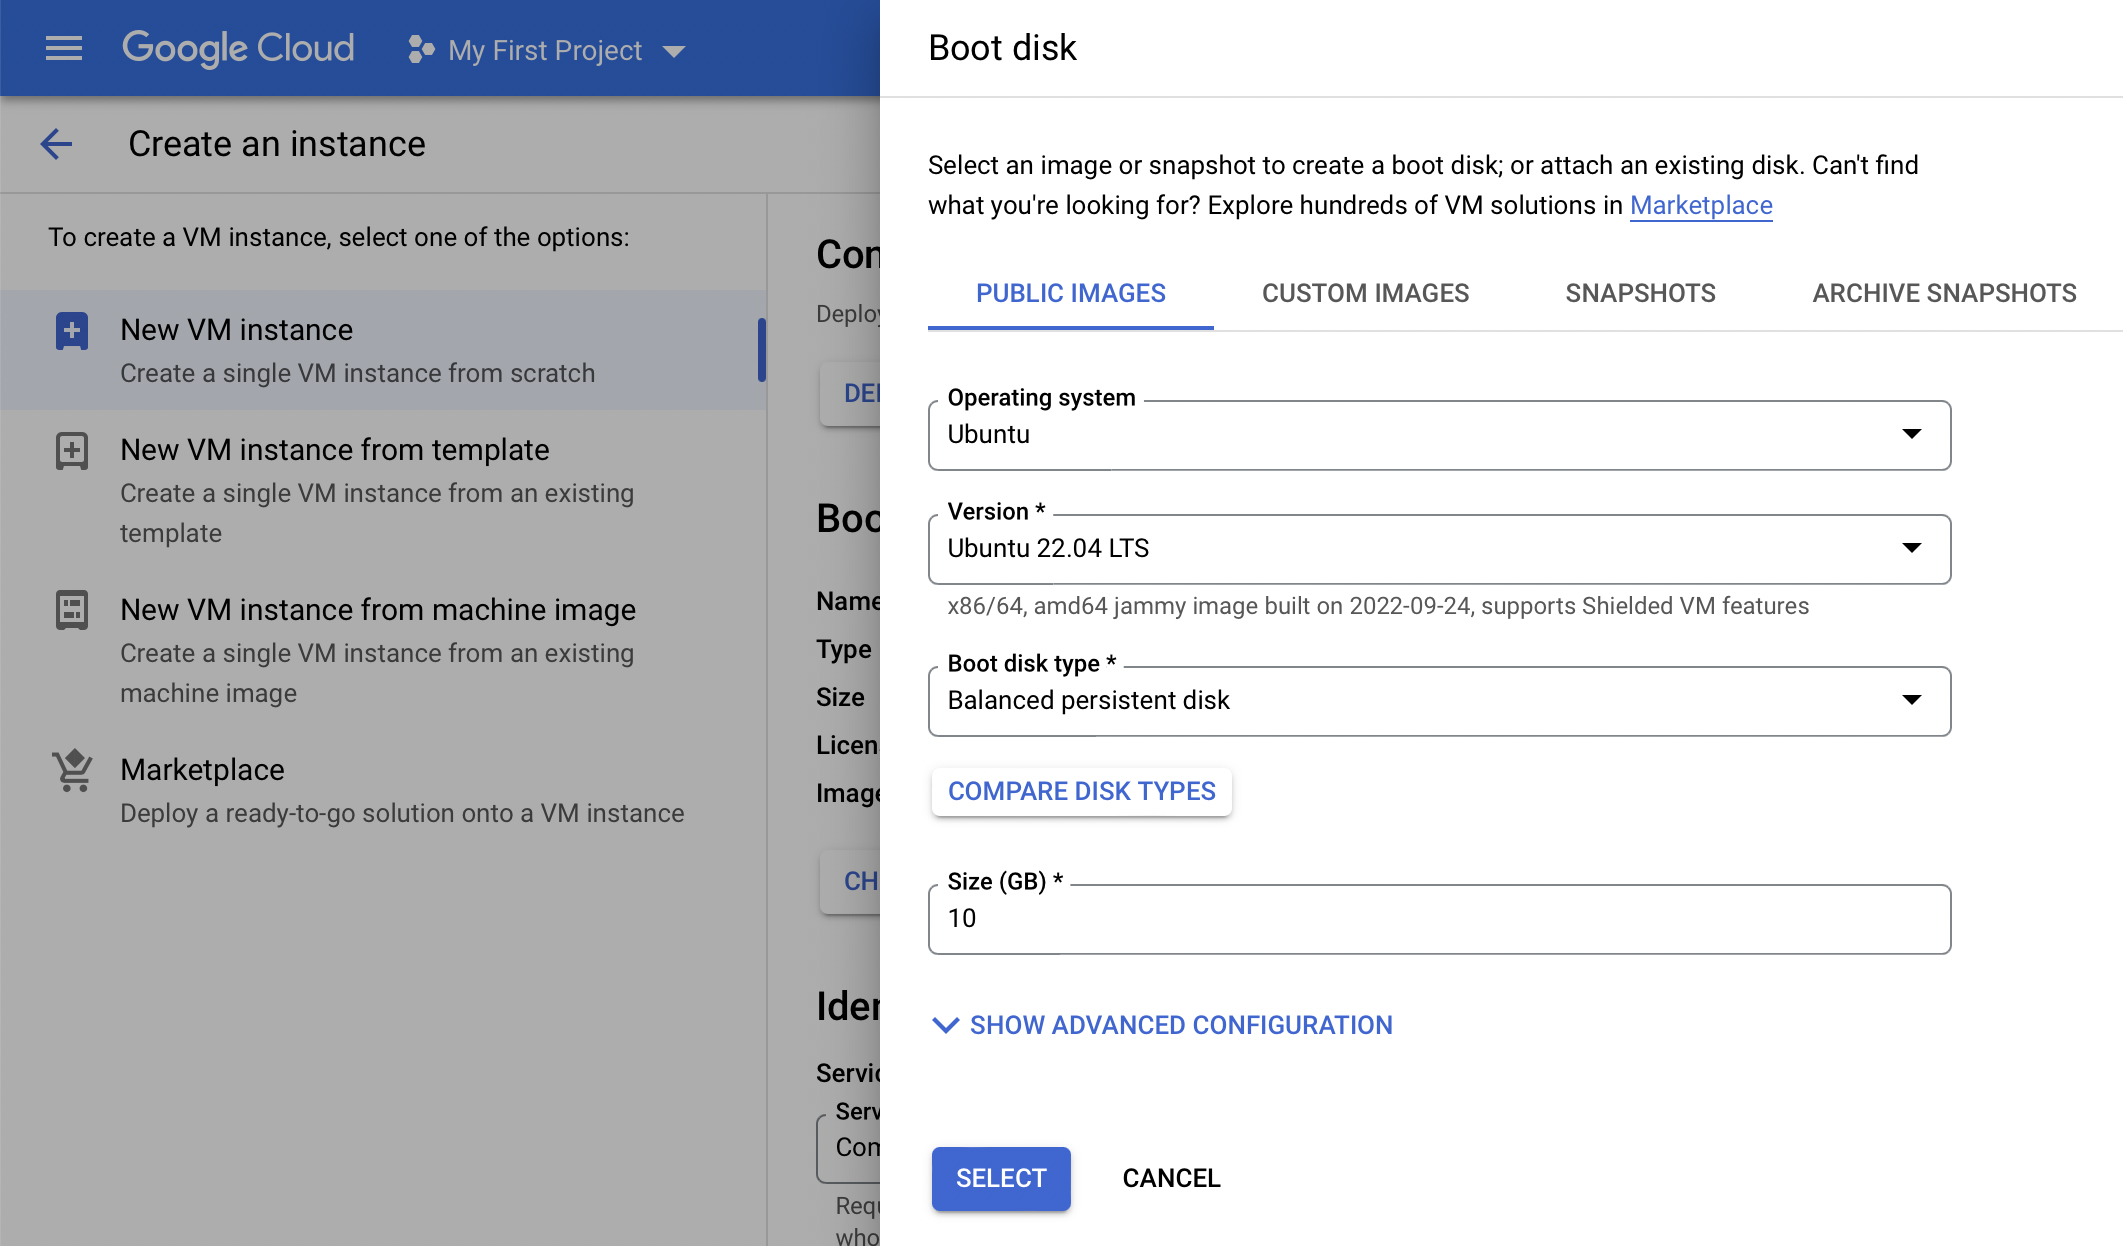
Select and save:
- Operating System Ubuntu
- Version Ubuntu 22.04 LTS x86/64
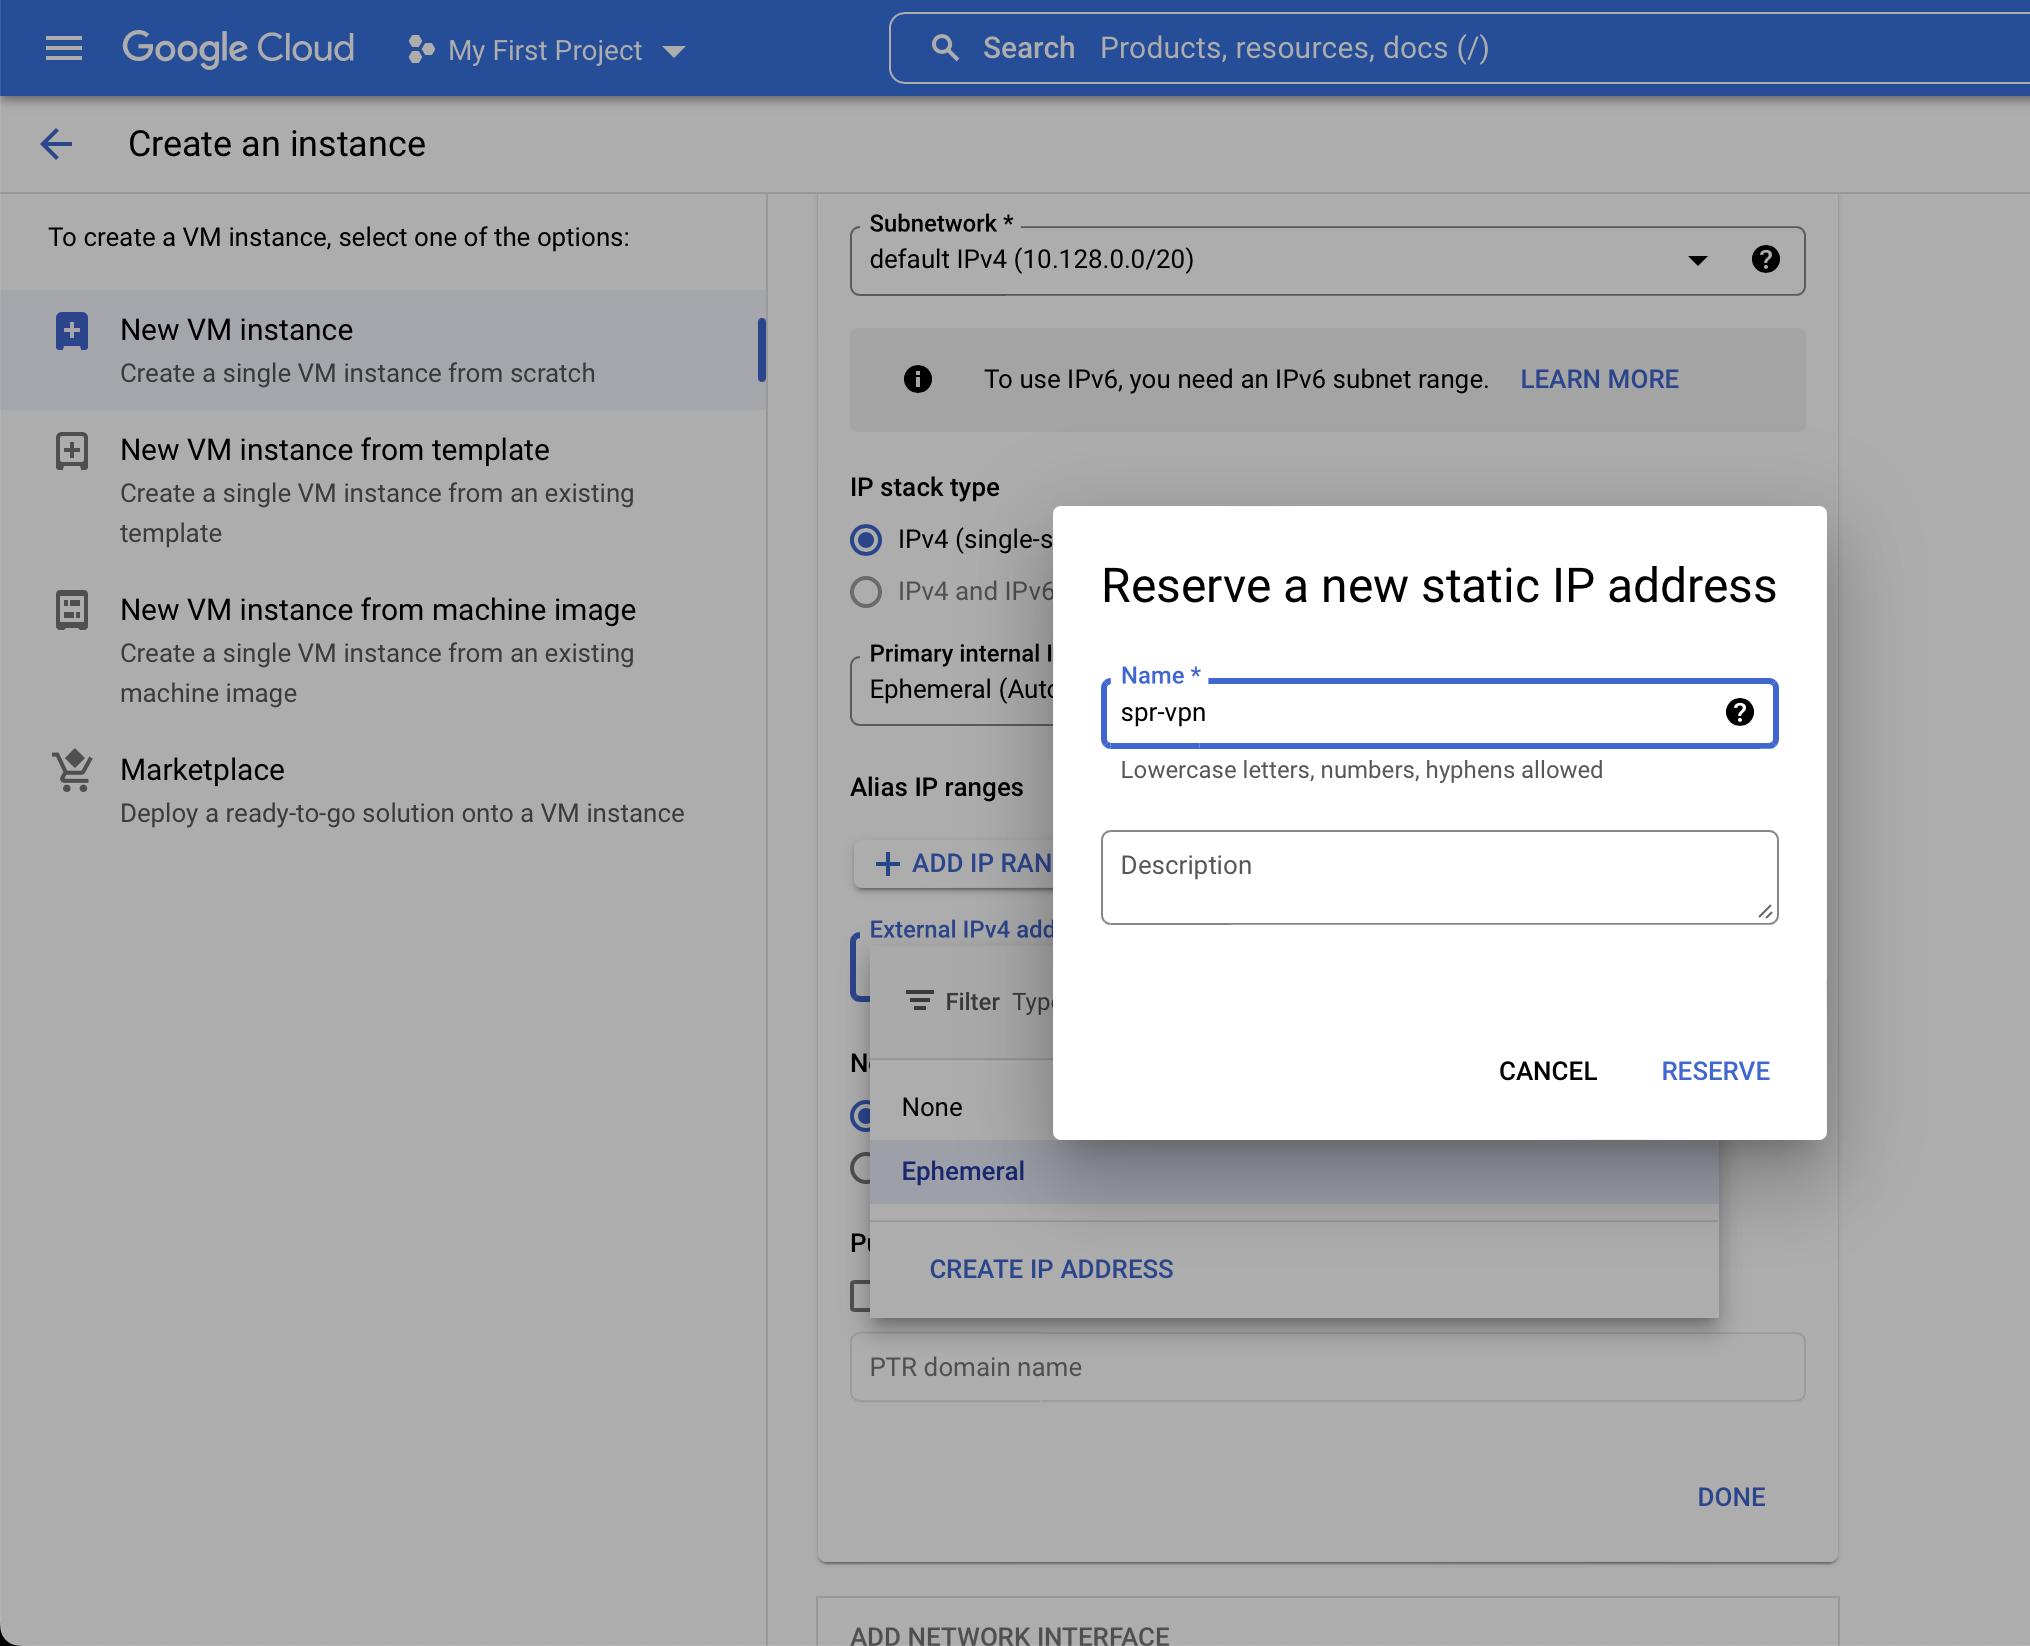
Expand Advanced options, then Networking, scroll down to Network interfaces and click default. Select External IPv4 address and click Create IP address to assign a static IP address for your instance.
The default settings is fine for the other options. Now click Create to boot up the instance.
Firewall rules for VPN access
In the navigation go to VPC Network and click Firewall. Click Create Firewall Rule at the top of the page.
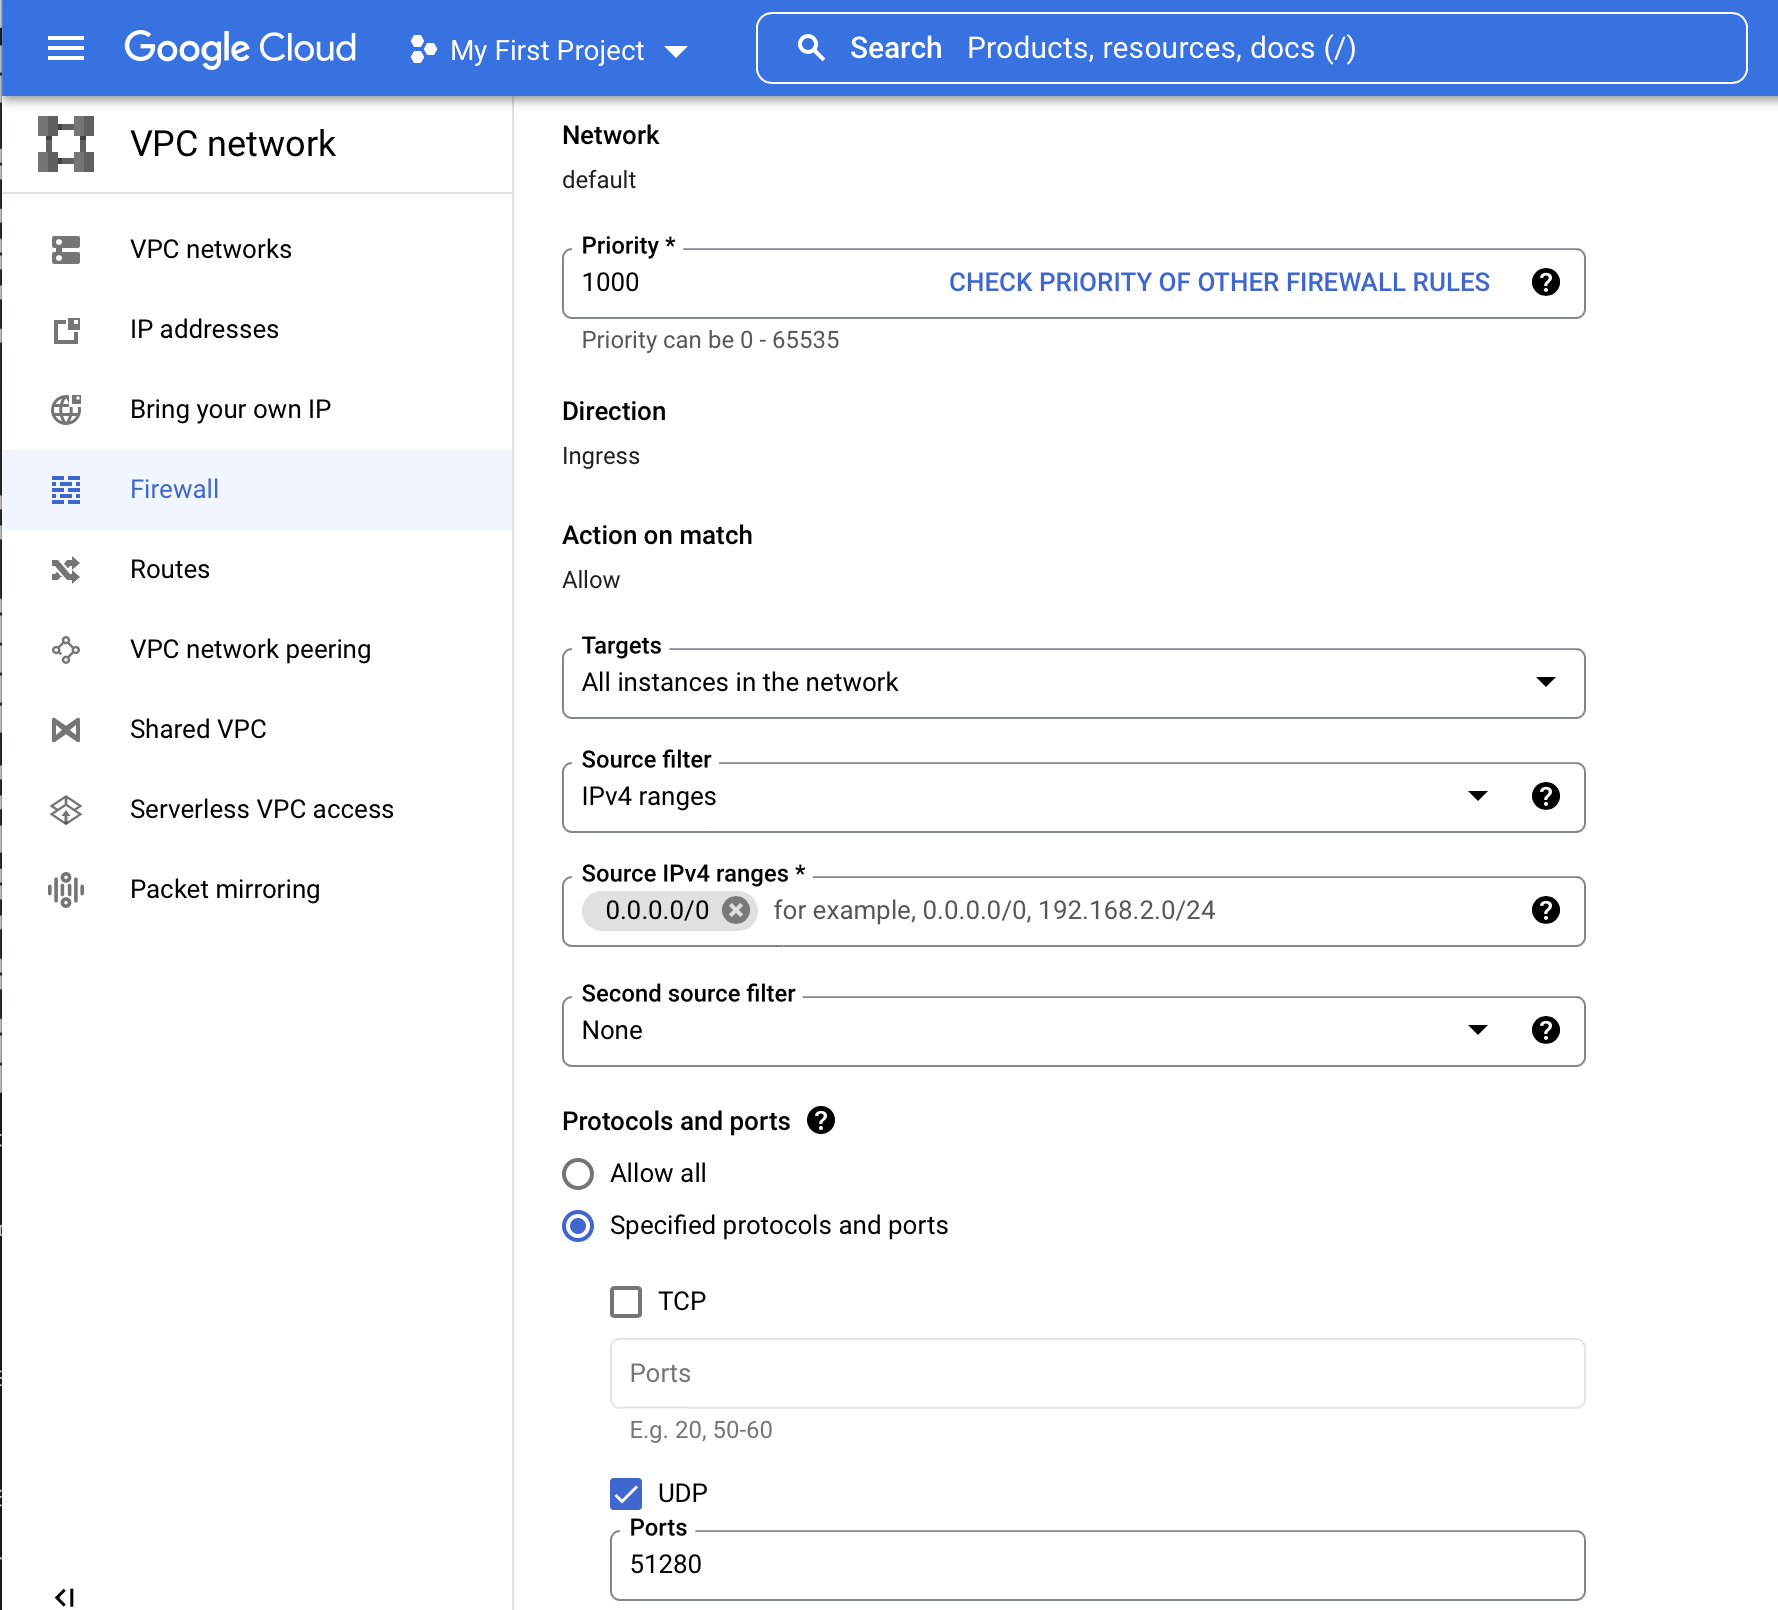
Settings in screenshot:
- Name allow-wireguard
- Diretion of Traffic ingress
- Network default
- Targets All instances in the network all is fine, specify a target if you run more instances
- Source Filter IP ranges
- Source IP Ranges 0.0.0.0/0 or if you know the range you will be connecting from
- Protocols and Ports UDP and 51280
- Second Source filter None
Note: This only allows connections to the instance, WireGuard will authorize clients when connecting.
Access instance & install SPR
Your instance should be available under Compute Engine -> VM Instances. Click SSH in the listing:
A browser window should popup with a terminal. Run the SPR virtual installer with sudo:
sudo bash -c "$(curl -fsSL https://raw.github.com/spr-networks/super/master/virtual_install.sh)"
Check out the source for virtual_install.sh here.
If you want to add another device, just run the setup script again:
cd super
sudo ./virtual_install.sh
Now you have a WireGuard VPN config ready, either scan the QR Code or paste the config into the WireGuard client.
For more information on setting up the client see the Virtual SPR Guide on how to connect your VPN client to the instance.