Running SPR on a Mini PC with WiFi 6
Intro
In the blog post we'll describe how to build and run SPR on a Mini-PC. And we'll use a WiFi 6 capable radio inside.
First, get a Mini PC ready
- Identify a good mini PC to use. Wilson suggested a look at QOTOM's i3 broadwell routers.
The g330 is not bad. It's a fanless build with a TDP of 15W. One mini pci-e slot is dedicated to mSATA, and the other can be used to fit a wifi radio. It also has additional SATA available for one more storage drive.
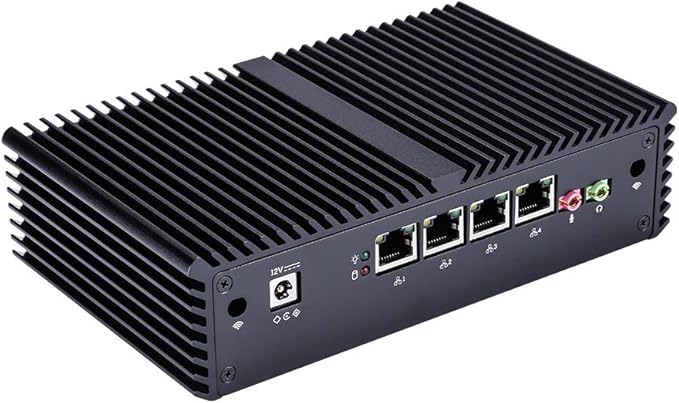
WARNING: On this device, the mini-pcie slot has a tall post for half-sized cards that needs to be removed to fit thicker full sized WiFi cards.
- Get a good WiFi radio.
We'll run with an 802.11ax card that works with Linux in AP mode (at least 802.11ac is recommended).
Mediatek is the disruptor in this space and supports AP mode on Linux. [NOTE: Many other cards will NOT work with ax in AP mode on Linux with open source drivers] . If you have recommendations please do not hesitate to reach out on the matrix chat. For the G330 Qotom, 2 antennas wires are provided to outside the case, so the 2x2 configuration is best.
The MT7915 can be purchased from AsiaRF.

Setup
Download and install Ubuntu Server. Since the WiFi 6 driver is a work in progress, we grabbed a daily release of Jammy Jellyfish 22.04 from the Ubuntu Live page to get the latest fixes. Copy the installer to installation media (a flash drive) then plug it in and go.
Then follow the SPR Setup Guide.
Our config/base/config.sh:
#!/bin/sh
SSID_NAME=6lab
SSID_INTERFACE=wlan1

#PPPIF=eth0
#WANIF=ppp0
#PPP_VLANID=201
#PPP_PROVIDER=provider-config
WANIF=enp1s0
RUN_WAN_DHCP=true
RUN_WAN_DHCP_IPV=4
# Uncomment the next line if a second ethernet port goes to wired LAN
#LANIF=eth1
VLANIF=wlan1
VLANSIF=$VLANIF.

LANIP=192.168.3.1
DNSIP=$LANIP
TINYNETSTART=192.168.3.4
TINYNETSTOP=192.168.3.255
TINYNETMASK=255.255.255.252
TINYSLASHMASK=30
DOCKERNET=172.17.0.0/16
DOCKERIF=docker0

WIREGUARD_PORT=51280
#WIREGUARD_NETWORK=192.168.3.1/24
Configure hostapd for 802.11AX
On the SPR device, modify configs/wifi/hostapd.conf and add:
ieee80211ax=1
he_su_beamformer=1
he_su_beamformee=1
he_mu_beamformer=1
he_oper_chwidth=1 # 80mhz channel
he_oper_centr_freq_seg0_idx=42
Restart wifid
docker compose restart wifid
Connect a wifi 6 client and verify HE codings are available
# iw dev wlan1.4096 station dump -v  | grep bitrate
        tx bitrate:     1200.9 MBit/s 80MHz HE-MCS 11 HE-NSS 2 HE-GI 0 HE-DCM 0
        rx bitrate:     720.6 MBit/s 80MHz HE-MCS 7 HE-NSS 2 HE-GI 0 HE-DCM 0
Some Notes on the MT7915
The MT7915 is a Dual Mode driver. This means that it supports both 2Ghz and 5Ghz
frequencies simultaneously. For our install the 2ghz interface is on wlan0 and 5Ghz on wlan1. This is really wonderful, since one card can serve older IOT devices that only run on 2Ghz as well as more modern devices at high speeds.
The linux kernel driver is not yet as stable as it could be, so beware that it may not yet be production ready -- several assertions and crashes were noticed. The mainline kernel does not yet support radar scanning, however the code is available in the openwrt development branch.