How to use the SPR 1-click install on DigitalOcean
Introduction
This guide allows you to setup your own cloud VPN using SPR for $4/month on the DigitalOcean Marketplace. It features ad blocking, firewall rules, and device micro-segmentation.
If you want to dive in directly: Click here to create a droplet using the SPR image. Else, follow along in the steps below.
Step 1 - Create a SPR Droplet
To create a SPR Droplet from the Digital Ocean marketplace, press the Create SPR Droplet button:

Pressing the button will take you to the DigitalOcean control panel. If you are not logged into your DigitalOcean account, you need to login. If you don't have an account, you can sign up for one.
Step 2 - Configure your droplet
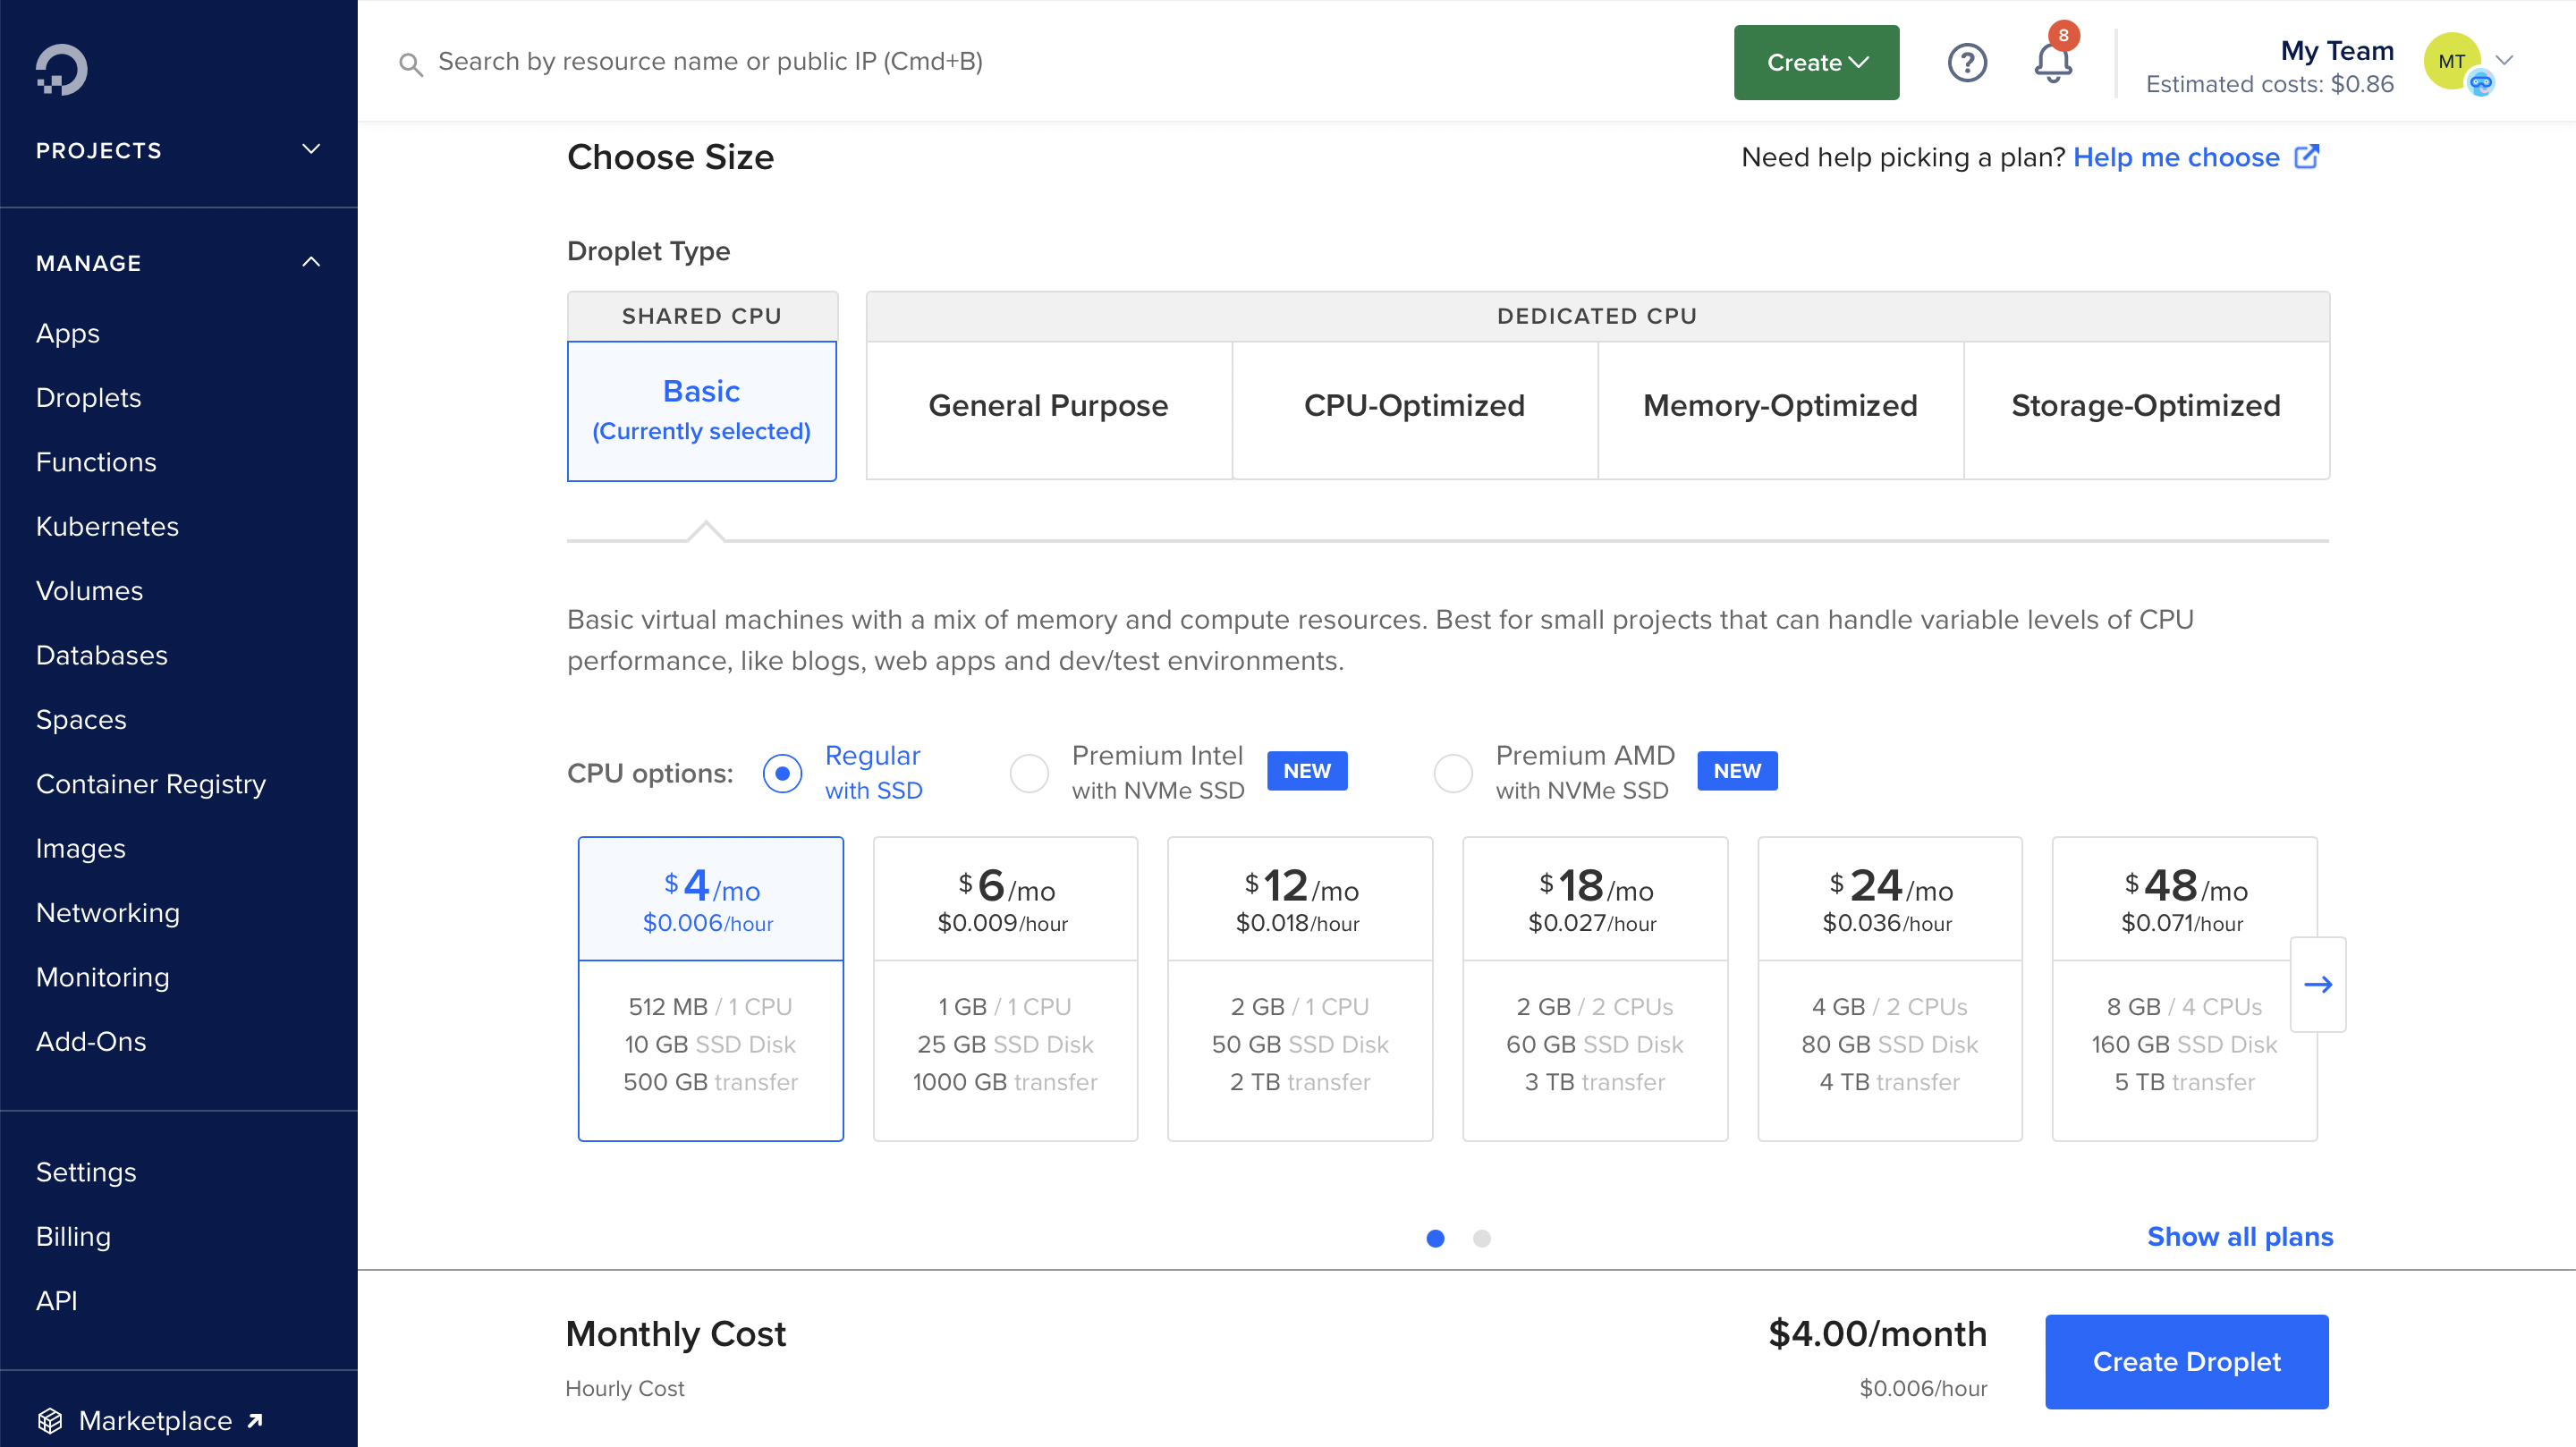
Select a region & be sure to create a SSH key if you don't have one configured already.
For Droplet Size, the smallest $4/month with 512 MB RAM is enough but feel free to choose another one.
After you've made all your choices, press Create droplet.
Step 3 - Access your droplet
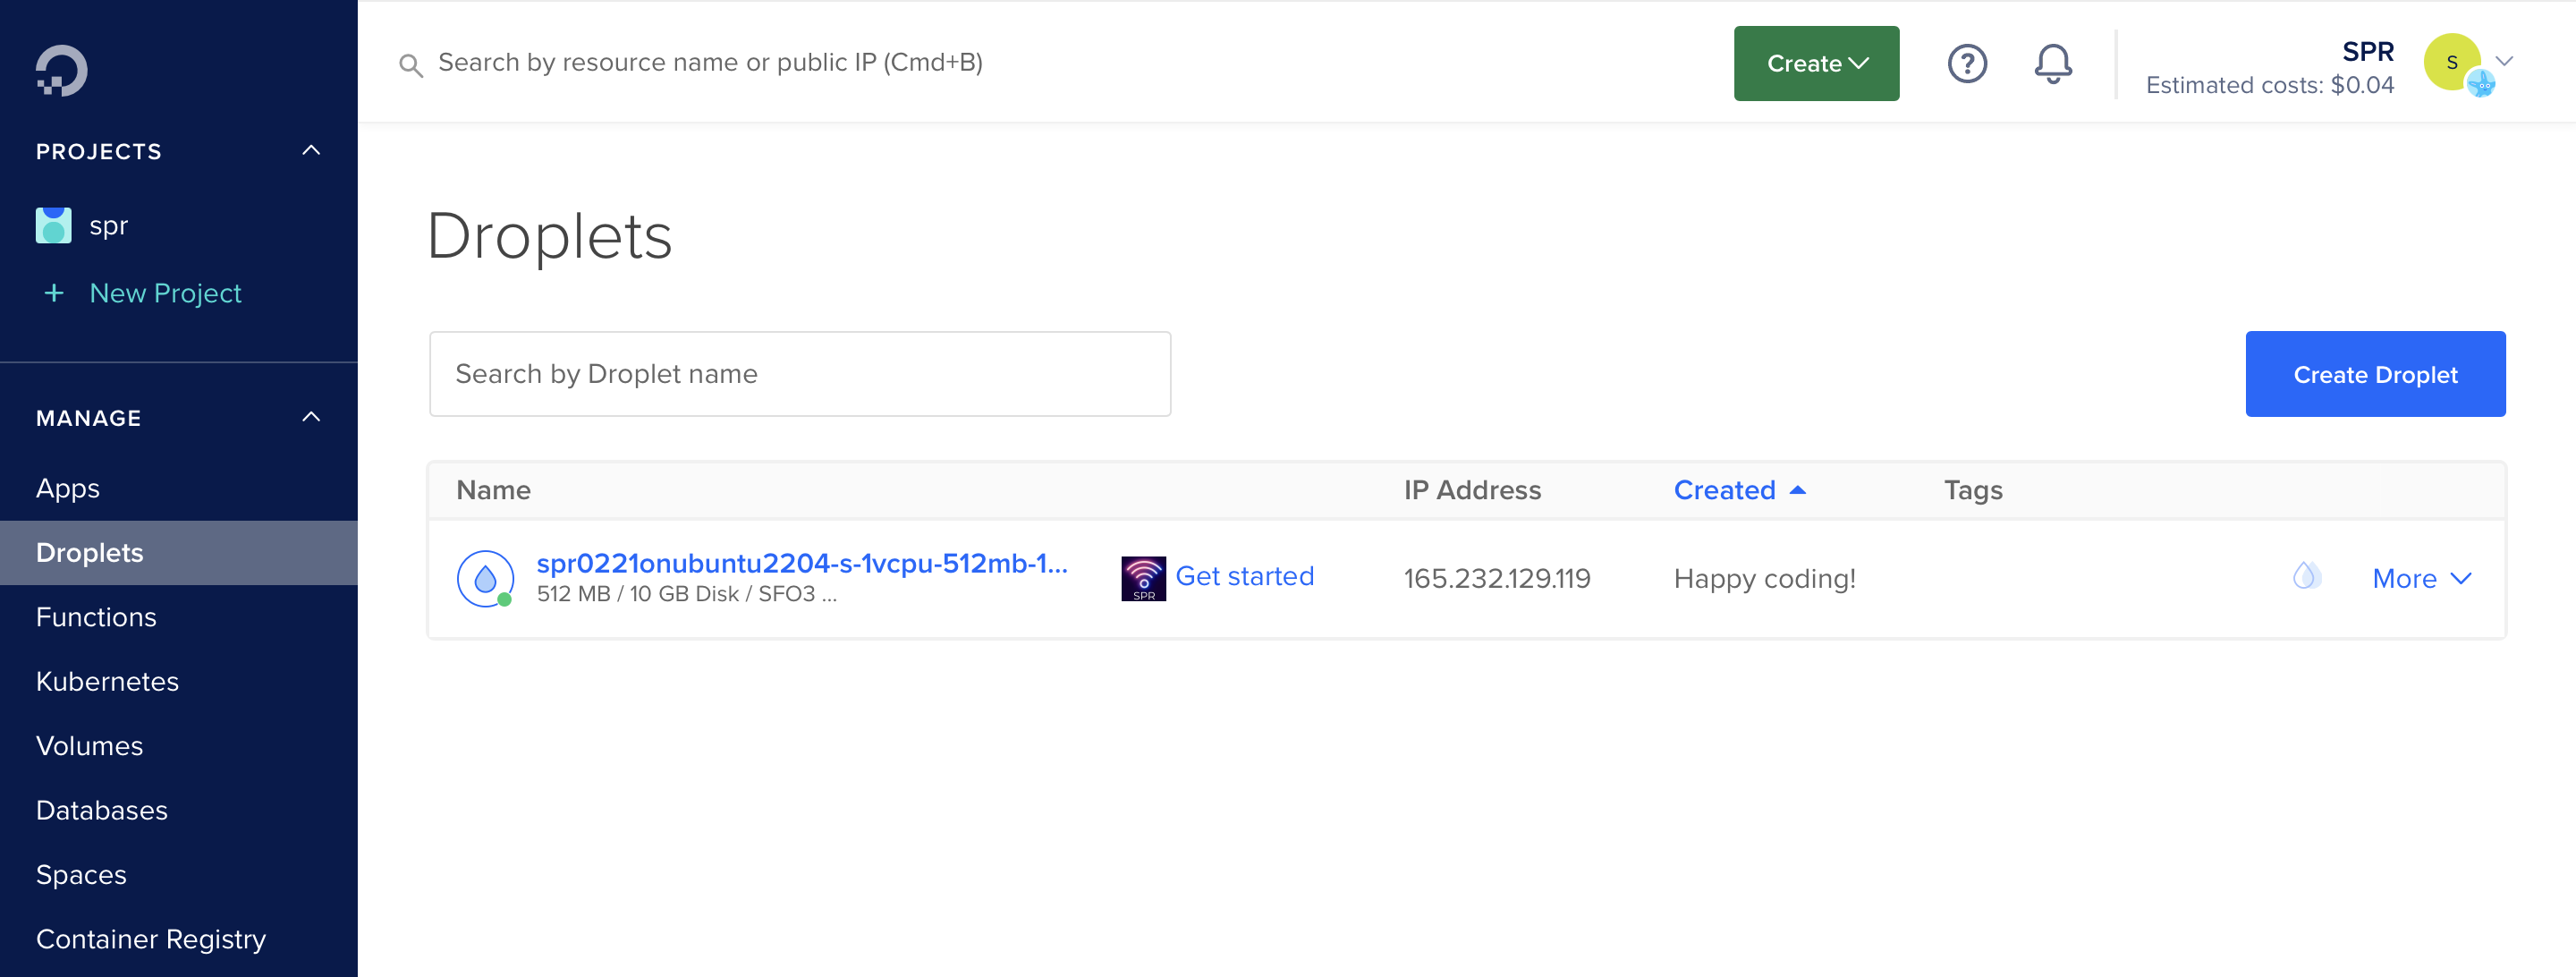
In the droplet listing you can see the IP address, click Get started to see the tutorial and how to access you server.
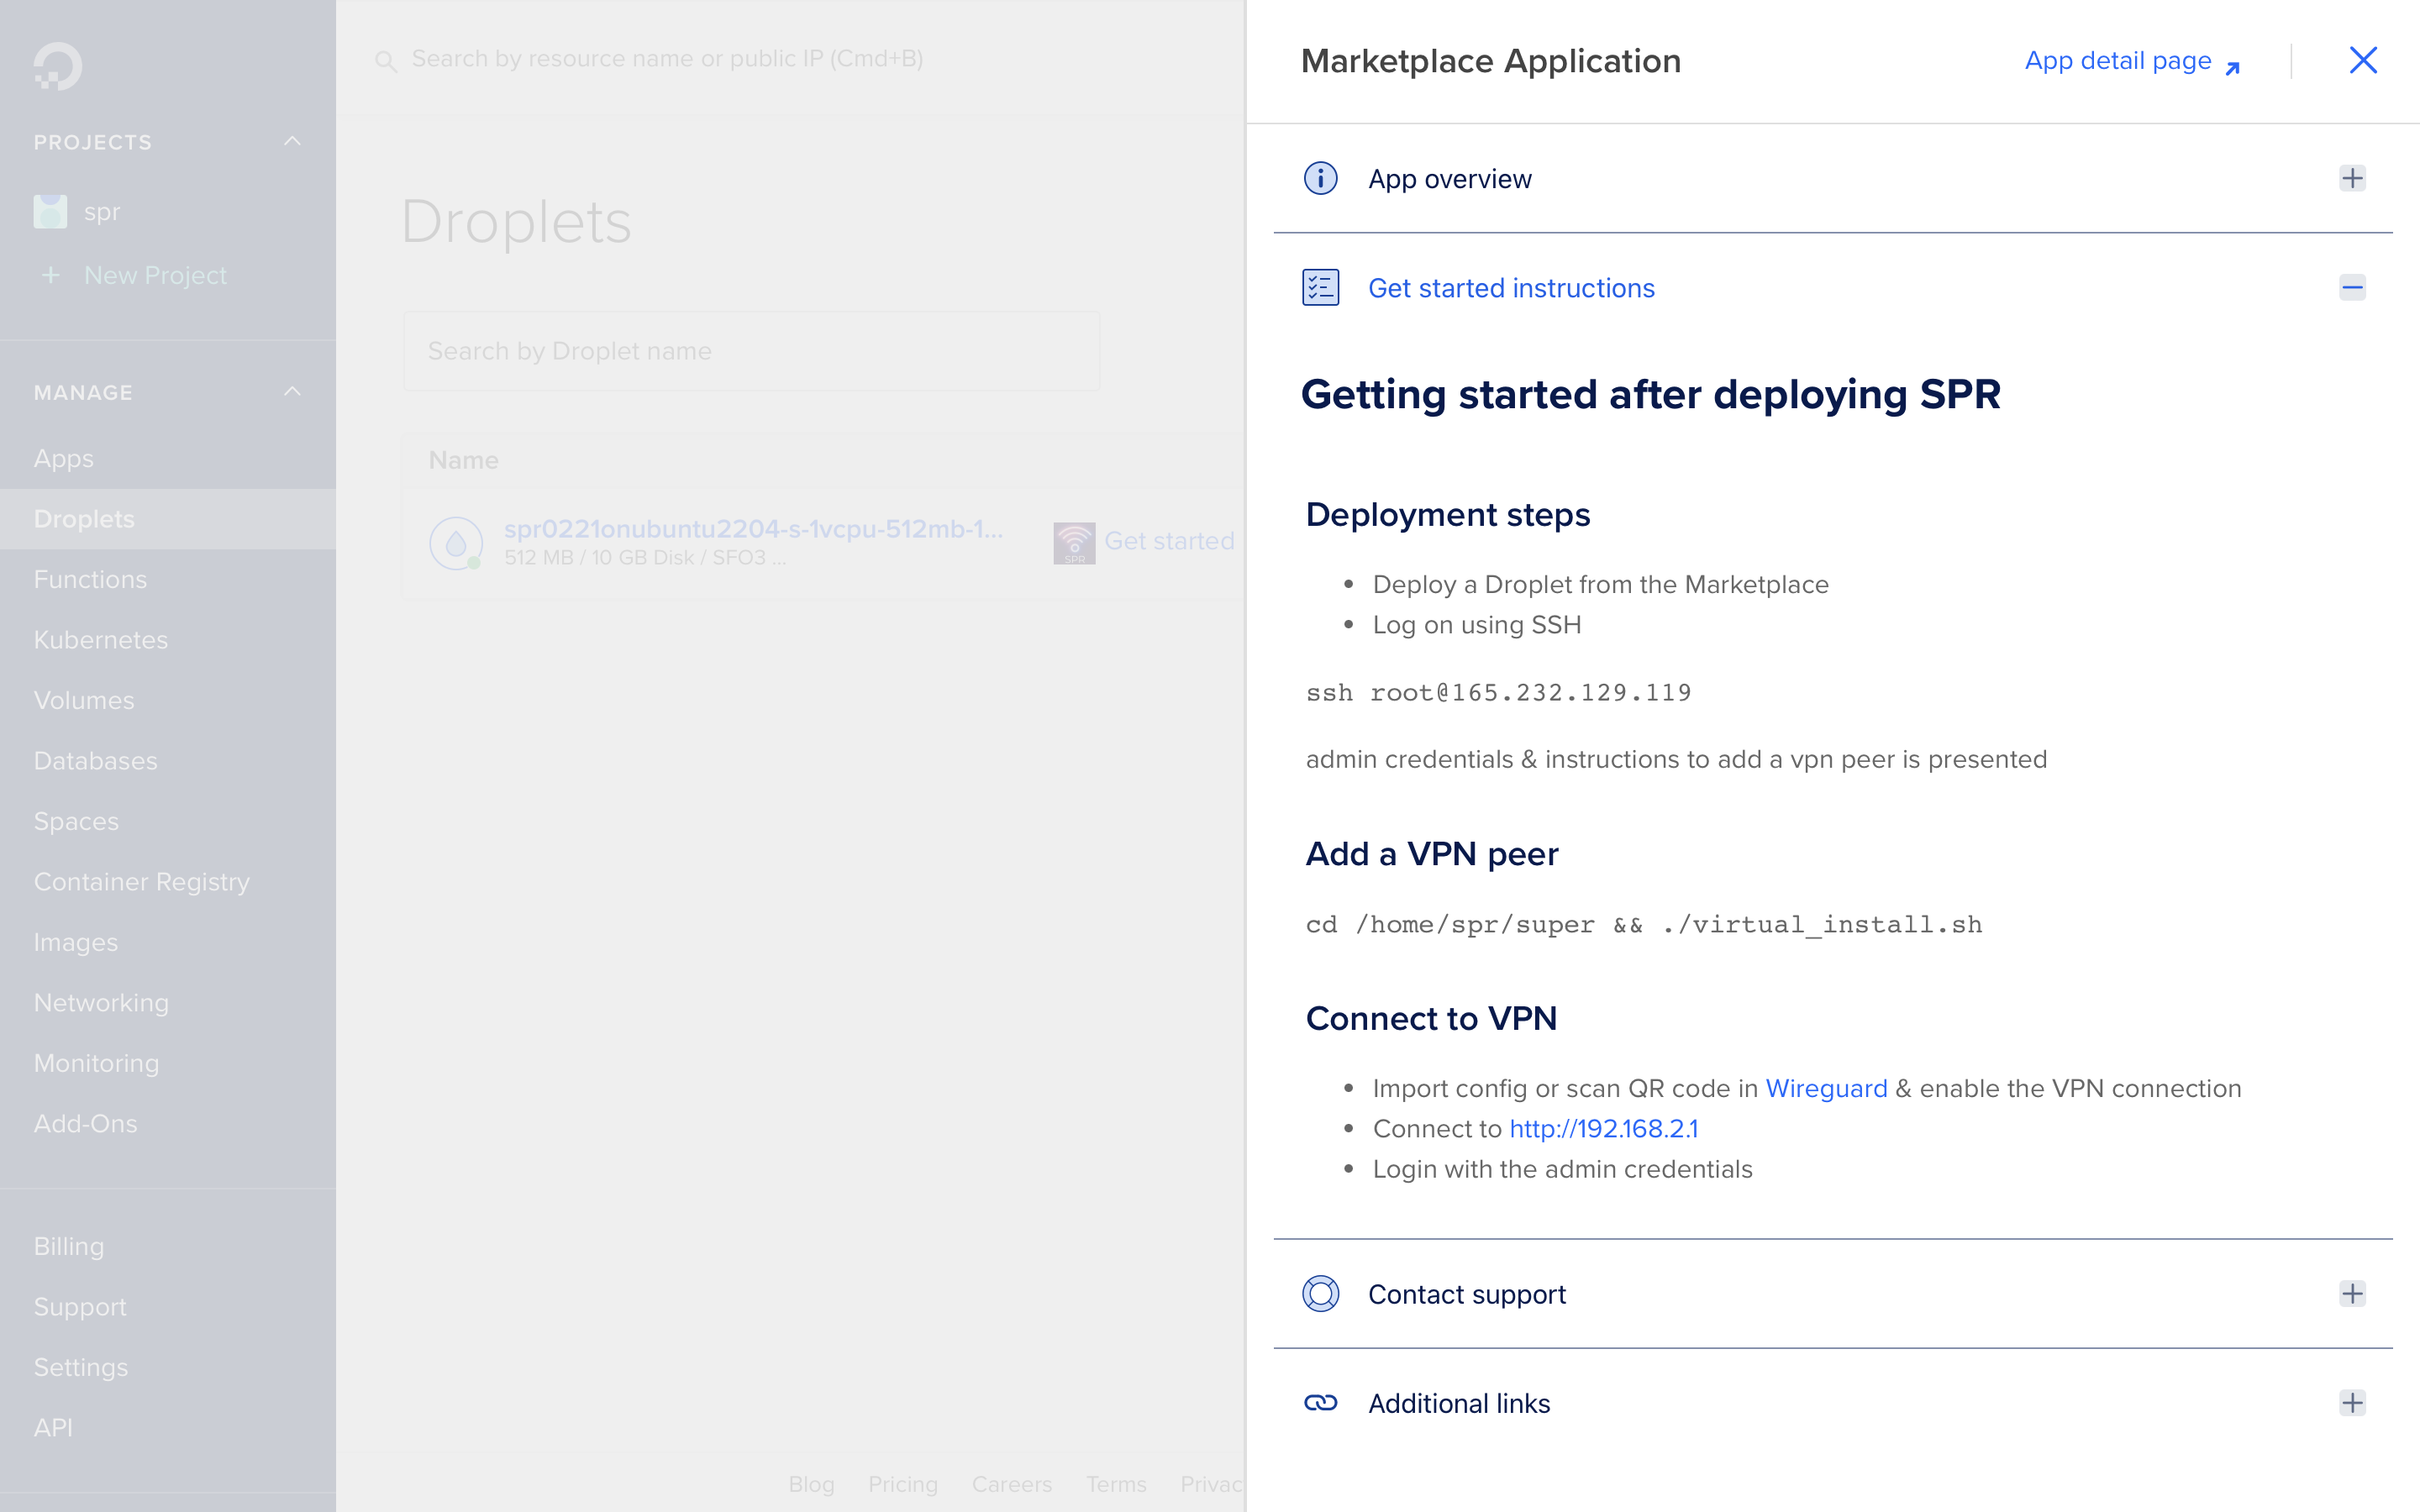
Step 4 - Generate a VPN Key and Connect
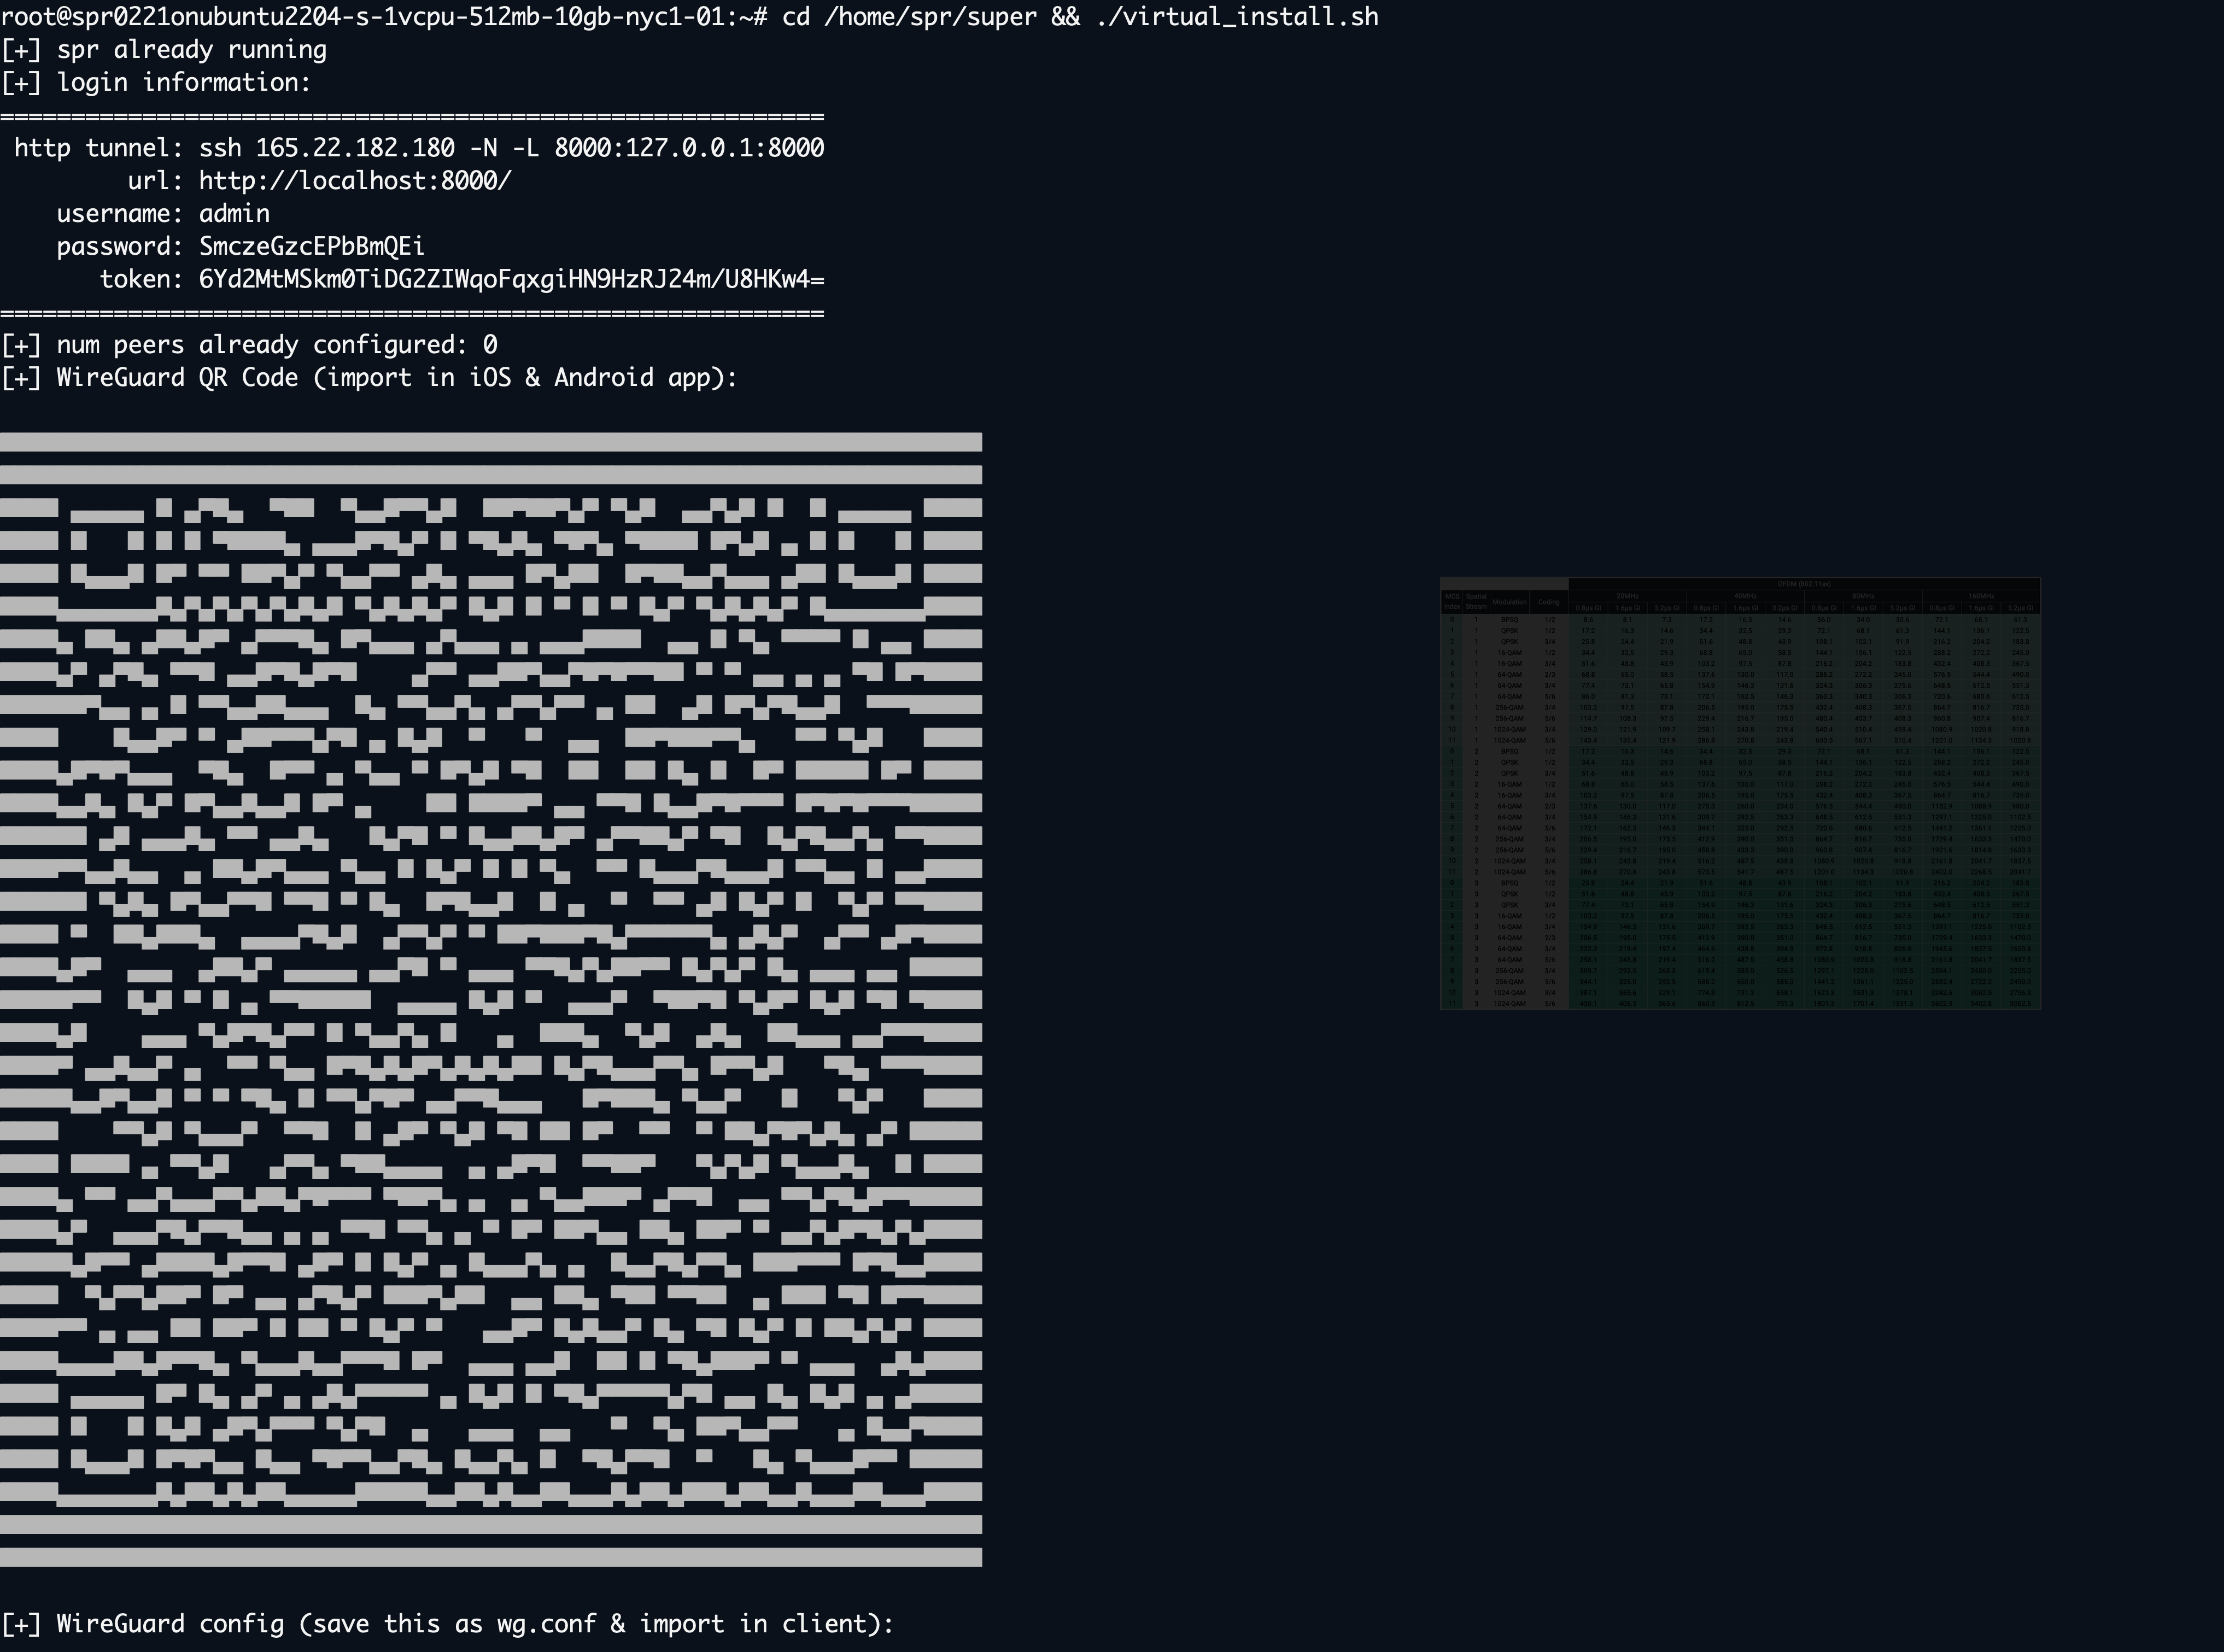
cd /home/spr/super && ./virtual_install.sh
You can scan the QR Code generated from the terminal
Step 5 -- Connecting to SPR
To connect to the SPR UI/API, it's possible to connect via the VPN, or to connect with an SSH tunnel
For the ssh tunnel approach, reconnect to the droplet, with forwarding options
ssh [email protected] -N -L 8000:127.0.0.1:8000
Then navigate to localhost:8000. The password is auto generated by the droplet and presented on the first login .
[+] login information:
==========================================================
 http tunnel: ssh 165.22.182.180 -N -L 8000:127.0.0.1:8000
         url: http://localhost:8000/
    username: admin
    password: SmczeGzcEPbBmQEi
       token: 6Yd2MtMSkm0TiDG2ZIWqoFqxgiHN9HzRJ24m/U8HKw4=
==========================================================
You can update the admin password by modifying /home/spr/super/configs/auth/auth_users.json directly.
Alternately, when connected to the VPN, the default address for the SPR frontend will be at 192.168.2.1. This can be updated under the 'supernetworks' panel.
Conclusion
With this guide we've described how to setup virtual SPR to get a secure, self-hosted VPN for $4/month. The setup allows you to route and redirect traffic, block ads, and automate networks tasks.
See the spr-virtual-image-build repository on GitHub for how the image is built.
Read more about running SPR in the cloud in the Virtual SPR Guide.